
How to Detect and Stop mSpy from Spying on Your Vivo Y100i | Dr.fone
How to Detect and Stop mSpy from Spying on Your Vivo Y100i
In this era of smartphones and smart gadgets, our lives have been stored inside these devices. Privacy gets more important and urgent when so many apps can spy on you easily. Being concerned about your privacy is a very important thing to consider. We care about your privacy, and we have the tools to take proper measures for the mSpy parental control app.
There are many apps like mSpy that normal users can’t detect due to their stealth behavior. If you want to know how to detect and stop mSpy from spying on you, then you are in the right place. This article will show you how to detect and remove mSpy on Android and iPhone devices without being tech-savvy. Read all the guidelines below on removing mSpy from Android and iPhone without hassle.
Part 1: What is mSpy, and is mSpy detectable on Your Vivo Y100i?
In this increasingly cynical world, people are using all sorts of monitoring software to monitor the phone activities of kids and employees. One such software is mSpy. Technically, mSpy is made as a business and parental monitoring app at first. But now, it is also used as a spy app that lets you look into someone else’s mobile phone or device.
Spying should not be misunderstood here as this app focuses mainly on checking employees’ devices or kids’ phones. It could be hard to discover since mSpy secretly works in the background. It monitors messages, phone calls, location, social media activity, and other device usages. Different features offered by mSpy are mSpy parental control, mSpy Instagram tracker, mSpy WhatsApp tracker, etc.
The process of detecting mSpy varies from different phone systems, Android or iPhone. Moreover, mSpy is a background app, so you can not normally see if it is installed on your phone or not. But don’t worry, we will help you out with how to detect mSpy. Below we have listed the two detection methods separately.
How to Detect mSpy on Android Devices
For detecting mSpy on an Android phone, that’ll be more direct if you check Update Service through the phone settings. Follow these steps:

- Step 1: Go to your Vivo Y100i phone settings.
- Step 2: Select Security.
- Step 3: Go to Device Administrators or Device Admin apps.
- Step 4: Navigate to Update Service (the name mSpy uses to run undetected). See if this service is enabled or disabled. If it is, you have spying software installed on your Vivo Y100is.
How to Detect mSpy on iPhone Devices
Apple users don’t have a way to tell for sure if mSpy is installed compared to Android users. But, there are some ways to tell if their devices are monitored.
1. Download history on the App Store
Certain apps masquerade as unharmful but turn out to be spyware. Recently, the malware was found in an app called System Update. That app was installed outside of App Store. After installation, the app hid and exfiltrated data from the users’ devices to the operators’ servers. It’s important to note which apps every user is hiding in their phone. Go to the App Store and download the history. This will help you figure out which apps have recently been downloaded on your Vivo Y100i.
2. Unusually High Data Usage
There is a big sign that spyware is running in the background. To check the mobile data on your Vivo Y100i, you need to go to Settings and click on Mobile Data. You will be to see your overall data usage. Scroll down to know how much mobile data individual apps are using. Suppose any user’s average internet usage is around 200 MB per day, and suddenly it increases rapidly to about 800MB per day with the exact usage of the internet. In that case, the user has to be aware as something is fishy.
3. Have Access to Your Device’s Microphone or Camera
When an app uses the microphone on iPhones, you will see an orange dot at the top of your screen and, similarly, a green dot for the camera. On Android phones, when an app starts, you will see a microphone or camera icon popup in the top right corner, which then turns into a green dot. These are healthy indicators that you should not ignore. Also, go to the list of apps that are allowed to access your Vivo Y100i’s camera or microphone. If you see mSpy there, that means your phone is being spied on.
4. Increased Device Shut Down Time
If the Vivo Y100i device fails to turn off properly or takes an unusually long time to do so, it can point to the presence of spyware, or if the phone reboot without your command, then maybe someone is controlling your phone.
5. Jailbreak your own iPhone and download apps from untrusted sources
If you detect the presence of an app named Cydia, then consider it an alarm bell. This advanced package tool will further install apps from untrusted sources. To find out if your Vivo Y100i is jailbroken or not:
- Step 1: Drag your finger downward from the center of the iOS home screen.
- Step 2: Type “Cydia” in the Search field.
- Step 3: If you find Cydia, then your Vivo Y100i is jailbroken.
Some signs can come in handy when you want to ensure if someone is spying on you or not
Part 2: How to Stop Somebody Spying Using mSpy on the phone?
When you figure out that somebody is spying on your device, the first thing that comes to your mind is how to stop it. If someone has installed mSpy on your device, you can easily control the process. This section will mention the complete process of stopping mSpy on your device. Like the spying app detection process, the spying app removal process is also different in the case of iPhone and Android devices. Below we have mentioned the complete processes of removing mSpy from your Vivo Y100i and iPhone device. There are two ways that you can use to remove this app from your devices
Method 1: Prevent mSpy from Spying via Phone Settings App
To remove mSpy from your Vivo Y100i manually, one needs to activate two-factor authentication and change your iCloud password.

- Step 1: To change the password, you have to go to Settings.
- Step 2: Click on Profile.
- Step 3: Select Password & Security.
- Step 4: Change password and activate two-factor authentication.
For Android users, you can refer to the following steps to follow:
- Step 1: Go to your Vivo Y100i Settings.
- Step 2: Select Security.
- Step 3: Go to Device Administrators or Device admin apps.
- Step 4: Navigate to Update Service (the name mSpy uses to run undetected).
- Step 5: Select Deactivate.
- Step 6: Go back to Settings.
- Step 7: Select Apps.
- Step 8: Uninstall Update Service.
Method 2: Play Protect Feature on Google Play Store [Android only]
Another trick for removing mSpy from your device is by taking help from the Play Protect feature on Google Play Store. But one limitation of this method is that it does not work for iPhone. It is only useful for Android devices.

- Step 1: You can also go to the Google Play store.
- Step 2: Select your Profile.
- Step 3: Select Play Protect.
- Step 4: If it detects any harmful app, select Uninstall it.
- Step 5: Or scan the Vivo Y100i device for any harmful apps.
- Step 6: It will notify you if any risky app is found.
Method 3: Spoof Location to Prevent mSpy from Location Tracking [Recommended]
You can use one more method to remove the mSpy app from your device. This method works for both Android as well as iPhone devices. This method spoofs location to prevent the mSpy app from tracking your location. If you feel that someone is tracking your location, you can use third-party app software that helps fake your location. One such app is Dr.Fone - Virtual Location . It is a full mobile device solution for both Android and iPhone devices. It helps solve a wide range of problems ranging from data loss and system breakdowns to phone transfer and whatnot. Dr.Fone Virtual Location is a great thing that allows you to change and fake your location. It also lets you trick the location-based apps and mock GPS locations with customized speed.
Features of Dr.Fone - Virtual Location
- Teleport GPS location with one click to anywhere.
- For stimulation of GPS movement flexibility, the joystick is available.
- Export or import GPX files for saving created routes.
- Offers perfect gaming stability with no crashing risks.
- Support location-based and social media-sharing apps without jailbreak.
Take a look at the video below to quickly learn how to spoof location to stop mSpy from tracking you.

 safe & secure
Step-by-step Guideline to Spoof Location via Dr.Fone Virtual Location
Step 1: Download Dr. Fone and launch the program.

Step 2: Select “Virtual Location” among all the options.

Step 3: Connect your Vivo Y100i/Android to your computer and click “Get Started”****.

Step 4: You will find your actual location on the map in the new window. If the spot is not inaccurate, tap the “Centre On” icon in the lower right to display the accurate location.

Step 5: Activate the “teleport mode” by touching the icon in the upper right corner. Enter the place you would like to teleport to in the upper corner left field, and tap on “Go.” Set Rome in Italy as an example.

Step 6: Click “Move Here” in the popup box.

Step 7: The location is fixed to Rome, Italy, whether you tap the “Centre On” icon or try to locate yourself on your Vivo Y100i or Android phone. It will be the exact location in your location-based app as well.

Method 4: Your Last Resort: Do a Factory Reset
Check phone settings app-reset options and clear out all the data from your phones if nothing works from all the above options, one last option is left, factory reset. For that,

- Step 1: Go to phone Settings.
- Step 2: Select System.
- Step 3: Chose Reset options.
- Step 4: Click on factory reset.
Or you can also make use of a third-party app - Dr.Fone - Data Eraser to wipe out data in some clicks
Dr.Fone - Data Eraser
Stop mSpy from Spying on You by Factory Reset
- Permanently erase all data, such as photos, videos, etc from your iOS device.
- It let you uninstall or delete useless applications from your device in batch.
- You can preview data before erasing it.
- Easy and click through the erase process.
- Provide support to all iOS versions and devices, which include the iPhone and iPad.
4,008,671 people have downloaded it
Not even professional identity thieves will be able to access your private data on iPhone or Android devices again. With the help of a third-party app, Dr.Fone – Data Eraser, you can erase all data permanently. This data eraser helps you render your data wholly unreadable and then cleans up the whole disk. It is a one-click solution to wipe all personal data like photos, contacts, messages, call logs, social app data, etc.
Part 3: How to Tell if Your Cell Phone is Being Tracked FAQ
Q1: Is it possible if someone remotely install surveillance software on My Vivo Y100i?
Basically, it could be extremely hard to remotely install phone surveillance software on an iPhone or Android smartphone without having physical access to the Vivo Y100i device in advance. Some remote spying apps will allow you to track the location of an iPhone, but you’d require the user’s iCloud login and password to enable the tracking of the Vivo Y100i device. Anything more than that, and you’d need physical access.
Q2: Can Someone Spy on You When your Phone is Off?
Sadly yes. According to What Whistleblower Edward Snowden has said in a 2014 interview that the NSA could listen to and spy on conversations using the microphone on a smartphone, even if you turn off your devices. It makes it by using spyware that prevents your smartphone from actually turning off.
Q3: Can Someone Read My WhatsApp Chats on My Cell Phone?
Sadly, yes. While it isn’t possible on iOS devices, apps can intercept your WhatsApp messages on Android devices due to the operating system’s sandboxing security.
Q4: What Other Forms of Spyware Are There?
Other forms of Spyware include keyboard loggers, Adware, browser hijackers, and modem hijackers.
To Wrap it up
In the 21st century, when the world is connected through one device, almost everybody shares an undercurrent of worry. That is, is someone spying on me through my devices or not? And as much risky and fatal as this can be for a person who does not know if he is being tracked or not, there are solutions one can employ to safeguard himself. This article was all about how to detect and how to remove mSpy on iPhone and Android. Hopefully, now you are well aware of the different methods with their steps. With the help of Dr.Fone - Virtual Location , you can easily spoof or fake your location to hide the real one.
 safe & secure
How to Change/Fake Your Vivo Y100i Location on Viber
Viber is one of the most commonly used messenger apps. It allows you to send short messages like texts, videos, images, audio, and documents. Viber also has another exciting feature that will enable you to share your location. But sometimes, you might want to change location on Viber to prank your friends or for security purposes. So, read on to learn how to fake location on Viber with some simple solutions.
Part 1: What is the My Location feature on Viber?
If you’ve used WhatsApp’s location feature before, you’ll know what Viber’s “My Location” is all about. With this feature, you can share your live location for whatever reasons you may have. For example, you may want to share your live location with your kids or vice-versa. Or, you might simply want to share a fake location on Viber with your nosy friends.
But as good as it sounds, this live location feature is enabled by default on your Vivo Y100i/Android browser. Therefore, you can send a location on Viber without knowing. This can be advantageous to stalkers or even cause misunderstanding in your relationship. What’s worse, it shares your actual location with every text you send. But fret not because this post will help you disable or enable My Location on Viber according to your needs.
Part 2: How to disable or enable My Location on Viber?
So, without wasting too much time, let’s find out the steps to disable/enable Viber location-sharing feature. It’s straightforward.
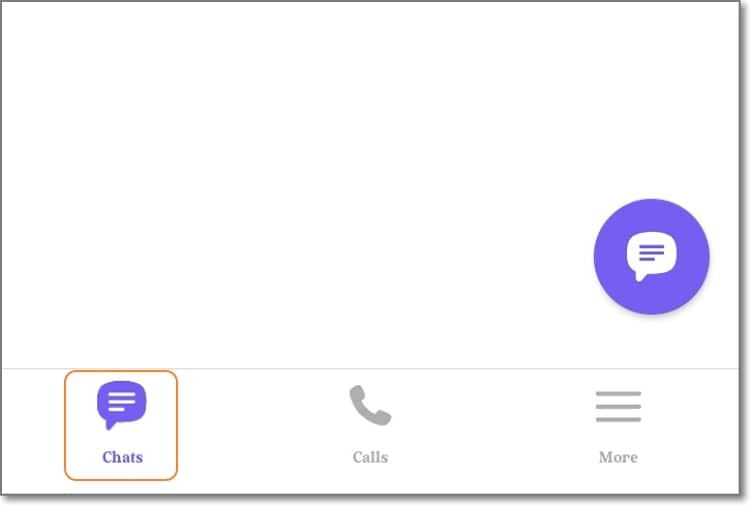
Step 1. Fire up your Viber app on mobile or PC and tap the Chats button. Here, proceed to open a chat that you want to enable/disable location sharing.
Step 2. Next, tap the Ellipsis (three dots) icon at the top-right corner of the screen and choose Chat Info. Alternatively, simply swipe the screen to the left.
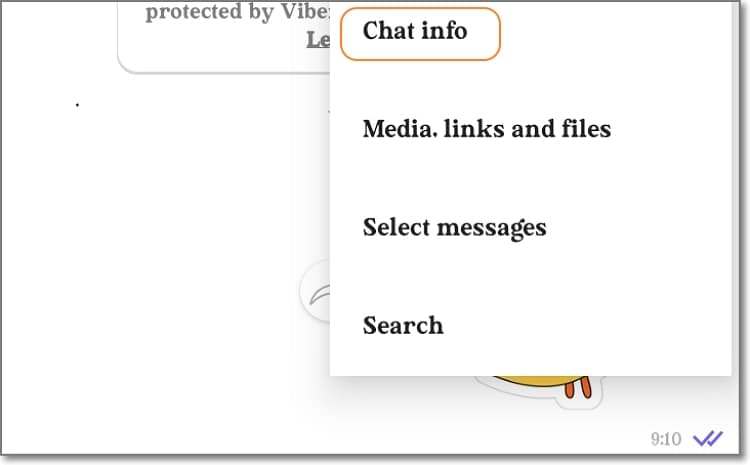
Step 3. On the Chat Info window, simply enable or disable the Attach location always toggle. It’s done!

Pro tip: You might be wondering how to share your actual Viber location with a chat or group. Again, this is very straightforward. Simply open the conversation and tap the three dots on the text field. Then, click the Share Location button and choose your location on the Google map. Lastly, tap Send location to share the Viber location with your selected contact.

Part 3: Can I send a fake location on Viber, and How?
So, is it possible to Viber’s fake location? Unfortunately, Viber doesn’t allow users to share a different place from the real one. That’s because the app asks to automatically access your actual location data using Wi-Fi or GPS while signing up. Therefore, based on the permission you set yourself, the answer is NO.
But nothing is impossible in the tech world. You can easily instruct Viber to share a different location using a third-party app or service like Dr.Fone - Virtual Location . With this professional GPS tool, you teleport your Viber location to anywhere in the world with a simple mouse click.
It’s compatible with Android/iOS devices and boasts a simple-to-understand map. Interestingly, you can walk or drive to your new location and even stop between destinations to make it more believable. It’s nothing complex!
You can check out the this video for further instruction.
Key features of Dr.Fone - Virtual Location:
- Compatible with all Android and iOS versions.
- Teleport Viber location to anywhere in the world.
- Walk or drive to your new Viber location.
- Simulate Viber movements with custom speed.
- Works with Pokemon Go , Facebook, Instagram , Snapchat , Viber, etc.
Steps to change Viber location with Dr.Fone:
Step 1. Launch Dr.Fone Virtual Location.
Install and run Wondershare Dr.Fone on your Windows/Mac computer, and then tap the Virtual Location tab on the Home page.
Step 2. Connect your phone to Dr.Fone with a USB cable.
Connect your smartphone to your PC using a USB wire and tap Get Started on the new Dr.Fone pop-up window. Remember to enable the “File Transfer” option on your smartphone instead of “Charging.”
Step 3. Link your phone to Dr.Fone via USB debugging
Press the Next button to begin connecting your phone to Dr.Fone. If the connection fails, enable USB debugging on your phone by following the on-screen instructions. On Android phones, tap Settings > Additional settings > Developer options > USB debugging. In addition, set Dr.Fone as the mock location app on your phone.
Step 4. Enter the GPS coordinates or location address.
If the connection is successful, the Virtual Location map will launch automatically on Dr.Fone. Now enter the coordinates or address in the location field at the top-left corner. After finding the exact location that you want, simply tap Move Here before sharing your new location on Viber. That is easy, right?
Dr.Fone - Virtual Location
1-Click Location Changer for both iOS and Android
- Teleport from one location to another across the world from the comfort of your home.
- With just a few selections on your computer, you can make members of your circle believe you’re anywhere you want.
- Stimulate and imitate movement and set the speed and stops you take along the way.
- Compatible with both iOS and Android systems.
- Work with location-based apps, like Pokemon Go , Snapchat , Instagram , Facebook , etc.
3981454 people have downloaded it
Part 4: Why send fake location on Viber?
Now that you know how to spoof location on Viber. Let’s discuss some reasons to spoof location on this messaging app. Below are some common ones:
- Protect your privacy
Many people don’t want other online users to have a clue of their actual whereabouts. If you’re one of them, use a third-party tool to spoof your Viber location on your Vivo Y100i or Android.
- Prank your friends
Do you want to show your friends that you’re in London or New York when you’re in some remote village/town somewhere in reality? Yes, that sounds cool!
- Improve sales
If you’re a digital marketer, you might want to convince your potential clients that the goods are from a specific region or city close to them. Believe it or not, this can lead to more sales closures.
Wrap it Up
You can share your live location on Viber just like you would on Facebook, WhatsApp, and other social media apps. But because most of these apps don’t allow you to share fake locations, I recommend Dr.Fone - Virtual Location change your area to anywhere in the world. Give it a try!
How to Change GPS Location on Vivo Y100i Easily & Safely
Change GPS Location iPhone and everything else will be alright! - Did you hear your friends suggest this to you? Whenever you cannot access the content of your choice or when you want to play some games, they must have asked you to change your location or spoof it. Creating a fake location iOS will not just help you with games and content, but also hide your identity and keep stalkers away.

The changed location will reflect in all of your social media databases and other everyday apps. No one can track you down using the over-smart softwares that pry on user locations on different apps they use. By doing so, you are enhancing your online security, protecting your privacy, and, in some cases, also keeping your personal information a secret. Trust us when we say that certain apps need your information worth plenty of bucks but get away with procuring it without your permission.
There is no harm in changing your GPS location, especially when the world wide web is eager to monetize your information. A proper iOS Fake GPS will keep you safe virtually. Then you might wonder, - How do I use apps to navigate the roads or track down that pub in the locality? Well, you can always revert to your original location whenever you want to just that these tricks will help you stay in the safe bubble most of the time.
Part 1: What is iPhone Location Settings for?
The iPhone Location settings are useful for providing optimum and smooth services to iPhone users. Several in-built apps and other installed apps use the iPhone location to make the user experience better. The settings help the iPhone owner decide which app gets to use his location and which one shouldn’t. It is quite easy to make the call and enable the settings under this section.
The in-built apps like ‘Camera’ use Location to add the time and date stamp to your images. They also detect where the photo is taken and provide appropriate tags to pinpoint the location.

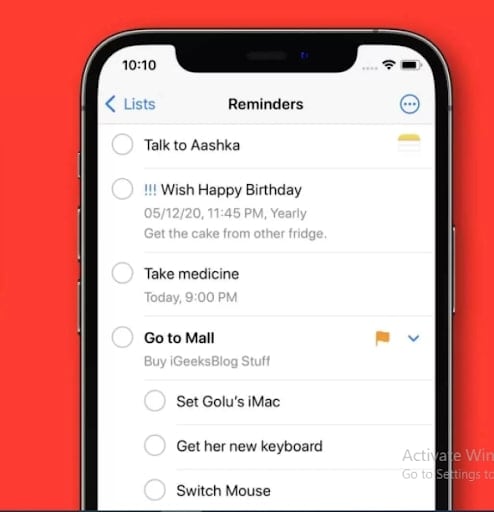
Your ‘Reminder or Alarm’ apps also use location to send you notifications and pop-ups to intimate you that you’ve reached a specific location. If you have somewhere to be, they can also tell you how long it will take to be there. It completely depends on the type of app you are using.
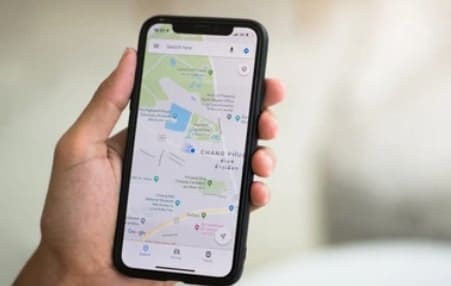
The Maps is one of the main apps that desperately rely on Location Settings. It tells where your favorite pub is, where the closest bookstore is and how to find the nearest Pharmacy in the locality. Name the necessity, and the Maps will find it for you. Letting this app access Location is important to get accurate results.
Compass is another app that needs access to the location to tell you which direction the sun sets in. You want to know the true south, enable your location, sync with the Compass app, and you’ll have the answers.
So, to sum that up, the Location Settings will determine which app gets to access your location and which does not. Whenever you install a new app, the phone will ask you if it’s okay to share the Location. If you accept, that’s how it goes. If you deny, the apps cannot access your GPS. When you spoof iPhone Location, then these apps will register this fake location.
Part 2: Change GPS location on iPhone using a PC program
The GPS Spoofing iPhone is very easy, especially when you go for a quick PC Program. These are easily available and do a better job than VPNs. There is no data logging, so your security and privacy are not at risk.
Wondershare’s Dr. Fone is one of the best applications if you are looking for a PC Program. It is going to get your work done in just four steps. This is what you should be doing -
Step 1: You have to download the Dr. Fone - Virtual Location (iOS) . It is easily available for everyone. Launch the application, and the options will display on your screen. Choose the ‘Virtual Location’ option.
Step 2: Connect your phone to your computer and click on ‘Get Started’.
Step 3: A Map displaying the entire world will appear on your screen. On the top right corner, the third icon represents the ‘Teleport Mode’. Click on that and enter the name of the place in the search box.
Step 4: Then click on ‘Move Here’ when you are completely sure that this is the place you want to be in ‘Virtually’. The map makes the shift for you, and the same will mirror in your Vivo Y100i too.
This is the simplest way to change iPhone Location without Jailbreak. We will discover some other methods in the following Parts.
Part 3: Change GPS location on iPhone using an external device
The external devices connect to the Lightning port of your device and create a secondary GPS that your apps and iPhone will detect. These are not completely software-based. You need to buy these mini-devices first, and then you can proceed with the location spoofing. These areas reliable as any softwares and much more than VPNs.
One of the best devices that we can suggest is Double Location.
Step 1: Buy the Double Location device and install the companion iOS app that is needed to change/ alter the location of your device. Then connect Double Location Dongle to your phone.
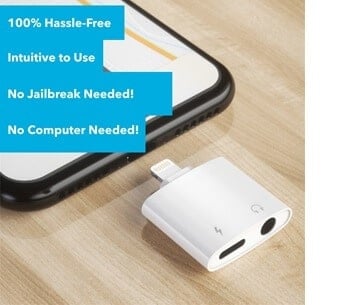
Keep in mind - The iOS companion apps are not available on the App Store, and you need to download them from their websites. The installation and launch procedure will differ depending upon the iOS model you are using. You have to follow the Double Location Manufacturer’s guidelines keenly not to jailbreak your phone.
Step 2: Open the Double Location iOS app and open the Map Tab.

Step 3: Move the pin to the location that you want to shift to virtually. If you cannot pinpoint the exact location, there is nothing much we can do about it. You have to settle for a little compromise. Adjust any other settings that you want to (Gaming).
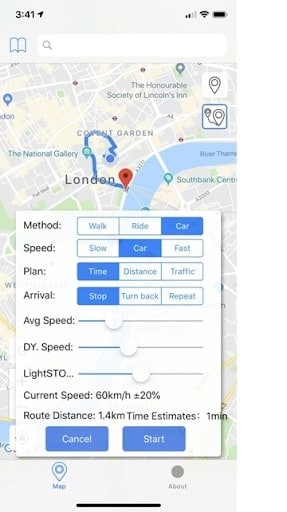
Step 4: On the bottom of the screen, hit the lock position option, and your iOS Spoof Location will reflect everywhere.

Part 4: Change GPS location on iPhone using Xcode
XCode is a computer program. It is very useful for those who have sound coding language knowledge. It works well with Mac devices, and it is a good Gps changer for iPhone.
Step 1: Firstly, Install the App from the App Store (on Mac) And then Launch it.
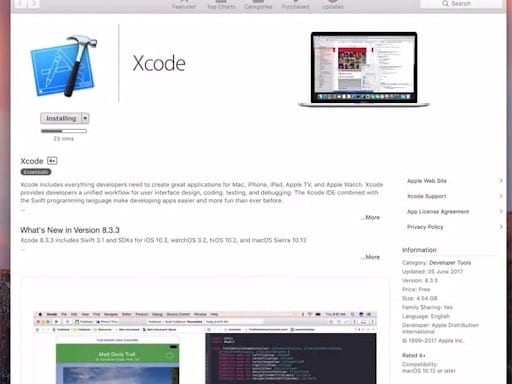
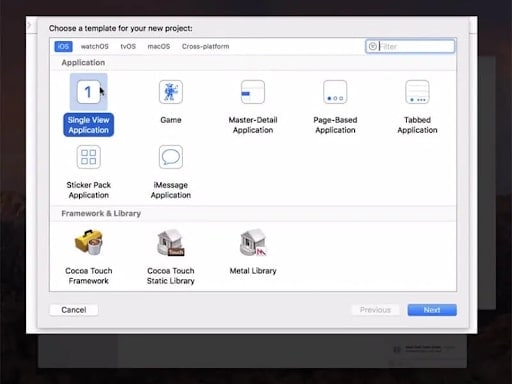
Step 2: Once you launch the app, the Xcode Window will open. Click on ‘Single View Application’ to start a new Project and proceed by clicking on ‘Next’. Set up a name and then proceed.
Step 3: A pop-up will appear asking you who you are, and you need to apply some GIT commands to this particular part of the process.

Step 4: Launch the terminal on your Mac device and enter these commands - git config –global user.email “[email protected]“ and git config –global user. name “your name”. (Add your information)
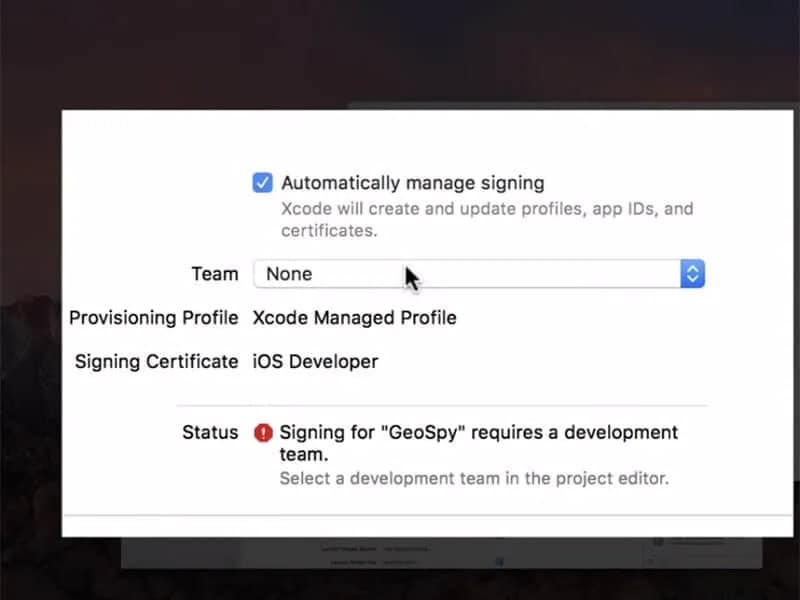
Step 5: At this stage, you have to set up the Development Team and proceed to connect your Vivo Y100i device to the Mac Device.
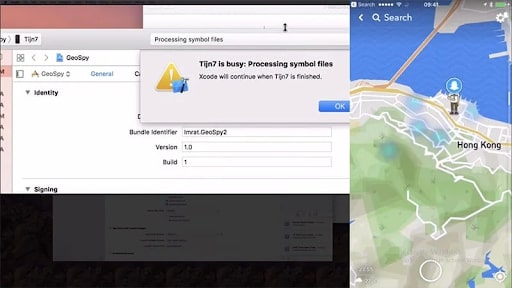
Step 6: Now, you need to select your device from the ‘Build Device’ option and while you do this, keep your phone unblocked for quick detection. Then the program will process the Symbol Files.
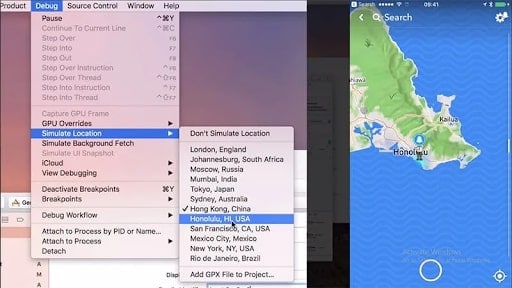
Step 7: Go to the Debug Menu and select Simulate Location. From there, you can choose any location that you want to, proceed with it, and the new spoofed location will appear on your Vivo Y100i device.
Part 5: Change GPS location on iPhone using Cydia
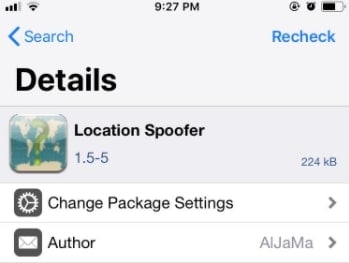
Cydia offers an app named Location Spoofer. This one is a very good option for those ready/okay with jailbreaking their iPhone devices. You can change the Phone Location iPhone without jailbreak in the previous suggestions, but that is not possible here. This is how you do it -
Step 1: Download the Cyndia LocationSpoofer app from their website. You will find LocationSpoofer8 if you are using the iOS 8.0 model.
Step 2: Launch the app and enter your virtual address into the search box at the top.
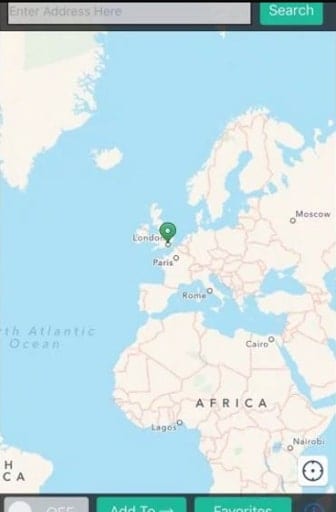
Step 3: Once you are sure about your location, change the toggle from ‘OFF’ to ‘ON’ at the bottom of the page.
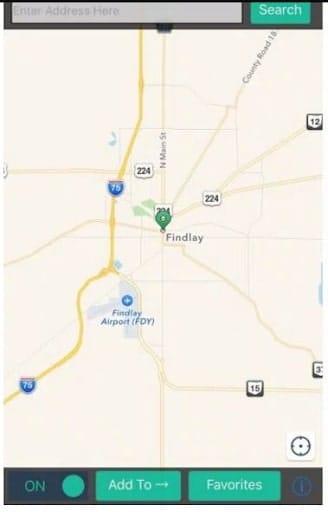
Step 4: Then, right at the end of this bottom line, you will find an ‘i’ icon. Click on that and then go with the wishlist. There you can choose the apps that can access your virtually changed location. Then Click on ‘Done’ when you are finished.
The problem with this method is that certain apps downright refuse to function when they detect that you have jailbroken your Vivo Y100i device. So, keep that in mind when you are making your choice.
Conclusion
If you’ve been wondering how can I change my location on iPhone, then I am sure this article must have at least given you one suitable way to do that. Weighing your necessities, choose the most suitable option that will safely transfer you from one place to another - Virtually, Of course! You can settle on the best location changer for iPhone.
- Title: How to Detect and Stop mSpy from Spying on Your Vivo Y100i | Dr.fone
- Author: Abel
- Created at : 2024-07-14 05:26:23
- Updated at : 2024-07-15 05:26:23
- Link: https://fix-guide.techidaily.com/how-to-detect-and-stop-mspy-from-spying-on-your-vivo-y100i-drfone-by-drfone-virtual-android/
- License: This work is licensed under CC BY-NC-SA 4.0.