
How to Fix It Samsung Galaxy A34 5G Wont Turn On | Dr.fone
How to Fix It: Samsung Galaxy A34 5G Won’t Turn On
Did your Samsung Galaxy A34 5G decide to go on vacation and refuses to turn on? If your Samsung Galaxy A34 5G won’t turn on for no apparent reason, finding why it failed to power on and the solution for it is not a fun process.
Here, we hope we are able to give you a checklist of reasons behind this issue and the possible steps you can take to rectify it.
Part 1: Common Reasons That Your Samsung Galaxy A34 5G Won’t Turn On
If you cannot find any reason why your Samsung Galaxy A34 5G will not switch on, here are some possible reasons:
- Your Android phone is simply frozen in power-off or sleep mode. In which case, it fails to switch itself on or wake itself up when you initiate it.
- Your phone’s battery may be out of charge.
- The operating system or installed software is corrupted. The tell-tale sign if this is that if you manage to switch on your Samsung Galaxy A34 5G, it freezes or crash soon after.
- Your device is clogged up with dust and lint causing the hardware to not work properly.
- Your power button is broken , which caused it to not be able to trigger the necessary action needed to power up the Android phone. Check to also see if your connectors have no carbon build-up which will cause your phone to not be charged properly.
Part 2: Rescue Data on Android Phone That Will Not Turn On
If you need some help rescuing data from an Android phone that will not turn on, the Dr.Fone - Data Recovery (Android) will be your best friend in your data recovery attempt. With the help of this data recovery solution, you will be able to intuitively recover lost, deleted or corrupted data on any Android devices. Its flexibility and efficiency in rescuing data make it one of the best software out there.
Note: For now, the tool can rescue data from broken Android only if your phone is earlier than Android 8.0, or rooted.
Dr.Fone - Data Recovery (Android)
World’s 1st data retrieval software for broken Android devices.
- It can also be used to recover data from broken devices or devices that are damaged in any other way such as those stuck in a reboot loop.
- Highest retrieval rate in the industry.
- Recover photos, videos, contacts, messages, call logs, and more.
- Compatible with Samsung Galaxy A34 5G devices.
3981454 people have downloaded it
If your Samsung Galaxy A34 5G won’t turn on, here is how you can use the software to recover data:
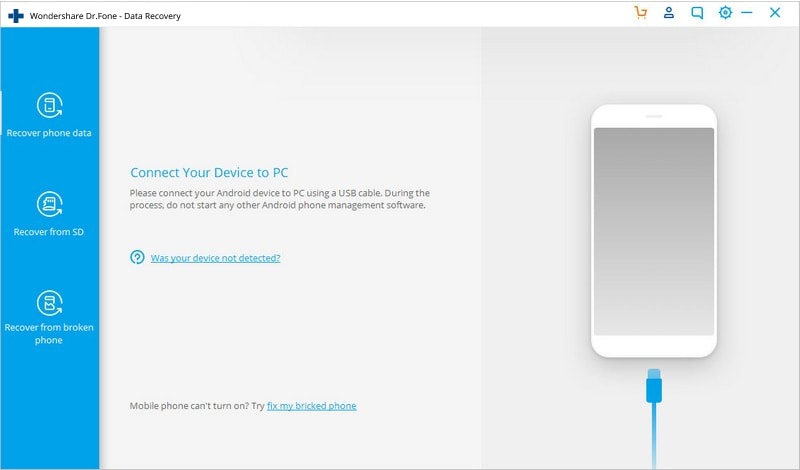
Step 1: Launch Wondershare Dr.Fone
On your desktop computer or laptop, open Wondershare Dr.Fone. Click on Data Recovery on the left column. Connect your Samsung Galaxy A34 5G to the computer using a USB cable.
Step 2: Decide which file types to recover
On the next window, you will need to check the boxes corresponding to the type of files you can recover from a list. You can get back Contacts, Messages, Call History, WhatsApp messages & attachments, Photos, Audio and more.

Step 3: Select the problem with your phone
Opt for “Touch screen not responsive or cannot access the phone” or “Black/broken screen”. Click Next to continue.

Look up for your device – pick the Samsung Galaxy A34 5G device Name and Device Model. Advance by clicking on the Next button.

Step 4: Go into your Samsung Galaxy A34 5G’s Download Mode.
The data recovery tool will guide you on how you can go into your Samsung Galaxy A34 5G’s Download Mode. You should be getting a step-by-step guide on your computer.

Step 5: Scan the Android Phone.
Using the provided USB cable, attach your Samsung Galaxy A34 5G to your computer – the data recovery tool should be able to discover your device automatically and scan it for recoverable data.

Step 6: Review and Retrieve the Data from Broken Android Phone.
Wait for the program to finish scanning the phone – once completed, you will be able to get a list of recoverable files. You can have a preview of the file by highlighting them. Tick the box next to the file name and click on Recover to start retrieving the files and save them in the destination of your choosing.

Part 3: Android Phone Won’t Turn On: One Click Fix
After repeated attempts, when your Android mobile/tablet stops buzzing, what options do you have to revive it?
Well, we would recommend picking Dr.Fone - System Repair (Android) to fix an Android phone will not switch problem. This one-click Android system repair tool resolves every Android system issue without any fuss including Android Phone won’t turn on issue.
Dr.Fone - System Repair (Android)
The real fix to issues like “Android phone will not switch on”
- This tool is aptly effective for all the latest Samsung Galaxy A34 5G devices.
- With a high success rate for fixing Android devices, Dr.Fone - System Repair (Android) ranks at the top.
- This is a single click application to fix all Android system issues effortlessly.
- It is the first tool to repair all Android system issues in the industry.
- It is intuitive and requires no tech expertise to work with.
3981454 people have downloaded it
Prior to fixing the Android phone will not switch and getting things back in action. You need to make sure that you have backed up the Android device . It is recommended that rescuing data from an Android phone by backing up is better than recovering it post the process.
Phase 1: Get the Samsung Galaxy A34 5G device ready and connect it
Step 1: Run Dr.Fone on your computer once the installation is complete and tap the ‘Repair’ option form the interface. Now, connect your Android mobile with the computer.

Step 2: You will find a range of options, tap on the ‘Android Repair’ one. Hit the ‘Start’ button so that you can proceed to fix Android Phone won’t turn on hassle.

Step 3: Now, over the Samsung Galaxy A34 5G device information window, ensure to feed your exact device details. Press the ‘Next’ button then on.

Phase 2: Enter ‘Download’ mode for fixing your Samsung Galaxy A34 5G
Step 1: You need to put your Samsung Galaxy A34 5G in Download mode for resolving the Android phone will not switch on.
- For the Samsung Galaxy A34 5G device having ‘Home’ button, you got to switch it off and press ‘Volume Down’, ‘Home’, and ‘Power’ keys for 5-10 seconds at once. Let them go and click on the ‘Volume Up’ button to put your phone in ‘Download’ mode.

- For ‘Home’ button-less device, turn the phone/tablet down first. For 5 – 10 seconds, hold down the ‘Volume Down’, ‘Bixby’, and ‘Power’ buttons. Tap on the ‘Volume Up’ button to get into the ‘Download’ mode, after releasing the 3 buttons.

Step 2: Hitting the ‘Next’ key will allow you to download firmware and proceed with the next step.

Step 3: Dr.Fone - System Repair (Android) would verify your firmware download and then take a while to rectify and resolve Android Phone won’t turn on issue.

Part 4: Android Phone Won’t Turn On: Common Fix
To try fixing an Android Phone that won’t turn on, follow these steps:
- For any Android devices, remove the battery (considering the battery of your Samsung Galaxy A34 5G can be removed) and leave it out for at least 30 minutes. Put back the battery in and try to turn it on.
- Press and hold down the Power and Volume Down buttons at the same time for 15-30 minutes to reboot the Samsung Galaxy A34 5G device.
- Should the first two steps do not work, charge your Samsung Galaxy A34 5G to get it out of the start-up loop. You can also opt to use a different battery, just in case your current battery is the source of the problem.
- If there are any connected hardware e.g. SD card, remove them from the Samsung Galaxy A34 5G device.
- Start your Samsung Galaxy A34 5G in Safe Mode by pressing and holding down the Menu or Volume Down button on your device.
- Should the first five steps do not work for you, perform a hard reset. Do take note that each device will have a different way to do so and that data that is stored locally on the phone will be deleted.
- Send your Samsung Galaxy A34 5G to the repair shop should none of these steps work.
Part 5: Useful Tips to Protect Your Samsung Galaxy A34 5G
There are several reasons as to why your Samsung Galaxy A34 5G won’t turn on. The problem could be a hardware or software issue which could be prevented. Here are some useful tips to protect your Samsung Galaxy A34 5G.
I. Hardware
- Remember that the components that make your Samsung Galaxy A34 5G is sensitive. To protect these components from being damaged, use a good guard casing.
- Take apart your Samsung Galaxy A34 5G and clean it routinely to avoid dust and lint from clogging the phone and overheating it.
II. Software
- It is recommended to download apps from Google Play Store. This way, you can be sure that your app comes from a trusted source.
- Read the app’s permission to see which part of the operating system and your personal information that you are giving access to.
- Install reliable anti-virus and anti-malware software to safeguard your Samsung Galaxy A34 5G from malicious attacks.
- Make sure you update your operating system, software and apps to make sure you have the latest version – the developer may have fixed the bugs that have caused problems on Android phones.
It is important to note that your phone contains some important data. Therefore, when your Samsung Galaxy A34 5G won’t turn on do not just give up - there are plenty of tools at your disposal to recover back your files and phone.
Samsung Galaxy A34 5G Stuck on Screen – Finding Solutions For Stuck on Boot
The market has embraced Samsung Galaxy A34 5G for being the pioneers in the industry. Although the company lacked in providing explicit smartphones, they were still able to catch up with the race. Samsung Galaxy A34 5G C31, known to provide durability of the next level, is taking up the latest shelves of Samsung Galaxy A34 5G smartphones. Although the company promises reliability, there are several problems involving such smartphones.
One prominent solution stated by Samsung Galaxy A34 5G users involves the screen stuck in the boot. If your Samsung Galaxy A34 5G is stuck on the “Samsung Galaxy A34 5G” screen for no particular reason, you will have to read this article. As this article tackles all reasons involving the problem, it comes up with the necessary solutions. These solutions will help Samsung Galaxy A34 5G users find solutions for their stuck screens on the boot.
Part 1: What Causes Samsung Galaxy A34 5G Screen Stuck on Boot?
Has your Samsung Galaxy A34 5G recently been stuck on the boot loop screen? If it is happening or has happened to you, there are some reasons that you need to be aware of. Having an overview of the causes of Samsung Galaxy A34 5G being stuck on the Android One screen can help you redirect yourself toward to right solution. Go through the list of all causes and find more about the issue involving screens stuck on boot in Samsung Galaxy A34 5G smartphones:
- The Device is Damped in Liquid
It is entirely possible that your Samsung Galaxy A34 5G smartphone is immersed in water. With a smartphone dipped in liquid, the Samsung Galaxy A34 5G device can turn useless. If you have tried starting it again, it won’t run and might get stuck on the boot.
- Soft-Bricked Device
There are multiple conditions where your Samsung Galaxy A34 5G smartphone can get soft-bricked. It majorly happens when a particular function in the Samsung Galaxy A34 5G device stops working. To counter the problem, it is essential that you can get your device stuck on the boot screen.
- Outdated Device
If the equipment wears out after a certain time, there is a need to have it changed. With such obsolete models of Samsung Galaxy A34 5G, you will surely face issues like a screen stuck on the boot. Smartphone equipment cannot be revamped, and you will have to go for newer options.
- Software Update Required
A software update on your Samsung Galaxy A34 5G smartphone might be causing issues with the screen stuck on the boot. The best way to get rid of this problem is to update your system software to the latest version.
Part 2: 5 Solutions To Solve Samsung Galaxy A34 5G Screen Stuck on Boot
Do you seek to resolve the problem of the Samsung Galaxy A34 5G Plus stuck on the Android One screen? There are specific techniques that can be tried as a remedy. These solutions are tried and recommended by experts. Go through the details provided below to solve the issues with your stuck Samsung Galaxy A34 5G screen.
Solution 1: Force Restart Samsung Galaxy A34 5G
The first and most proclaimed technique to refresh Samsung Galaxy A34 5G devices under such a problem is to force restart them. If the Samsung Galaxy A34 5G device is stuck, you will have to perform this process by pressing the “Power” and “Volume Up” keys for 15 seconds. Continue holding the buttons until the Samsung Galaxy A34 5G device vibrates or restarts by showing the screen again.

Solution 2: Leave the Phone For a While To Drain Its Battery
A conventional way to solve the issue of a stuck screen in Samsung Galaxy A34 5G is to leave the phone in its position. As you let its battery drain out, the phone will turn off, and you can activate the Samsung Galaxy A34 5G device again by charging it.
Once you restart it this way, all the procedures will initiate again, and the Samsung Galaxy A34 5G device will be as good as new. Draining the battery has given you the leverage to regain control over the Samsung Galaxy A34 5G device again.
Solution 3: Check For Updates on Samsung Galaxy A34 5G Smartphones
Another quick remedy to try on your Samsung Galaxy A34 5G smartphones involves updating their software. If there is any prevailing software update to install on the smartphone, you will have to check and update it by following the steps guided below:
Step 1: Open the “Settings” of your Samsung Galaxy A34 5G smartphone and continue to the “System” section in the list of options. You will have to access the “Advanced” options in the “System” menu.

Step 2: As you lead to the advanced options, look for “System update” in the provided options. Look for the “Check for update” button. This will check if your Samsung Galaxy A34 5G needs any software updates or not.

Solution 4: Using Wondershare Dr.Fone
One of the finest options available to perform is using a third-party platform that promises smooth operability. Wondershare Dr.Fone is a platform designed to provide such smartphones another life to survive. Its unique functionality repairs all the issues with a smartphone and makes it as good as a new one.
If your Samsung Galaxy A34 5G Plus is stuck on the Android One screen, this platform is the ultimate solution for you. With the support of the latest devices and software versions, Dr.Fone – System Repair (Android) offers the best results. To know how to repair your Samsung Galaxy A34 5G smartphone with the help of this tool, look through the steps featured next:
Step 1: Open Dr.Fone and Select System Repair
As you launch Dr.Fone after downloading it on your computer, continue to the “System Repair” option. You will have to start by connecting the Android device to the computer through a USB cable. Select “Android Repair” from the options available and continue to the following options.
Step 2: Define Device Information and Confirm
You will be directed to the Samsung Galaxy A34 5G device information screen, where you must define the identification parameters of the Samsung Galaxy A34 5G device. Select the brand, name, model, country, and carrier details for proper system recovery. On clicking “Next,” you will receive a warning where you will have to type the number “000000” to proceed with the method.
Step 3: Put Your Samsung Galaxy A34 5G in Download Mode
Following this, you will have to put your Samsung Galaxy A34 5G in Download Mode. For that, you need to follow the steps according to the condition of the Samsung Galaxy A34 5G device:
- For Devices with Home Button:
Power off your Android and continue to press and hold the “Volume Down,” “Home,” and “Power” buttons for a few seconds. After holding them for almost 10 seconds, release and press the “Volume Up” button to enter the mode.
- For Devices without Home Button:
Turn off the Android device and hold the “Volume Down,” “Bixby,” and “Power” buttons simultaneously for a few seconds. On releasing the buttons, press the “Volume Up” button to enter Download Mode.
Step 4: Start Downloading and Verify Firmware
To proceed, tap the “Next” button to download the firmware. As you verify the firmware, the repairing process starts on your Samsung Galaxy A34 5G device.

Solution 5: Contact the Customer Service Center of Samsung Galaxy A34 5G
If the issue of the Samsung Galaxy A34 5G stuck on the “Samsung Galaxy A34 5G” screen continues, you will have to contact the Samsung Galaxy A34 5G device’s customer support. With no proper method left for the Samsung Galaxy A34 5G device, the only effective technique is to visit the authorized store for Samsung Galaxy A34 5G smartphones and claim the issue with the Samsung Galaxy A34 5G device. In this way, you might receive or get a fully repaired device with no additional charges if the Samsung Galaxy A34 5G smartphone is under warranty.
Part 3: How to Avoid Samsung Galaxy A34 5G Screen Stuck on Boot?
What if you come to know that you can avoid the Samsung Galaxy A34 5G screen stuck-on boot problem? There are a set of tips and tricks that you can follow to explain how to prevent such an issue in the first place. Follow these tips to learn more about saving your Samsung Galaxy A34 5G from such miserable conditions:
1. Protect from Malware
The first thing to protect your Samsung Galaxy A34 5G smartphone from getting stuck on the boot is to keep it safe from unauthorized and malicious data. The best thing to keep a device secure is to follow all security protocols and avoid bypassing them. If you try downloading something not authorized by the Play Store itself, for instance, an APK, it can make your device vulnerable to malware.
2. Keep Your Device Updated
If you feel frustrated by issues like Samsung Galaxy A34 5G being stuck on the Android One screen, the best thing to avoid such a problem is to keep your device updated at all costs. Whenever there is an update on your Samsung Galaxy A34 5G smartphone, make sure to install it on time and properly. Do not leave updates uninstalled for no reason, as they can hinder the Samsung Galaxy A34 5G device’s speed and performance.
3. Do Not Fool Around with System Files
Changing or modifying system files can be fatal for smartphones. Thus, to keep your Samsung Galaxy A34 5G safe, you need to keep your hands away from such important files. Modifying a single file can make your device useless or put you in situations like a Samsung Galaxy A34 5G smartphone stuck on the boot. For that, the best tip is to keep yourself out of engagement.
4. Use Wondershare Dr.Fone To Manage All Data With Ease
As you have observed, the power of Dr.Fone can be a perfect phone manager for you at all times. While providing system repair services, it can also help you manage your device’s data and other statuses. Thus, consider keeping Dr.Fone close to your device and its operations. In this way, you will be able to have complete control over all types of data present in the Samsung Galaxy A34 5G smartphone.
 safe & secure
4,675,795 people have downloaded it
Conclusion
With that, this brings the article on Samsung Galaxy A34 5G smartphones to a conclusion. If you are still facing issues with your Samsung Galaxy A34 5G stuck on the “Samsung Galaxy A34 5G” screen, this article is the perfect solution for your problem.
With all the provided methods, we do hope that you will be able to restore the status of your Samsung Galaxy A34 5G smartphone and make it functional. For the finest results, you have also discovered Dr.Fone – System Repair (Android) as the best solution for repairing such devices.
How to Exit Android Factory Mode On Samsung Galaxy A34 5G?
You’ve often heard that recovery mode will solve just about any problem your Samsung Galaxy A34 5G is experiencing. This is mostly true and one of the components of Android’s recovery mode, factory mode or factory reset is one of the most efficient ways to solve various problems on your device. While factory mode is often a good thing, there are times when your device can enter factory mode on its own. Other times, you can safely enter factory mode but not know how to get out.
Fortunately for you, this article will explain all aspects of factory mode and especially how to safely exit factory mode.
Part 1. What is Android Factory Mode?
Factory mode or what is commonly known as factory reset is one of the options available for you when your Samsung Galaxy A34 5G is in recovery mode. Several options are available for you once you enter Recovery mode on your device but few are as effective as the wipe data/ factory reset option. This option is useful in solving a whole host of problems that your device could be experiencing.
If you have been using your Samsung Galaxy A34 5G for a while now and its performance to be less than ideal, a factory reset might be a good solution. That is however not the only problem a factory reset or factory mode can solve. It will also work for a number or Android errors that you may experience, problems caused by faulty firmware updates and also tweaks made on your device that may not have worked as expected.
It is however important to note that a factory reset or factory mode does often result in the loss of all your data. Therefore a backup is necessary to protect against this data loss risk.
Part 2. Backup your Android Device First
Before we can see how to safely enter and exit factory mode, it is important to have a full backup of your device. We mentioned that a factory mode will likely erase all the data on your device. A backup will ensure that you can get your phone back to its original state before the factory mode.
In order to do a full and complete backup of your device you need to have a tool that will not only ensure that you backup everything on your device but one that makes it easy for you to accomplish this. One of the best tools in the market is Dr.Fone - Backup & Resotre (Android) . This software is designed to enable you to create a full backup of your device.
Dr.Fone - Backup & Restore (Android)
Flexibly Backup and Restore Android Data
- Selectively backup Android data to computer with one click.
- Preview and restore backup to any Android devices.
- Supports 8000+ Android devices.
- There is no data lost during backup, export or restore.
3,428,803 people have downloaded it
Follow these very simple steps to use this MobileTrans Phone Transfer software to create a full backup of your device.
Step 1. Launch Dr.Fone on your computer and choose “Backup & Restore”
Run the software on your computer and you can see all features displayed in the primary window. Choose this one: Backup & Restore. It allows you to get your device backed up entirely with one click.
Step 2. Plug in with your device
Then plug in with your device to the computer. When your devic is detected, click on Backup.

Step 3. Select the file types to backup
The program will display all the file types it can support to backup. Just select the ones you would like to backup and hit Backup.

Step 4. Start backing up your device to the computer
After choosing the file’s type for backup, click “Backup” to begin backing up your device to your computer. It will take you a few minutes, depending on the storage of the data.

Note: You can use the feature of “Restore From Backup” to restore the backup file to your device, when you have the need later.
Part 3: One Click Solution to fix Android stuck in factory mode
From the above parts, you are well aware about what is factory mode. As we discussed, this mode fixes most troubles with Android devices.
But for situations when your Samsung Galaxy A34 5G gets stuck in this very same factory mode, the most feasible solution for you is Dr.Fone - System Repair (Android) . This tool fixes all Android system issues including unresponsive or bricked device, stuck on Samsung Galaxy A34 5G logo or factory mode or blue screen of death with a single click.
Dr.Fone - System Repair (Android)
One click fix to Android stuck in factory mode
- You can easily fix your Android stuck in factory mode with this tool.
- The one-click solution’s ease of operation is appreciable.
- It has carved a niche being the first Android repair tool in the market.
- You don’t need to be a pro in technology to use this program.
- It is compatible with all latest Samsung Galaxy A34 5G devices like Galaxy S9.
3,645,867 people have downloaded it
In this part we will explain how to exit Android recovery mode using Dr.Fone - System Repair (Android) . Prior to proceeding, you got to remember that device backup is paramount to keep your data safe. This process might erase your Samsung Galaxy A34 5G data.
Phase 1: Ready your device and connect it
Step 1: Installation completion needs to be followed by running Dr.Fone on your system. Over the program window, tap ‘Repair’ afterwards and get the Android device connected.
Step 2: Select the ‘Android Repair’ option from the list to fix Android stuck in factory modeissue. Hit the ‘Start’ button soon after.
Step 3: Select Android device details on the Samsung Galaxy A34 5G device information window, followed by tapping the ‘Next’ button.
Step 4: Enter ‘000000’ for confirmation then proceed.

Phase 2: Get in ‘Download’ mode for repairing the Android device
Step 1: It’s important to put the Android device in ‘Download’ mode, here are the steps to do so –
- On a ‘Home’ button-less device – turn off the Samsung Galaxy A34 5G device and push down the ‘Volume Down’, ‘Power’ and ‘Bixby’ buttons for about 10 seconds and un-hold. Now, hit the ‘Volume Up’ button to get into ‘Download’ mode.
- For a device with ‘Home’ button – switch it off and hold down the ‘Power’, ‘Volume Down’ and ‘Home’ buttons together for 10 seconds and release. Click the ‘Volume Up’ button for entering ‘Download’ mode.
Step 2: Press ‘Next’ for initiating firmware downloading.
Step 3: Dr.Fone –Repair (Android) starts Android repair as soon as download and verification of firmware is done. All Android issues along with Android stuck in factory mode will be fixed now.
Part 4. Common Solutions to Exit Factory Mode on Android
Having a backup of all your data will eliminate the risk of losing any of your data. You can now safely exit factory mode using one of the 2 methods below. These two methods will work on a rooted device.
Method 1: Using “ES File Explorer”
To use this method, you will need to have installed file explorer on your device.
Step 1: Open “ES File Explorer” and then press the icon on the top left corner
Step 2: Next, go to “Tools” and then turn on “Root Explorer”
Step 3: Go to Local> Device> efs> Factory App and then open factorymode as text in the “ES Note Editor” Turn it ON
Step 4: Open keystr as text in the “ES Note Editor” and change it to ON. Save it.
Step 5: Reboot the Samsung Galaxy A34 5G device

Method 2: Using Terminal Emulator
Step 1: Install Terminal emulator
Step 2: Type “su”
Step 3: Then Type the following;
rm /efs/FactoryApp/keystr
rm /efs / FactoryApp/ Factorymode
Echo –n ON >> / efs/ FactoryApp/ keystr
Echo –n ON >> / efs/ FactoryApp/ factorymode
chown 1000.1000/ efs/FactoryApp/keystr
chown 1000.1000/ efs/FactoryApp/ factorymode
chmod 0744 / efs/FactoryApp/keystr
chmod 0744 / efs/ FactoryApp/ factorymode
reboot
You can also exit factory mode on unrooted device by going to Settings> Application manager> All and the search for Factory Test and “Clear Data”, “Clear Cache”
As much as factory mode can be a useful solution to a number of problems, it can be quite annoying when it pops up unexpectedly. Now you are equipped with 2 effective solutions to help you safely exit factory mode if ever you find yourself in this situation.
Also read:
- [New] Prime Routines for Mobile Game Screening for 2024
- [New] The Cinematic Edge Master the Top 5 Camera Skills
- [Updated] Luminous Landscapes Mastering Nightscape Portraits with Precision
- [Updated] QuickSnap Pause & Capture Techniques for 2024
- 4 Most-Known Ways to Find Someone on Tinder For Xiaomi 13T by Name | Dr.fone
- 効率的にMP3を高音質Flacにアップコンバートする方法 - 完全なマニュアル
- Efficiently Incorporate YouTube Playlists for Engaging Pages
- Gain Popularity on YouTube 11 Powerful SEO Techniques for Video Content
- How To Unbrick a Dead Nubia Red Magic 8S Pro | Dr.fone
- How To Unbrick a Dead ZTE Blade A73 5G | Dr.fone
- In 2024, How to Change Location On Facebook Dating for your Vivo V29 | Dr.fone
- In 2024, How to Change/Fake Your Honor Magic 5 Location on Viber | Dr.fone
- In 2024, How to Fake Snapchat Location on Vivo S18 | Dr.fone
- In 2024, How to Stop Google Chrome from Tracking Your Location On Apple iPhone 7 Plus? | Dr.fone
- Sony VR Headset: News and Expected Price, Release Date, Specs; and More Rumors
- Strategies for Apps That Wont Download From Play Store On Honor X50 GT | Dr.fone
- Title: How to Fix It Samsung Galaxy A34 5G Wont Turn On | Dr.fone
- Author: Abel
- Created at : 2025-02-09 01:25:55
- Updated at : 2025-02-10 21:07:21
- Link: https://fix-guide.techidaily.com/how-to-fix-it-samsung-galaxy-a34-5g-wont-turn-on-drfone-by-drfone-fix-android-problems-fix-android-problems/
- License: This work is licensed under CC BY-NC-SA 4.0.