
How to Fix the Soft Bricked Motorola Razr 40? | Dr.fone
How to Fix the Soft Bricked Motorola Razr 40?
Bricked phone is a serious problem, as your brick smartphone could be suffering from a soft brick or hard brick problem, and must be dealt with carefully. It is very common to see a brick smartphone these days. If you are wondering what exactly is a bricked phone, here is your answer.
A bricked phone, hard brick or soft brick, is a smartphone which refuses to start or boot all the way up the home/main screen of the Motorola Razr 40 device. This issue is observed within most Android phones because users have a tendency to tamper with the Motorola Razr 40 device settings, flashing new and customized ROMs and tweaking with the essential files. Playing around with the phone’s internal set-up leads to such errors, worst of them being a brick smartphone. Usually, a bricked phone does not switch on and stays frozen at the Motorola Razr 40 device logo, a blank screen or even worse, doesn’t respond to any command, even the power on command.
If you are confused about the soft brick and hard brick problems and looking for solutions to fix your priced phone, then here is all you need to know.
Read on to find out more.
Part 1: What is the difference between soft brick and hard brick?
To begin with, let us understand the basic difference between a soft brick and hard brick issue. Both versions of a bricked phone prevent it from booting but differ in their causes and gravity of the problem.
A soft-brick problem is caused merely by a software error/crash and makes your device switch on automatically every time you manually turn it off. This phenomenon is referred to as Boot Loop. Soft bricked Android phones are not as difficult to fix as the hard bricked Android phones. It is convenient to say that a soft bricked phone only boots up half-way and not fully, whereas a hard bricked device does not switch on at all. A hard brick error is thus caused when the kernel, which is nothing but an interface for the software to communicate with the hardware, is tampered with. A hard bricked phone is not recognized by your PC when plugged in and is a serious problem. It requires troubleshooting techniques and cannot be easily fixed as the soft brick problem.

Hard bricked phones are a rare sight, but the soft brick is very common. Given below are ways to fix a soft brick Android phone. The techniques listed here are the best and the most efficient ways to get your phone back to its normal working conditions without losing your important data or damaging your device or its software.
Part 2: Stuck at the Boot Loop
This is the first sign of a soft bricked Android phone. Boot Loop is nothing but when your phone does not remain switched off and turns itself on automatically, and freezes at the logo screen or blank screen, every time you manually try to power it off.
Stuck at boot loop problem can be fixed by clearing your Cache partitions. These partitions are nothing but storage locations for your modem, kernels, system files, drivers and built-in Apps data.
It is advisable to clear Cache partitions regularly to keep your phone free from such glitches.
Since the phone refuses to boot, Cache can be cleared from entering into the Recovery Mode. Different Android devices have different ways to put it in recovery mode. Normally pressing the power key and volume down key helps, but you may refer to your phone’s guide for better understanding and then follow the steps given below to clear the cache partition:
Once you are the recovery mode screen, you will see a number of options as shown in the screenshot.

Use the volume down key to scroll down and select ”Wipe cache partition” as shown below.
 >
>
After the process is completed, select “Reboot System” which is the first option in the recovery mode screen.
This method will help you erase all the clogged up and unwanted files. You may loose some App related data, but that is a small price to pay to fix your bricked phone.
If this method does not boot up your brick smartphone and the problem still persists, there are two more things you can try. Read ahead to find out about them.
Part 3: Booting straight into recovery mode
If your bricked phone does not boot up to your Home Screen or Lock screen and instead boots directly into Recovery Mode, there is not much left to do. Booting straight into recovery mode is undoubtedly a soft brick error but it also indicates a possible problem with your current ROM. The only option you have to flash a new ROM to reboot your bricked phone back to its normal functioning.
To flash a new ROM:
Firstly, you must root your phone and unlock the Bootloader. Every phone’s mechanism to unlock the bootloader is different, thus, we suggest to refer to your user manual.
Once the Bootloader is unlocked, take a backup of all your data by selecting “Backup” or “Android” back in recovery mode. The process should not take long and all you need to do is tap “OK” to config backup.

In this step, download a ROM of your choice and store it in your SD Card. Insert the SD Card in your phone to begin the flashing process.
Once at the recovery mode, select “Install Zip from SD Card” from the options.

Scroll down using the volume key and use the power key to select the downloaded ROM.


This might take a few minutes of your time, but once the process is complete, reboot your phone.
Hopefully, your bricked phone will not boot normally and work smoothly.
Part 4: Booting straight into Bootloader
If your bricked phone boots straight into Bootloader, then this a serious issue and must not be taken lightly. Flashing a new ROM or clearing cache partitions are of little help in such a brick smartphone situation. Booting straight into Bootloader is a peculiar soft bricked Android phone feature and can be tackled only by downloading and flashing your original ROM from the manufacturer. In order to do so, a detailed study about your manufacturer’s ROM, ways to download and flash must be carried out. Since different Android phones come with different types of ROMs, it difficult to cover all the aspects about the different types of ROMs.
Brick smartphone problem has become more prominent than phone freezing or hanging issue. Android users are often seen looking for solutions to fix their soft brick and hard brick phones. Android phones are prone to get bricked and thus, it is important for us to know about the three techniques given above. These methods have been tried, tested and recommended by ay affected bricked phone users. Therefore, these tips are reliable and worth a try. So if your phone acts stubborn and refuses to boot normally, examine the problem carefully and adopt one of the solutions given above which best suits your situation.
[Solved] Warning: Camera Failed on Motorola Razr 40
In this article, you will learn why camera fails on Motorola Razr 40 devices, how to make camera work again, as well as a system repair tool to fix this issue in few clicks.

Motorola Razr 40 devices are one of the best Android devices available in the market and their users are always satisfied with their features. However, it is a recent observation that many Motorola Razr 40 users complain about Motorola Razr 40 camera failed error while using the camera App on the Motorola Razr 40 device. It is a strange error and pops up suddenly with only one option to tap on, i.e., “OK”
The error message reads as follows: “Warning: Camera Failed”.
Once you click on “OK” the app shuts down abruptly and your Motorola Razr 40 camera is failed. We understand this is not a very pleasing situation, thus, here are ways to tackle the camera failed Motorola Razr 40 issue. Let us now move ahead and find out why exactly you experience Warning: Camera Failed error and how to fix it.
Part 1: Why Motorola Razr 40 phone has Warning: Camera Failed error?
We are all aware that no device runs smoothly, without any glitches. We also know that there is a cause behind every problem. Listed below are a few reasons behind camera failed error, especially on Motorola Razr 40 devices:

- If you have recently updated your OS version, there are chances that certain bugs are preventing the camera App from functioning normally. Also, if the update is interrupted and not downloaded completely, certain apps may suffer.
- There are chances of your internal storage being cluttered with unwanted Apps and files leaving no space for the camera App to save its data and work smoothly.
- If you haven’t cleared camera Cache and Data, the chances of the App to get clogged up increase tremendously which disrupt its working.
- Warning: Camera Failed error can also be a direct outcome of a change in the system settings or the Motorola Razr 40 device’s internal settings.
- Finally, if you tamper a lot with the camera settings and do not update the App whenever it is available, Motorola Razr 40 Camera App will not be efficient.
There might be much more reasons for the camera failed error, but these are the most obvious ones. Now let us now move on to troubleshooting the problem.
Part 2: How to fix Motorola Razr 40 Camera Failed in One Click?
If you are experiencing some kind of issues in your Motorola Razr 40s such as Motorola Razr 40 camera failed, the Motorola Razr 40 device stopped working, black screen, play store not working, etc. There is a special software is designed for such kind of issues in Android devices, i.e. dr. fone. The tool enables the users to fix various kinds of issues in the Motorola Razr 40 devices and perform a complete system repair so the Motorola Razr 40 device starts working normally.
Dr.Fone - System Repair (Android)
One-click solution to fix camera failed on Motorola Razr 40 devices
- The tool has a one-click operation which makes it super easy to use.
- You don’t need any technical skills expertise to operate the software.
- The software supports all the Motorola Razr 40 devices including the latest and older ones.
- The software can fix the “warning camera failed”, the app is crashing, failed update, etc.
4,616,396 people have downloaded it
Note: You have to remember that the system repair may erase all the Motorola Razr 40 device data. So, create a backup of your Motorola Razr 40 data first and then try fixing the Motorola Razr 40 phone.
Follow the steps given below and fix the camera failed error:
Step 1. Download the software on your computer and launch it. Connect your device and select the System Repair option from the main interface. In the next screen, select Android Repair module.

Step 2. You will have to provide the Motorola Razr 40 device details accurately to ensure that the software provides a precise firmware package to be downloaded. Enter brand, name, model, country, and carrier of your device and agree to the terms and condition.

Step 3. Now put your device in the download mode. The software will provide you with a guide to put the phone in download mode to begin the downloading process.

Step 4. As soon as the firmware is downloaded, the software will automatically initiate the repair process. You will be able to see the ongoing repair.

When the software is done repairing the system, you will be notified. Thus, the Camera failed Motorola Razr 40 error in your phone will be fixed.
Part 3: How to fix Camera Failed error by clearing camera data?
Has anyone ever informed you that it is absolutely necessary to keep clearing camera data every once in a while? Yes, since it deletes all unnecessary data stored in respect of the App and no, it does not mean that all your photos and videos will get deleted. Just follow the steps given below to clear camera data:
1. First, visit “Settings’” on your Motorola Razr 40 device and select “Apps” or Application Manager”.

2. Now a list of all Apps will appear before you. Keep scrolling down until your find “Camera”.

Tap on “Camera” to open the “Camera Info” screen and once you are there, hit “Clear Data” option as shown below.

That’s all, now return to the Home Screen and access the camera again. Hopefully, it will work now.
Part 4: How to fix Camera Failed error by removing third-party Apps?
Another tip to fix Motorola Razr 40 camera failed error is by deleting a few unwanted third-party Apps (recently installed) to free some space in the Motorola Razr 40 device’s internal storage. It is essential to create and keep storage space for the camera App to function smoothly and allow it to store its data as well. Also, if this issue only happens recently, it might be some newly installed Apps causing some glitches with the camera.
Simply, follow the instructions given below to remove Apps from Motorola Razr 40 Devices:
1. Click on the “Settings” icon on the Home Screen and from the options before you, select “Apps”/ “Application Manager”.
2. You will see that a list of downloaded and built-in Apps will open up before you as follows.

3. Now, once you select the App you want to uninstall, the App Info screen will appear. Tap on “Uninstall” option and then tap on “Uninstall” again on the pop-up message.

The App will be removed immediately and its icon will disappear from the Home Screen and you will notice an increase in the storage capacity of your device.
Part 5: How to fix Camera Failed error by wiping Cache Partition?
This method might seem tedious and time-consuming and you may also lose your data and essential settings. However, wiping the Cache Partition only cleans your device system internally and gets rid off any unwanted and trouble making elements causing Warning: Camera Failed error. Follow the step-by-step guide given below to clean Cache Partition smoothly:
1. Firstly, switch off the Motorola Razr 40 device by pressing the power button and tapping on “Power Off” as shown in the screenshot below. Then wait for the lit screen to turn off completely before proceeding further.

2. Now, press and hold the power on/off, home and volume up button simultaneously. Your device will now vibrate. This a signal to let go of the power button (only).

3. Once the Recovery Screen appears, leave all buttons and use the volume down key till you reach “Wipe Cache Partition”.

4. Now, to select the option to use the power on/off button and wait for the process to get over. Once this done, tap on “Reboot system now” and see that your device restarts normally.

You may try to use the camera app once the process completes.
Part 6: How to fix Camera Failed error by Reset Settings?
Resetting the camera settings solves the problem 9 out of 10 times and thus is worth a try.
1. To reset, first, launch the Camera App by tapping on its icon.

2. Then go to Camera “Settings” by tapping on the circular gear like icon.

3. Now look for “Reset Settings” options and click on it.

Once done, go back to the Home Screen and start the camera App again to use it.
Part 7: How to fix Camera Failed error by Factory Reset?
Lastly, if the above-mentioned techniques do not help you in fixing the camera failed error, you can consider performing a Factory Reset. Note: This method will delete all your saved data so it is advised to backup before you start the process.
Here are the steps to factory reset your device to fix “Warning: Camera Failed” Error:
1. Start by visiting “Settings” on your Motorola Razr 40 device on which the camera has failed.

2. Now from the list of options before you, select “Backup and reset” and move ahead.

3. Now you must first select “Factory data reset” and then tap on “Reset Device” as shown in the screenshot below.


4. Finally, you have to click on “Erase Everything” and wait for the Motorola Razr 40 device to reboot itself.

Note: You will have to set up your Motorola Razr 40 device from scratch once it is reset, however, that is a small price to pay to fix your Camera App.
Warning: Camera Failed error is not a rare phenomenon and many users experience it on daily basis. So, there is no need to panic, All you need to do is carefully follow the instructions given above and repair your Camera App yourself. You do not need to seek any technical assistance for the same as the camera failed issue is not difficult to deal with. So go ahead and try these tricks to enjoy using the Camera App on your Motorola Razr 40 devices.
Motorola Razr 40 Not Receiving Texts? 10 Hassle-Free Solutions Here
If you are using an Motorola Razr 40, you might have encountered the issue of not receiving texts. This issue can be quite frustrating, as it prevents you from staying connected with your friends and family. However, there are several ways to fix this issue and get your texts back up and running. In this article, we will show you some of the best solutions to fix the issue of not receiving texts on Motorola Razr 40.
It is very common that the Android messaging app is not working on many devices especially broken devices . People often encounter this issue in Motorola Razr 40 phones, even the latest ones.
You might find lots of people online stating I can’t receive text messages on Android. And usually, people don’t find a legit solution for this issue. If you are also experiencing this sort of issue on your Motorola Razr 40s, then don’t panic. We have a series of methods that can supposedly fix the problem. But at first, we will learn what the main reasons this problem arises are and how do you know that it is consistent not some random error.
Take a look at the sections below, and you will learn all possible things regarding the messaging application on your phone.
Part 0. Symptoms and Causes of Android Not Receiving Texts
The most common symptoms that would clarify that your Android messaging service is not working right are given below:
- You will stop receiving any texts all of a sudden.
- You can’t send or receive a text message.
- Whenever you try to text someone, the message sent failed notification pop up on the screen.
The reasons why your Android is not receiving texts are given below:
- Network issue
- Insufficient memory
- Mis-configuration of device settings
- Switching of devices
- A glitch in the messaging app
- Software issue
- Carrier problem with the registered network.
Apart from all these reasons, some additional causes are also there that can lead to this issue.
Part 1: One-click to Fix Android not Receiving Texts by Android System Repair
If you are not willing to waste your precious time fixing the message problem, then you can switch to the top-rated Android repair tool, i.e., Dr.Fone - System Repair (Android) . With this software, you can easily fix issues like the black screen of death, crashing apps, can’t receive text messages on Android, or failed download. If you have no idea what is causing the message app problem, you can simply think of repairing the whole Android system.
You surely need to try the software as it can perform the following tasks:
Dr.Fone - System Repair (Android)
Android repair tool to fix Android Not Receiving Texts
- Fix the Android system without technical knowledge.
- Complete Android repair tool for all brands and models.
- Simple and Easy Repair procedure
- 100% guarantee that the problem will be fixed.
- Also available for iOS devices.
3981454 people have downloaded it
You can download and install the software on your system and use it to fix any issue. Then follow the steps given below:
Step 1: Launch the application and choose the System Repair option from the main interface. Connect your Motorola Razr 40 to the computer and choose the Android Repair mode, and hit the Start button to begin.
Step 2: You will have to provide information about your device, including the brand, name, model, country, and carrier. In between, you will be notified that your device repair might erase the existing data of your device.
Step 3: Agree with the conditions and hit the Next button. The software will download the firmware package automatically. It might take a while to finish the download, and when it is finished, the repair process will be initiated automatically.
It won’t take long, and your Motorola Razr 40 will be repaired. Now you will be able to receive and send text messages without any hassle.
Part 2: Remove and Insert the SIM
The easiest thing that you can try if your Motorola Razr 40 is not receiving any text messages is because the SIM is not inserted right. If your SIM card is inserted wrong, then it is obvious you can’t receive text messages on Android. Simply take out the SIM card, see how it must be inserted, and do it correctly. Once the SIM is inserted in the right way, you will receive the pending text messages immediately unless there is another issue preventing it.
Part 3: Check Network Connection
Another simple method that you can try if you are not receiving text messages on Motorola Razr 40 phone is to check your network connection. Usually, you can see the bar on the top of the screen. Maybe the problem exists because you have no signal strength at the moment.
Part 4: Consult your Carrier about the Data Plan
Maybe you are unable to get messages on your Motorola Razr 40s because your existing data plan has expired. You can directly contact your Carrier about the issues where your Motorola Razr 40 is not receiving texts. If your plan has expired, then you might have to renew it immediately. If not, then try out other fixes to resolve this issue.
Part 5: Try the SIM card in Another Phone or Slot
Sometimes, people complain that Motorola Razr 40 is not receiving texts from iPhone, and it might be because of the SIM card issue. So, the best thing you can try is to remove the SIM from your current phone and insert it into another phone.
When you are offline the message is saved on the server and just about when you get online, the text messages are delivered. If it is the SIM issue, then you will not get the message unless you contact your network operator.
Part 6: Clear the Cache of Messaging App
In smartphones, the memory space often gets filled up with cache. And not everyone remembers that they have to clear the cache from time to time. The accumulated cache can also lead to this issue. So, if your Android messaging app is not working, you have to clear the cache memory.
Step 1: Open the Settings and go to Apps. Find the Messages app from the list and tap to open it. There you will see the storage occupied by the app along with the cache.
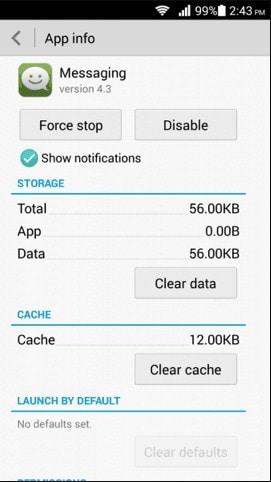
Step 2: Click on the Clear Cache button and wait as the Motorola Razr 40 device free up the memory of your device.
Once the cache is cleared, you can also clear the data if you want to and you’ll instantly receive the text messages on your phone.
Part 7: Delete Useless Messages to Free Up Space
Sometimes, if you are not receiving text messages on Motorola Razr 40, it means that you need to clean up the clutter of useless messages from your phone and SIM both. The phone messages can be deleted directly from your phone. But the SIM card messages needed to be deleted separately. The SIM cards don’t have enough memory to hold plenty of messages. Therefore, once the storage is full, you will stop receiving messages entirely.
Step 1: Open the messages app and open settings. Look for an option that says “Manage SIM Card Messages”. Sometimes, you can find this option under Advanced Settings.
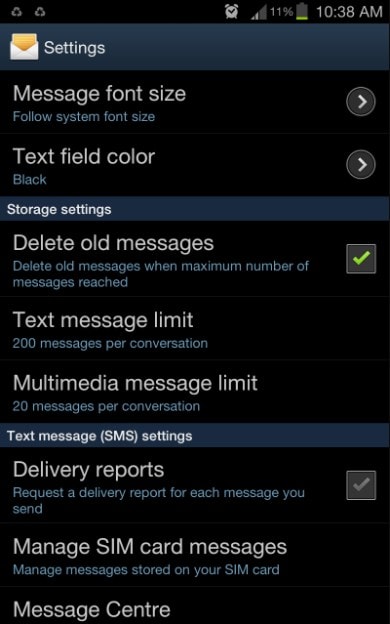
Step 2: There, you will see the existing messages on the SIM. You can either delete all the messages or perform a selective deletion to free up space.
Part 8: Try a Third-party Messaging App
If you can’t receive messages on your default app, then you can try installing a third-party messaging app. Nowadays, most people use social media messaging apps like WhatsApp, Skype, etc. for messaging. So, if somehow, the Android is not receiving texts, then the new apps can help you to send and receive messages with a non-native network.
_Further Reading: 15 Best Free Chat Apps in 2022. Chat Now! _
Part 9: Ensure your Phone is Fully Charged
Another possible fix to this problem might be your phone’s battery percentage. Sometimes, when the Android is in power saving mode, it disables the default apps too. As a result, you can’t even receive text messages on Android. So, when you plug in the charger, the power saving mode will be disabled, and you will get your text messages.
Part 10: Ensure It’s Not An iMessage From iPhone
If the Motorola Razr 40 phone is not receiving texts from iPhone, then this might be a different issue. Usually, there is an option on the iPhone where they can send texts as iMessage and simple messages. If the iPhone user sends the text as iMessage, then it will not show up on the Android device. To resolve this, you have to follow the steps below:
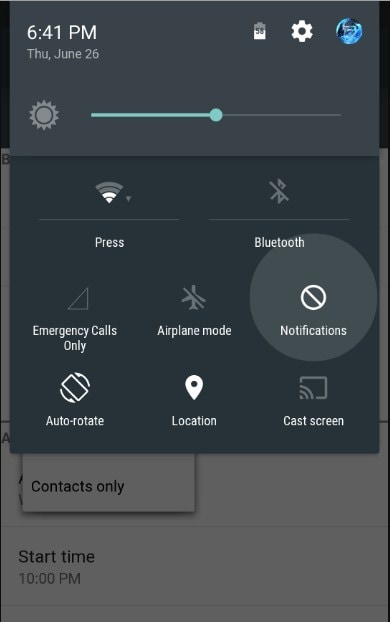
Taking the iPhone in hand makes sure that you are connected to a network. Open settings and scroll to look for the Message option. Toggle the bar next to the iMessage option to turn it off.
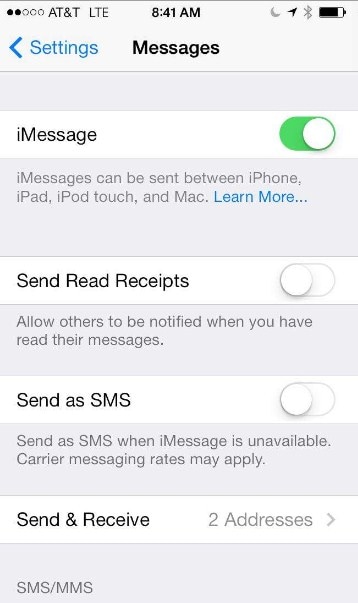
If the FaceTime option is also on, you might have to deactivate that too to send messages and calls as regular ones.
Part 11: Update Your Android
Updating the operating system to the latest Android version can fix some system errors which may cause the “Android not receiving texts” issue because the latest version always brings a better user experience and fix the know bugs.
Conclusion
Now you know several methods that can work if the Android messaging app is not working. If you experience this kind of issue with your Motorola Razr 40, then you are most likely to resolve them with these fixes. If none of the solutions seem to fix the issue, then you can take the help of Dr. Fone - System Repair (Android) feature. With this tool, you can resolve all kinds of working issues on your device.
Also read:
- 2024 Approved Wallet-Friendly High-Definition Equipment
- Complete Tutorial to Use GPS Joystick to Fake GPS Location On OnePlus Nord N30 5G | Dr.fone
- Effective Strategies for Exporting Photos From Your Device to Snapchat
- How to Fix Unfortunately, Contacts Has Stopped Error on Vivo T2 Pro 5G | Dr.fone
- How To Revive Your Bricked Honor X50i in Minutes | Dr.fone
- How To Use Special Features - Virtual Location On Vivo V29? | Dr.fone
- My Videos Arent Playing on Honor Magic 5 – What Can I Do? | Dr.fone
- Top 5 Solutions for Reducing GPU Consumption by the Windows 11/10 DWM
- オフィシャル MP3/FLAC への無償オンライニクス MP2 OGG コンバーター - Movavi
- Title: How to Fix the Soft Bricked Motorola Razr 40? | Dr.fone
- Author: Abel
- Created at : 2025-01-23 21:20:12
- Updated at : 2025-01-29 22:08:04
- Link: https://fix-guide.techidaily.com/how-to-fix-the-soft-bricked-motorola-razr-40-drfone-by-drfone-fix-android-problems-fix-android-problems/
- License: This work is licensed under CC BY-NC-SA 4.0.