
How to Fix Unfortunately, Contacts Has Stopped Error on Nokia XR21 | Dr.fone
How to Fix Unfortunately, Contacts Has Stopped Error on Nokia XR21
Have you recently noticed a message stating “Contacts has stopped”? This is enough to take away all your peace. As, our native contacts app stashes all our useful contacts which are time and again needed by a user. It’s malfunctioning is enough to give us chills. But, why the Nokia XR21 or any other Android device incurs such problems?
It can occur while you launch the app or while you’re in the app already finding the required contact or when any other application is trying to gain access to it. So, to rage a battle with this issue, you need to seek help of some powerful methods in killing down the issue of contacts app crashes. And, the best part is that you’ve secured yourself by reaching the right place. We will be taking an in-depth discussion on several methods that may prove to be helpful. Let’s read them up here now.
Part 1: Get Android system fixed in one click
We’re always in search of a method that provides handy solution in a quite speedy and hassle-free manner. There are hundreds of tips and tricks for the same. You never know the possibility of firmware being the major drawback. No amount of manual methods can beat the performance of Dr.Fone - System Repair (Android).It is capable of providing 100% solution to any kind of issues, your phone gets troubled with. It is designed with the technology of combating the problem of black screen of death, app crashes and several other issues. In just a single-click, ward off the issue and free your device with errors
Dr.Fone - System Repair (Android)
Fix Contacts app crashing on Android in one click
- Incorporates with 1-click technology to resolve any issues occurring in your Nokia XR21. Black screen of death, app crash, system crash, faulty issues etc.
- fone – Repair (Android) interface is extremely simple for users and lays functionalities aptly.
- One of its kind software with highest success rate in the market.
- Fully compatible with all kinds of Android phones, models, as well as the popular carrier.
- It provides users with 24 hours customer care service to resolve queries.
3,016,434 people have downloaded it
In this tutorial, we will learn the methodology of addressing the contacts keep stopping problem and gain triumph over it.
Step 1: Load program and draw connection of device
Download Dr.Fone - System Repair (Android) on PC. While program installs, use USB cable to connect device with system. From interface, tap on “System Repair” main window.

Step 2: Opt for Android Repair option
You’ll be directed to the “System Repair” screen where you have to opt for “Android Repair” options appearing over the left panel of the program. After that, do not forget to press “Start”.

Step 3: Key in device information
From following screen, fill the fields of “Brand”, “Name”, “Model”, “Country” and several other parameters. Then, tap on “Next” option to proceed further.

Step 4: Download Firmware package
Just follow the on-screen steps for booting your Nokia XR21 into download mode. Then, hit the “Next” button to proceed with downloading the most suitable firmware package for your Nokia XR21.

Step 5: Repair Android phone
Once the software downloads, the program will automatically repair any issues irking over your phone. Now, your phone is all free from contacts error.

Part 2: 9 Common ways to fix “Unfortunately, Contacts Has Stopped”
2.1 Restart Android system
Our response to any minuscule issue is straightaway restarting phone. This helps in clearing out any problem that might have disrupt the functioning of phone. So, to fix the problem of “Contacts app won’t open”, you too can try out your hand in this method.
- Get hold of your Android system and long press the power button.
- This will fadeout the main screen and showcase several options from where you’ve to tap on “Reboot/Restart” mode.
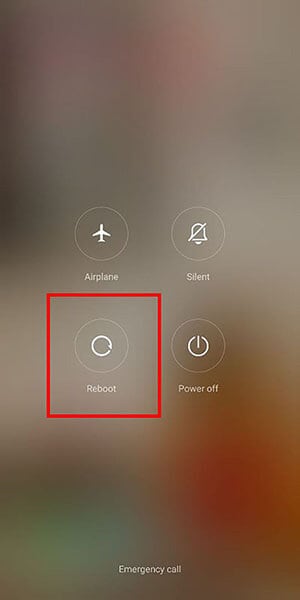
Now, your device will quickly reboot the Nokia XR21 device. Once, the Nokia XR21 device regains its normal state, check whether the issue is coming again or not.
2.2 Clear cache and data of Contacts app
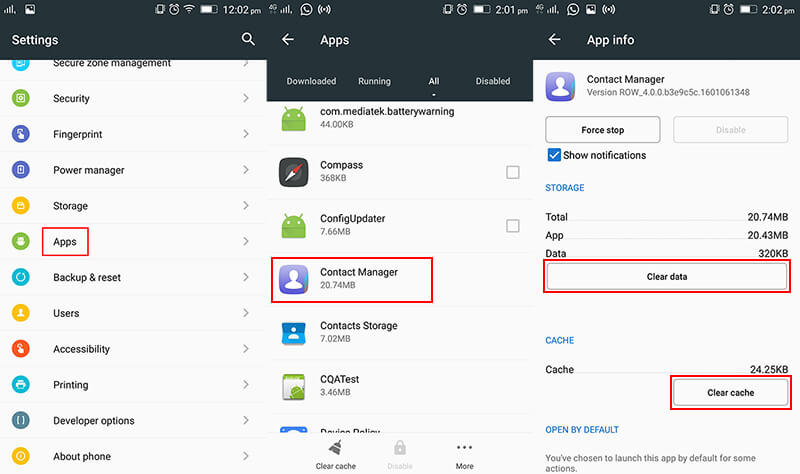
The cache memory basically stashes the copies of the concerned application. It is indeed a streak of copies of the desired app storing information and incurring additional space on the storage. This might be the reason why the contact app crashes rapidly on your Nokia XR21. Hence, it can prove to be a good remedy for this problem. Just follow down the steps mentioned below-
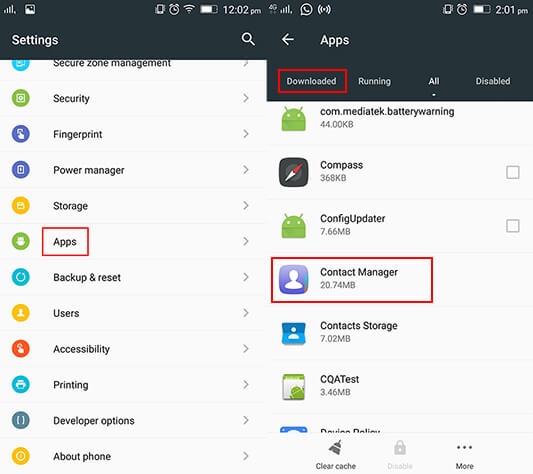
- First of all, go to “Settings” application from the app drawer or from the notification panel.
- Now, surf and select for “Applications” or “Apps & notifications”.
- Here, you need to browse for “Contacts” app and open it.
- On “Contacts” app, just tap on “CLEAR CACHE” and “CLEAR DATA” button. This will prompt the cache memory to be cleared.
2.3 Wipe cache partition
As we know the cache memories are the temporary files build by the firmware. These are of little importance as they are bound to become a bit more corrupted in nature. And sometimes, may indirectly become a hurdle for the working of contacts app. It is good if the Nokia XR21 device is cleared off from the caches. Instead of manually wiping down the cache memory, we will understand how to clear off the cache partition in the following steps.
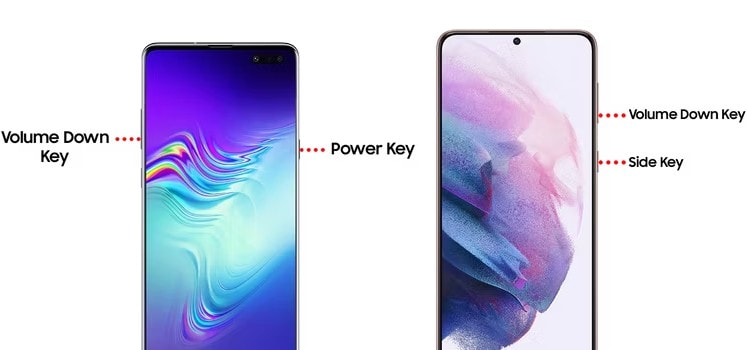
- From device, just power off your device. Then, press the “Volume Down + Power” button with “Home” combinations together.
- In a moment’s time, lose fingers from the “Power” button but do not release fingers from “Volume Down” and “Home” buttons.
- Once you view the “Android System Recovery” screen, just lose the “Volume Down” and “Home” buttons.
- Over the options available, just opt for “wipe cache partition” by tapping the “Volume down” button until the desired option is highlighted.
- Finally, push the “Power” key to give consent to the selection.

- After, the process is through there will be an option for “Reboot System Now”. Tap on it and restart the Nokia XR21 device.
2.4 Disable Google+ app
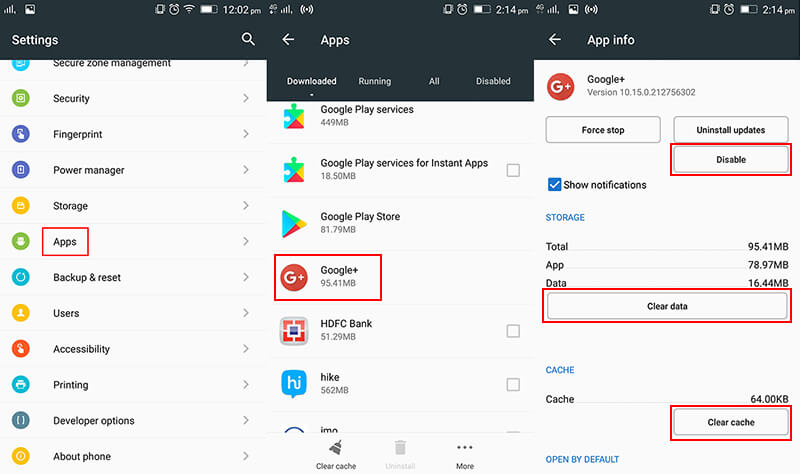
The root cause for detecting any problem is not very easy. You never know the overloading of Google + application might have directly impacted contacts app crashes. To resolve it, disabling it may prove to be a helpful solution. Here is the quick reference for disabling Google+ application.
- First of all, visit “Settings” from your Nokia XR21.
- In “Settings”, visit the “Application Manager” or “Applications” menu and browse for “Google +” app.
- From the application main page, you can choose to do either of the methods:
- Either, completely disable the application to work by pressing on “Force stop” or “Disable” feature.
- Or, brush away the unnecessary cache piled up on your storage by using “Clear Cache” functionality.
There will be a prompt stating that the application may misbehave. However, you must disable the feature and check whether it worked out for you or not.
2.5 Update your device software
Many a times, we skip updating our device software thinking it is of less importance. In fact, one must not miss out the updates that occurs in phone. As, without the updates, the scope of some applications are affected to some extent. For its better functioning and avoiding issues like “contacts keep stopping”, here is how you should update device software.
- First and foremost, head on to “Settings” menu. Over there, click on “About Device”.
- There, you need to tap over “Software Update”.
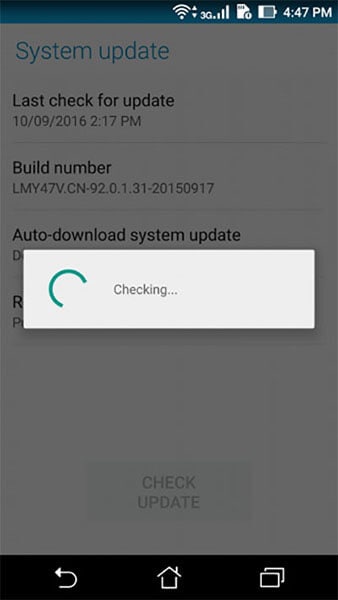
The device will now check whether there are any updates available for your device. If yes, then update application right away.
2.6 Reset App Preferences
As stated, the malfunctioning of contacts can be due to be any unexpected reason. Hence, users can opt for resetting app preferences. This may prove to be helpful in brushing away the issue of “Contacts app won’t open”.
- Launch “Settings” app and surf for “Apps” or “Applications” option on your Nokia XR21.
- Just, tap over the three dots appearing at the upper right section and then tap on “Reset app preferences”.
- At last, just select “Reset default apps”.

2.7 Delete voicemail
Do you happen to exchange voicemails quite often? It can trigger to be the reason for contact app crashes. If your device happens to have a bulk of voicemails, you must get rid of them sooner or later. As, these might standout to be the prime reason for contacts stopping on Nokia XR21. If you’re unaware about the procedure of removing all kinds of voicemails, you can proceed to make use of the following steps.
- Start with, launching the “Google Voice” app.
- From there, duly opt for “Voicemail”.
- Just click on the press menu option and at last select “Delete” option.
2.8 Uninstall the downloaded apps
Some applications contain some unwanted advertisements and some elements of malware. This can be enough for disrupting the functionality of the built-in contact app won’t open. It is crucial for your phone to be detoxed from such elements. You need to manually scrap off such applications. Do, ensure to download the application from the genuine source for future use.
- On your Nokia XR21, just go to “Home” screen and tap on “Apps” icon.
- Then, tap on “Settings” icon followed by going to “Applications” or “Apps & Preferences” menu.
- After that, tap on “Menu icon” which will showcase the apps installed on device.
- Simply, open the app and hit the “Uninstall” button to brush away that app. Repeat the same with other application(s).
Now, check whether you’ve fought the battle with the problem or not.
2.9 Reset to Factory Settings
Last but not least, if all the methods falls flat to resolve the issue of contacts app won’t open. Then, it might be your device has some internal problem. This can be any software crash which might not be fixing with the aforementioned steps. That is where reset to factory settings may prove to be a good option. With this method, your phone will be cleared of all the components, settings and everything present in it. Here are is the comprehensive tutorial for biding bye to the problem of contacts app won’t open.
Note: Do ensure to take a backup of all the data available in your device. As, we don’t want you to regret afterwards.
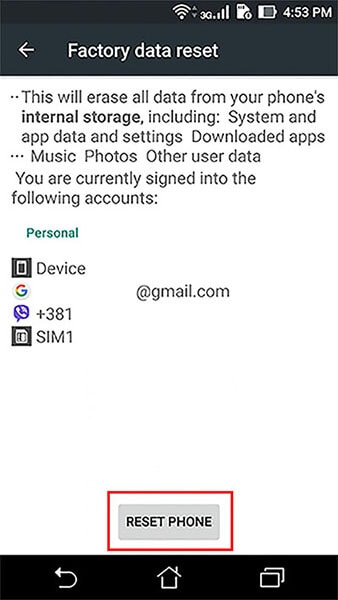
- Just go to “Settings” and surf and select “Backup & Reset” option.
- You need to toggle on the option for performing the backup on your Google account.
- Then, tap on “Reset” button and then tick mark the option for resetting your phone.
Android Screen Stuck: General Nokia XR21 Partly Screen Unresponsive
Over time, both stuck and dead pixels on phone screens can make it challenging to enjoy your device features, especially if they are in a critical area. In addition to making your phone look less appealing, they can make it hard to use for big tasks like texting, surfing, or taking pictures.
Fortunately, there are ways to overcome this, and one of the best is Dr.Fone. In this article, you will discover more about these broken pixels on phones, which of the different methods works for you, and why it is worth considering. By the end of this article, you will have the knowledge and tools you need to get your phone working like new again.
Part 1: Understanding Stuck and Dead Nokia XR21s on Phone Screens
While dead and stuck pixels on the phone may seem similar, there are important distinctions between the two. Read on to discover the differences and what causes them.
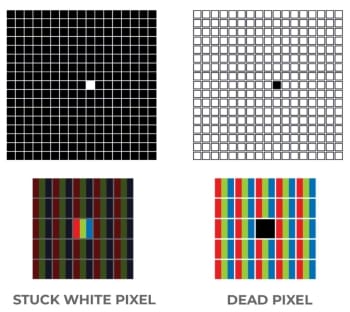
Stuck Nokia XR21s on Phone
A stuck pixel phone is always on, so it shows up on a touchscreen as a bright, persistent dot of red, green, blue, or white. Combinations are also possible, and although it is usually stationary, this dot occasionally flickers.
Dead Nokia XR21s on Smartphones
In contrast to the stuck pixel, the dead pixel subpixels are all left unpowered, turning them off. A dead pixel on the phone is a tiny, persistent rectangle of black or white color on the part of the phone screen not working.
Some Differences Between Stuck and Dead Nokia XR21s on Phone
Stuck pixels may have less effect on the user experience than dead pixels on the phone screen since they still display color. But dead pixels may be more disturbing because they are either black or white.
It is easy to mistake stuck and dead pixels on the phone for one other, but they are unique issues with different causes and effects. Read on to understand the differences and how they affect your phone’s display.
- Power. The stuck pixel on your device always receives energy, causing it to display a specific color while the dead pixel is permanently off, resulting in a black spot on your phone screen.
- Possibility of repair. You can quickly fix ****stuck pixels on the phone,****while some may even disappear on their own. However, dead pixels are more challenging to repair.
- Occurrence. The stuck pixel is a common issue that often affects older or less-used displays, while dead pixels rarely appear on digital cameras and sensors.
Factors That Contribute to Stuck and Dead Nokia XR21s on Mobile Devices
Stuck and dead pixels on phone screens can happen for various reasons, including manufacturing defects, physical damage, and age-related wear and tear. These broken pixels on the phone can hurt the user experience, and it is essential to know the root causes to prevent them from occurring in the first place.
- Manufacturing defects. During manufacturing, some pixels may not work due to poor quality control, resulting in stuck or dead pixels on the phone In other words, if the power transfer issue isn’t completely fixed, you might see more dead pixels.
- Physical damage. Accidents such as dropping the phone or exposure to extreme heat or cold can damage the screen and cause stuck or dead pixels. For instance, the upper part of the touch screen not workingmay also occur due to pressure on the display when the phone is placed in a pocket with other sharp objects.
- Age-related wear and tear. Over time, the display on your phone may start to wear out, resulting in the appearance of dead or stuck pixels on the phone. It is more common in older devices and those with high usage rates. Factors such as exposure to sunlight or excessive phone use can also contribute to the issue.
Part 2: How To Fix Dead Nokia XR21s on Phone Screens on Android Devices
It is essential to have the right tools and knowledge to fix dead pixels on your phone screen. Fortunately, you can use several effective techniques to address the issue. In this section, you will discover step-by-step instructions on how to fix dead pixels on phone screens on Android devices.
Option 1: Check Phone Screen Appearance
Before attempting to fix a dead pixel on a smartphone screen, it is necessary to check its appearance and ensure there is no physical damage.
Step 1: Check for chips, cracks, or any other signs of damage on the screen if your phone touch screen is not working in some areas. If you find any damage, you may need to take your phone to a professional repair shop or consider getting a replacement.
Step 2: If you have a screen protector or case, remove them because they can interfere with the process. This step will allow you to get a clear view of the screen and accurately assess the dead pixel on the phone.
Step 3: Remove any gloves you may be wearing and any stickers placed over the screen or sensors. Gloves and stickers can interfere with the touchscreen and affect the accuracy of fixing the broken pixels on the phone.
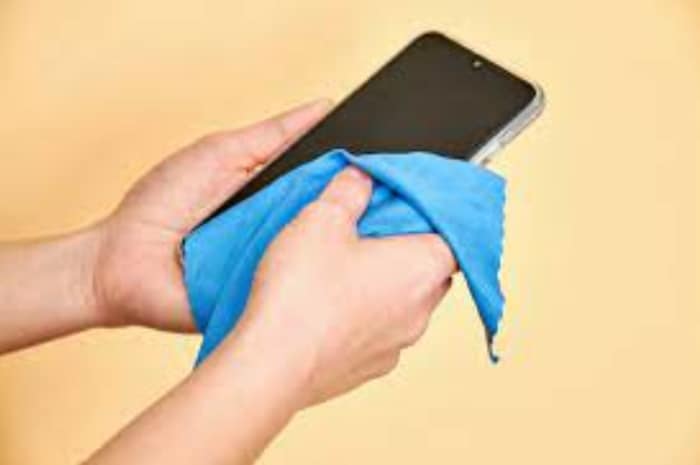
Step 4: Finally, ensure that your screen is clean and free from any smudges or dirt that could affect the accuracy of fixing dead pixels on the phone. You can use a microfiber cloth to clean your screen gently, making sure not to apply too much pressure or use any harsh chemicals that could damage the screen.
Option 2: Restart Your Nokia XR21
This method may seem simple, but it can be the most effective solution to your problem. Here is how you restart most smartphones available in the market.
Step 1: Press and hold down the power key on your Nokia XR21 until the power menu appears.
Step 2: Select Restart on your phone’s screen. It will initiate a reboot of your device.
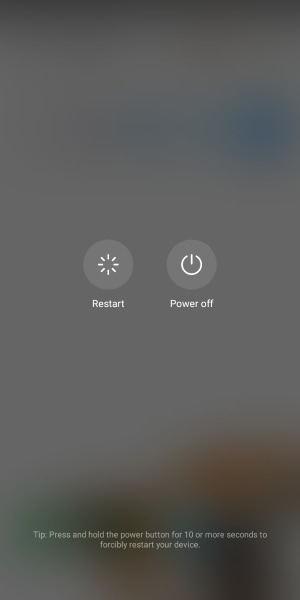
Tip:
If your Nokia XR21 is unresponsive to the usual restart method because a part of the phone screen is not working, try a forced restart by holding the power button for at least 10 seconds.
Option 3: Check If Stuck Nokia XR21 Phone Only Appears in Specific Mobile Apps
If the previous method did not work, check if the stuck pixels on the phone only appear in specific mobile apps. Sometimes, stuck pixels may only show up when using particular apps, so identifying which app is causing the issue can help pinpoint the problem.
Step 1: Put your smartphone in Safe Mode.
Note:
Visit the help page for your device’s manufacturer to learn how to activate and deactivate safe mode. Safe mode disables all downloaded programs momentarily.
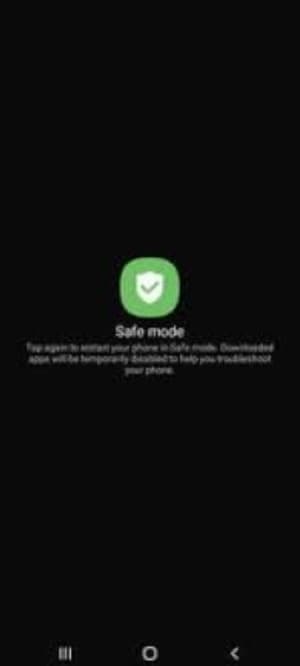
Step 2: Try touching the screen while your phone is in safe mode. If the display functions as intended, a specific app is likely causing the issue with the stuck pixel phone display. Next, turn off Safe Mode.
Step 3: To resolve issues related to a problematic app on your phone, remove the most recent downloads one at a time, and restart your phone after each uninstallation. Check if uninstalling the app resolves the issue. Once you know the problematic app, you may install the other applications you deleted again.
Option 4: Perform Factory Data Reset
Consider a factory data reset if the previous options did not resolve your issue with stuck or dead pixels on the phone screen. This process will erase all data from your device, so remember to back up any important information before proceeding.
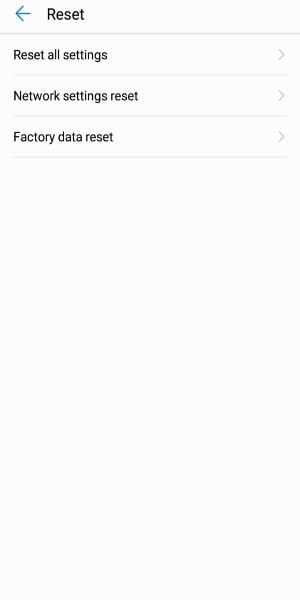
Step 1: Open the Settings application.
Step 2: Choose System > Reset > Erase all data (factory reset) > Erase all data.
Note:
It is crucial to wait for the system to finish deleting all data during the factory data reset. For instructions tailored to your device, see your manufacturer’s help page.
Option 5: Use Wondershare Dr.Fone
Dealing with the stuck pixels on the phone can be a challenging issue to tackle. Although Dr.Fone may not be able to fix this issue directly, it can still provide support with other problems you might face during the process. This includes content backup and recovery, as well as system repair for other system issues such as a black screen, being stuck in a boot loop, forced termination, and more. In this section, you’ll learn how to use Dr.Fone’s System Repair feature.
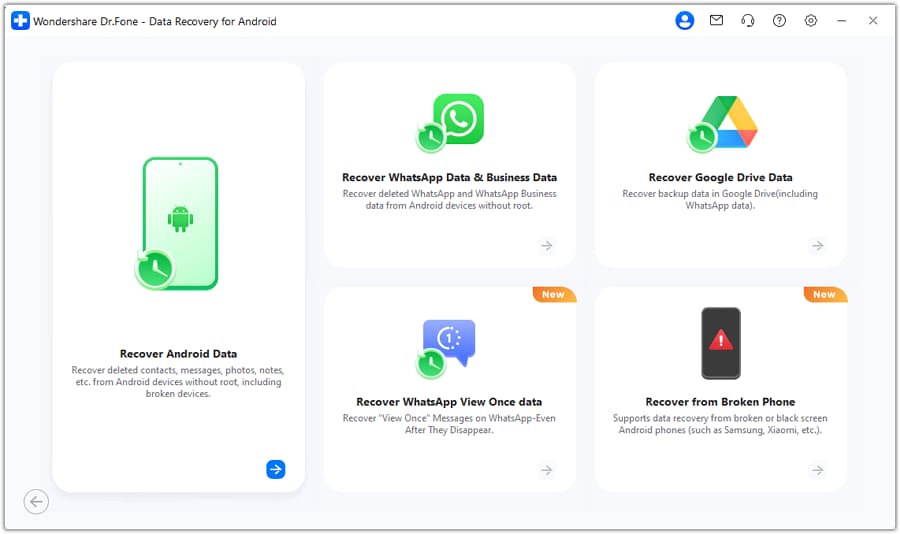
Step 1: Install and launch Dr.Fone, then click System Repair.
Step 2: Choose either Android or iPhone, depending on the type of device you have.
Note:
Wondershare Dr.Fone provides support for Nokia XR21 S22 as well as other popular Nokia XR21 models.
Step 3: Select the type of Android issues your phone has then click Start.
Step 4: Choose the corresponding Brand, Name, Model, Country, and Carrier from each drop-down menu and click Next.
Step 5: Connect your device to your computer and follow the in-app instructions to enter the Download mode, then click Next.

Step 6: Your device will need to have the new Android firmware flashed onto it, which Wondershare Dr.Fone will take care of. Simply wait while the process completes.
Part 3: Benefits of Using Dr.Fone on Phones With Dead Nokia XR21s
If your phone’s screen is malfunctioning or some features are inaccessible due to stuck or dead pixels, following the steps to fix dead pixels on the phone may be challenging. Resetting your phone and backing up data can also be a hassle.
The good thing is Dr.Fone can help you with these issues, making the process easier and more efficient. This app offers a variety of benefits and features that can help you find a quick and effective fix for your smartphone.
Backup and recovery of data. Dr.Fone offers a straightforward way to back up your vital data from iOS and Android smartphones and selectively restore specific files when needed. This feature is essential for those who have lost important files due to a phone’s damage, malfunction, or accidental deletion. It allows you to recover data and avoid potential data loss.
Ease of use. The software is user-friendly and easy to navigate, making it accessible to anyone without advanced technical knowledge.
Safety. The software is safe and secure, ensuring that your data is not compromised during the process. This feature is for users concerned about the confidentiality of their data and wants to ensure that their personal information is not shared or stored on the internet.
Part 4: Frequently Asked Questions
Aside from the methods and tools discussed for fixing dead pixels on phone screens and stuck pixels on the phone, you may still have some questions regarding the issues. Whether you are dealing with a single stuck pixel or a cluster of dead pixels, this section aims to provide you with helpful insights.
1. Can Dead Nokia XR21s Fix Themselves?
No, a dead pixel on the phone is permanent. There is a much lower chance that dead pixels will self-correct over time. They are often impossible to fix using any of the widely used techniques. Unlike stuck pixels, they rarely have a chance of recovery. Before giving up, verify if the pixel is dead, as stuck pixels may be fixable.
2. Can Dead Nokia XR21s Worsen?
Dead pixels cannot spread because each pixel functions independently of the others. Thus, a dead pixel on the phone does not affect surrounding pixels. However, it can be a nuisance for users, especially if it appears in prominent parts of the screen. Call an expert if you see that it is spreading so they can diagnose the issue and assess whether a repair is possible.
3. Why Are Dead Nokia XR21s Spreading on My Nokia XR21?
It simply signifies that this specific area of your screen had poor manufacturing quality or is physically damaged if you have a patch of closely spaced dead pixels on your phone. When a group of dead pixels is close together, it indicates localized damage or defect to that specific area. So, the pixels in that region no longer produce light or color.
4. How Many Stuck Nokia XR21s Are Acceptable?
It frequently happens throughout the LCD manufacturing process when one or more subpixels enter an unchanging state, leading to a bright or lifeless pixel. Generally speaking, an acceptable display has 1 to 5 fixed subpixels.
In addition, the essential factor in comparing dead pixel policies is whether or not the policy permits the Nokia XR21 devices to be returned, swapped, or repaired when this frequent issue arises.
 safe & secure
Conclusion
You have learned the difference between a stuck and dead pixel on the phone. With this knowledge, you can apply the different tools and techniques for removing stuck pixels on phone screens and how to work around dead pixels on the phone screen. Whether using software like Dr.Fone or employing manual methods such as rebooting or cleaning your device, there are various options you can try.
Remember to back up your data before attempting any fixes and to seek professional help if necessary. If you are still experiencing issues with dead pixels on your phone screen, don’t hesitate to contact your device manufacturer for further assistance.
What To Do When Nokia XR21 Has Black Screen of Death?
Have you ever got the error of freezing the Android device home screen? Or the notification light keeps blinking without anything shown on display? Then you are facing Android black screen of death.
This scenario is common with many Android mobile users, and they always hunt for solutions to get rid of this Android black screen problem. Here are some more situations that can assure you that you are facing Android black screen of death.
- The light of the phone is blinking but the Nokia XR21 device is not responding.
- The phone is hanging and freezing very frequently.
- The mobile is rebooting and crashing more often and the battery is draining a lot faster.
- Phone restarts on its own.
If you face these situations, you might be facing the Android black screen of death issue. Follow this article, and we’ll discuss how to get rid of this annoying problem at ease.
Part 1: Why Android device gets black screen of death?
Similar to the “Blue Screen of Death “ (BSOD) on computers, the Android Black Screen of Death indicates a severe system crash or malfunction. When this issue occurs, the Nokia XR21 device’s display remains blank, and you are unable to interact with the Nokia XR21 device, access apps, or perform any actions. The cause of the Android black screen of death can vary, but some common factors include:
- Install incompatible apps or apps with bugs and viruses.
- Have bugs or errors in the Android operating system.
- Keep the mobile charged for long after it’s fully charged.
- Use a non-compatible charger.
- Use an old battery.
- Incorrectly install or incomplete system updates.
- Excessive heat due to heavy usage or environmental factors.
If you face the situations mentioned above, this is clearly a case of the Android screen black. But don’t worry about that. You can follow the article below to get rid of this situation on your own.
Part 2: How to rescue data when Android gets black screen of death?
This annoying Android black screen of death is making it impossible to access your internal data. So, the possibility is that you might lose all the data. We have a solution for all of your data recovery problems from a damaged Android device.
The solution for recovery data is the Dr.Fone - Data Recovery (Android) toolkit by Wondershare. This tool is highly appreciated worldwide and very popular for its feature-rich user interface. This tool can perform a lot of functions that can successfully recover the data from a damaged device.
Use this revolutionary toolkit to get the data back from the black tablet screen of death. Connect the Nokia XR21 device with the PC after installing this tool and follow the on-screen instruction, and all of your data will be transferred to your PC. Unfortunately, the tool is supported on selected Nokia XR21 Android devices as of now.
Dr.Fone - Data Recovery (Android)
A Dedicated Tool to Retrieve Data from Broken Android Devices .
- Recover data from broken devices or devices that are damaged in any other way, such as those has black screen.
- Recover photos, videos, contacts, messages, call logs, and more.
- Highest retrieval rate in the industry.
- Compatible with most Nokia XR21 devices.
3981454 people have downloaded it
Part 3: 9 Solutions to fix the black screen of death of Android
- 3.1 One click to fix the black screen of death

- 3.2 Force restart your Nokia XR21
- 3.3 Check and clean your phone
- 3.4 Remove the battery
- 3.5 Recharge the Nokia XR21 device
- 3.6 Wipe cache partition to fix black screen of death
- 3.7 Uninstall incompatible apps
- 3.8 Reboot to safe mode
- 3.9 Factory reset to fix Android black screen of death
3.1 One click to fix the black screen of death
Facing an Android device with a black screen of death, I believe, is one of the gloomiest moments of one’s life, especially for those who know little about the technical part of Android. But here is the truth we have to admit: most cases of the black screen of death arise due to system glitches in Android.
What to do? Shall we find someone who is tech-savvy to seek help? Come on, this is the 21st century, and there are always one-click solutions to deal with technical issues for laymen like you and me.
Dr.Fone - System Repair (Android)
Fix Black Screen of Death for Android In One Click
- Fix all Android system issues like a black screen of death, OTA update failures, etc.
- Update the firmware of Android devices. No technical skills are required.
- Support all the new Nokia XR21 devices like Galaxy S22, S23, etc.
- Click-through operations to bring Android out of the black screen of death.
3,364,231 people have downloaded it
Here are the easy steps to get your Nokia XR21 out of the black screen of death:
Download and install the Dr.Fone tool. After launching it, you can see the following screen pop up.
Select “System Repair” from the home page, and then click on the “Android “.
Click “Start” to commence the Android system repair. In the next screen, select and confirm your Android model details like name, model, country, etc. and go on.
Boot your Android into Download mode by following the on-screen demonstrations.
Then the tool will download the Android firmware and flash the new firmware to your Nokia XR21.
A moment later, your Nokia XR21 will be repaired completely, and the black screen of death will be fixed.

Video guide: How to fix the Android black screen of death step by step
safe & secure
3.2 Force restart your Nokia XR21
Because it is the quickest and most painless solution, most people do this when their Android phone screen goes black too fast. The majority of phone issues can be resolved by performing a hard reboot. Here are the necessary measures if you haven’t tried this method before.
To reboot your Nokia XR21, you may need to press a specific key combination, depending on the model you have, but most Android devices can be force restarted by doing the following steps:
Step 1: Press and hold the power button for about 10-15 seconds. Keep holding it until the Nokia XR21 device restarts.
Step 1: For Nokia XR21 devices, press and hold down the Power and Volume Down buttons for about 7 seconds.
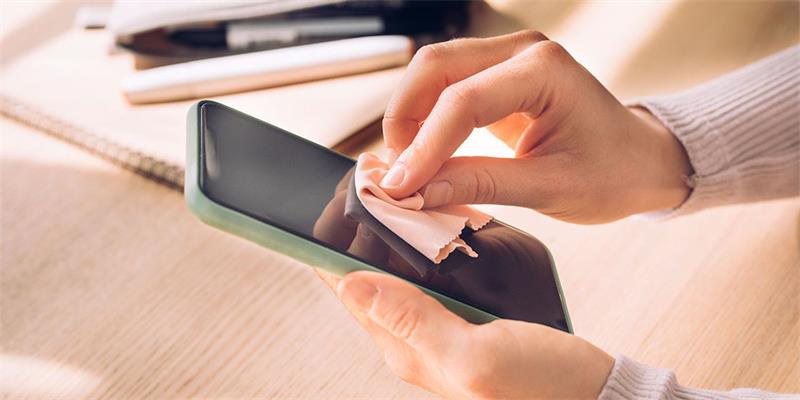
3.3 Check and clean your phone
This method might not be popular with Android users, but this can do wonders when dealing with an Android black screen of death issue. To do this, follow the steps provided below:
Step 1: Ensure your phone’s buttons and ports are not stuck before anything else.
Step 2: See if dirt prevents you from turning the Nokia XR21 device on. Then, quickly press and release the button a few times.
Step 3: If the phone isn’t charging normally, ensure the charging port isn’t clogged with dust and debris by checking and cleaning it. You can gently blow out any debris in the charging port or use a wooden toothpick to pry it open.
Step 4: After you’re done with the cleaning, it’s best to charge the phone for at least 10 minutes. Just give it a quick charge and then try to restart it.
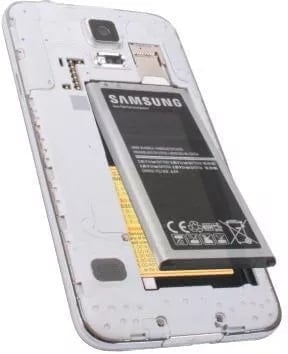
3.4 Remove the battery
If your phone’s battery is removable, you can try taking it out and trying again if restarting and cleaning it doesn’t fix the problem.
Step 1: To get started, take the phone apart by starting at the back.
Step 2: After 20 to 30 seconds, take out the battery and put it back in.
Note: When replacing the battery, ensure the metal contacts correctly connect to the phone.
This easy and straightforward method should help you fix your Android screen black issue, but if it doesn’t, continue reading, as this article got more techniques you can try.
3.5 Recharge the Nokia XR21 device
If your Nokia XR21 screen suddenly goes black, let the battery die completely. Then once the battery is completely dead, you should plug it in to charge and turn it on by pressing the Power button. Try to check if you still encounter the issue after doing so.
3.6 Wipe cache partition to fix black screen of death
If your Nokia XR21 turns on, but the screen remains black, clearing the cache partition should solve the problem. After all, keeping caches on your phone would cause it to run more slowly and cause other problems. Therefore, the issue can be resolved by clearing the cache partition. Check the following steps on how to do this below:
Step 1: Turn off your Nokia XR21.
Step 2: Boot the Nokia XR21 device into Recovery Mode.
Note: The steps necessary to enter recovery mode will vary depending on your specific Android phone model. To ensure you’re doing the correct steps for your device, consult the user manual or look it up online. The following instructions work for Nokia XR21 devices:
- For older Nokia XR21 devices with the home button: Press and hold the Volume Up button, the Power button, and the Home buttons simultaneously.
- For newer Nokia XR21 devices without the home button: Press and hold the Volume Up button and the Power button together.
- If the Nokia XR21 device logo appears, release your grip, and the phone will restart.
Step 3: Find the Wipe cache partition option using the volume controls after entering Recovery Mode.
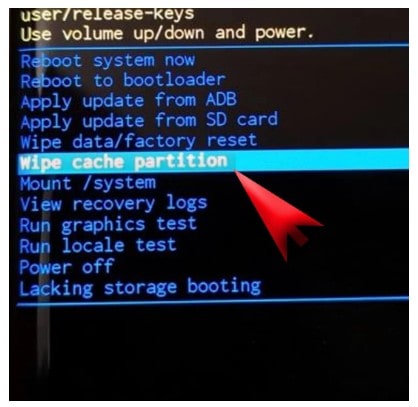
Step 4: Select Wipe cache partition by pressing the Power button.
Step 5: On the next screen, use the Volume Down button to highlight “Yes” and then press the Power button to confirm the cache wipe.
Step 6: The cache partition will be wiped, and you will see the “Cache wipe complete” message on the screen.
Step 7: Use the Volume Down button to navigate to the “Reboot system now” option and press the Power button to reboot your Nokia XR21 device.
After rebooting, you can see that you have successfully got rid of the annoying Android black screen of death. For most of the cases, this method solves the problem. If not, you have to move to the next method.
3.7 Uninstall incompatible apps
Android screen black can be a result of installing a bug or incompatible apps. If you have recently installed an app that crashes frequently, that may be the reason for the issue. Uninstalling the app from the Nokia XR21 device may solve the problem with ease. For doing this, you need to boot your device in Safe mode. Follow the below steps.
Step 1: Power down your device by pressing and holding the Power button until a menu appears.
Step 2: Navigate to Safe Mode by pressing and holding the Power Off button.
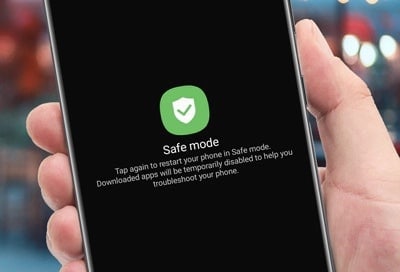
Step 3: Tap the “Safe mode” icon to enter Safe mode. You should now see Safe Mode at the Nokia XR21 device’s bottom.
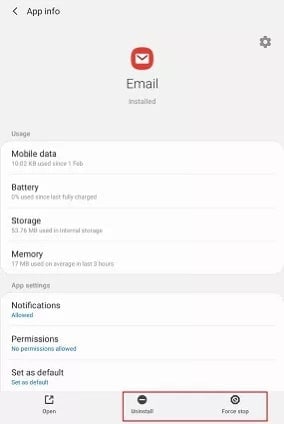
Step 4: After selecting Settings, head to the Apps section.
Step 5: Select the app by clicking on it; the App Info window should appear. To uninstall the app, tap the Uninstall option from the menu below the screen.
Step 6: Now restart the Nokia XR21 device by pressing the power button and let it boot up in normal mode.
If the app is the reason for Android black screen of death, then after uninstalling, you can get rid of this issue. If not, now you have to factory reset your device to solve the problem.
3.8 Reboot to safe mode
Even after multiple attempts to launch them, certain applications act suspiciously and cause the Nokia XR21 device to crash. When an Android phone suddenly goes black, you can often isolate the problem to a specific app by booting into Safe mode.
Step 1: Begin by restarting your phone. To do that, press the Power button until a menu appears.
Step 2: Press the Power Off button to enter Safe mode.
Step 3: Activate Safe mode by clicking the “Safe Mode” icon.
Step 4: To return to Normal mode, turn off your device and then turn it back on.
3.9 Factory reset to fix Android black screen of death
The factory reset is the option that enables the factory state of your device by erasing all data, settings, bugs, and apps. Your device will be fresh like factory condition after this reset. Worth mentioning here, you’ll lose all the internal data and installed apps after this reset. So, to overcome the Android tablet black screen of death, you must perform this action as the last option. Follow the below steps carefully.
Step 1: Turn off the Nokia XR21 device. Then press the Volume Up + Power button + home button (or press Volume Up + Power buttonS) altogether and let the mobile boot into recovery mode.
Step 2: After booting up in recovery mode, you can find the “Factory data reset” option. Navigate to that option with the volume up and down arrow and select it with the power button.
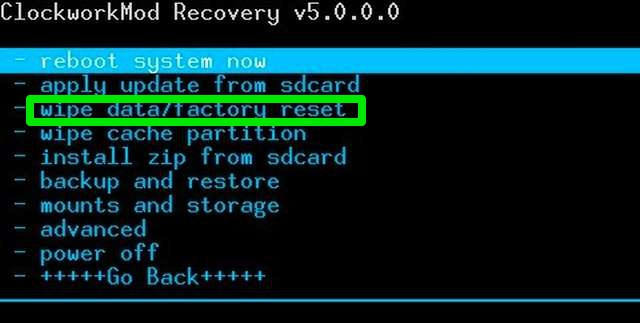
Step 3: In this step, you need to confirm your action by tapping on the “Yes” option. After this, your device will start erasing. This may take a while to complete the whole process.
Now, your device will reboot automatically and you can see the Android black screen of death problem is solved.
Part 4: How to avoid Android black screen of death?
These are the general methods to overcome the situation of Android screen black. But to avoid this situation, here are a few tips to follow –
- Install apps from trusted suppliers only.
- Use security or antivirus software on your device.
- Take a backup at regular intervals.
- Always keep Android OS updated.
- Don’t keep your mobile charged for a long duration after a full charge.
- If your battery gets old, replace it soon.
- Keep your device’s storage well-maintained. Regularly delete unnecessary data.
- Close unused apps running in the background to conserve system resources.
- Prevent phone overheating by avoiding excessive usage, and not exposing it to direct sunlight for extended periods.
By following these steps, you should avoid the most unpleasant situations, such as the Android screen black. We all know that “Prevention is always better than cure”.
The Bottom Line
There could be a lot of reasons why an Android black screen issue occurs, but the important thing is knowing the correct ways how to fix it. And this article has covered nine proven methods to help you fix an Android phone screen black problem.
But among the methods discussed above, Dr.Fone – System Repair just stood out as this program does not only help you with a black screen of death problem, but it covers many other Android system issues too. It’s also a highly intuitive program that requires no skills to operate.
safe & secure
Also read:
- [New] CastEvaluation Synopsis
- [New] In 2024, Streamlined Language Translation – Best Online Subtitle Manipulators
- [New] Unlocking Full Potential In-Depth Review of LG's Monitor Tech
- [Updated] 2024 Approved The Ultimate Guide to Stock Investing Channels Online
- 1. Effective Techniques for Printhead Maintenance and Cleaning - Insights From YL Computing
- How To Restore a Bricked Realme C67 5G Back to Operation | Dr.fone
- In 2024, 4 Most-Known Ways to Find Someone on Tinder For Vivo X100 by Name | Dr.fone
- In 2024, 4 Most-Known Ways to Find Someone on Tinder For ZTE Nubia Z60 Ultra by Name | Dr.fone
- In 2024, Edit and Send Fake Location on Telegram For your Vivo Y100 5G in 3 Ways | Dr.fone
- Limited Time Offer: Snag a Microsoft Surface Laptop 5 at an Unbeatable Price of $850 - Now!
- My Videos Arent Playing on Realme C33 2023 – What Can I Do? | Dr.fone
- Navigating the Green Screen Landscape for Webcam Enthusiasts for 2024
- Proven Ways to Fix There Was A Problem Parsing the Package on Realme Narzo 60 5G | Dr.fone
- Spotify Keeps Crashing A Complete List of Fixes You Can Use on OnePlus Nord CE 3 5G | Dr.fone
- Unlocking Your GPU Power in Cyberpunk 2077 - A Guide for Windows 11 Users
- Title: How to Fix Unfortunately, Contacts Has Stopped Error on Nokia XR21 | Dr.fone
- Author: Abel
- Created at : 2025-01-19 16:08:07
- Updated at : 2025-01-22 16:08:15
- Link: https://fix-guide.techidaily.com/how-to-fix-unfortunately-contacts-has-stopped-error-on-nokia-xr21-drfone-by-drfone-fix-android-problems-fix-android-problems/
- License: This work is licensed under CC BY-NC-SA 4.0.