
How to Quickly Fix Bluetooth Not Working on Vivo Y100 | Dr.fone
How to Quickly Fix Bluetooth Not Working on Vivo Y100
One of the key features of an Android device these days is the Bluetooth technology. This is such an important part of the phone that many of us take for granted, but as soon as the feature stops working, it can cause all kinds of problems.
Fortunately, despite there being many reasons why a problem could occur to your Bluetooth feature, there are also plenty of fixes. Today, we’re going to share with you the complete guide that details everything you need to know to get your Bluetooth up and running once again as quickly as possible.
Let’s get straight into it!
Part 1. About Bluetooth Not Working on Android
Of course, the most common problem to occur with Bluetooth technology in your Vivo Y100 is when it doesn’t connect to the Vivo Y100 device you’re trying to link it to. This could be anything from a Bluetooth headset or headphones, to a portable speaker or even an in-car audio system.
However, the problems don’t stop there. You may have problems with turning your Bluetooth settings on through your actual device. Perhaps the software simply isn’t loading, or maybe the Bluetooth feature keeps turning itself off randomly.
Due to the complicated nature of Bluetooth technology, there could be many reasons as to why your Bluetooth feature is playing up in this way, but that doesn’t mean it can’t be fixed. For the rest of this guide, we’re going to explore the nine need-to-know ways you can fix the Bluetooth problems not working on your Vivo Y100 as quickly as possible.
Part 2. 9 fixes for Bluetooth not working on Android
2.1 One click to fix Android Bluetooth issues due to Android system
Since Bluetooth is an internal technology, this indicates there’s a problem with the software or firmware of your Vivo Y100. If something’s broken, this means you need to fix it. Fortunately, there’s a quick and easy way to do this using software known as Dr.Fone - System Repair (Android).
Dr.Fone - System Repair (Android) is a powerful Android repair tool which is hailed as many as being on the best software applications in the industry. With all the tools you need to repair your phone not just for Bluetooth errors, but basically any internal firmware problems, this is a one-shot-tool that gets the job done.
Dr.Fone - System Repair (Android)
Android repair tool to fix Bluetooth issues in one click
- Can fix most internal software and firmware issues
- Trusted by over 50+ million people around the world
- Supports over 1,000+ unique Android brands, manufacturers, and devices
- Incredibly user-friendly and easy-to-use
- Compatible with all Windows computers
3981454 people have downloaded it
To ensure you have the best experience while using the Dr.Fone - System Repair (Android) software, here’s a complete step-by-step guide on how it works when fixing your Android’s Bluetooth problems.
Step One Make your way over to the Wondershare website and download the Dr.Fone - System Repair (Android) software to either your Mac or Windows computer. Install the downloaded file by following the on-screen instructions. Once installed, open the software, so you’re on the Main Menu.

Step Two Connect your Vivo Y100 to your computer using the USB cable, wait a couple of seconds, and then click the System Repair option. On the Menu on the left, click Android Repair, and then press Start.

Step Three Next, use the drop-down menus to make sure all the information about your specific device is correct, including your device, operating system number, and carrier information. Click Next to confirm your selections.

Step Four When prompted, put your phone into Download Mode needed for repairs. You can do this by following the on-screen instructions which will depend on which device you have and the available buttons.

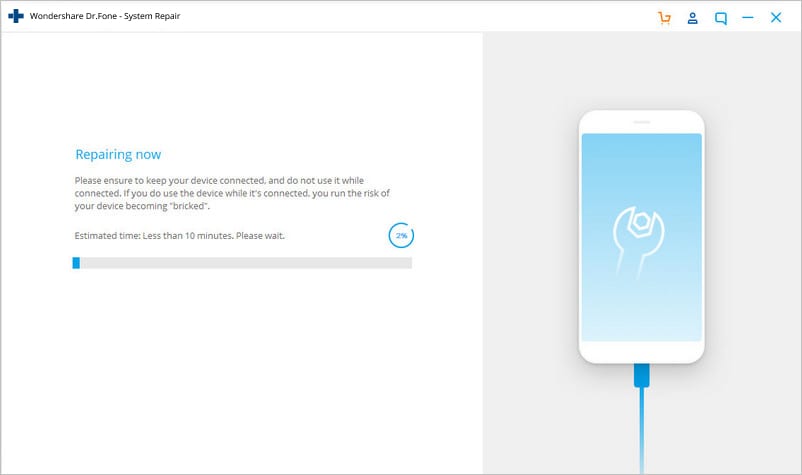
Step Five The software will now begin the repair process. This will happen automatically, and all you’ll need to do is make sure your device doesn’t disconnect during this process, and your computer doesn’t turn off.

When the repair process has been completed, you’ll receive the screen below, which means you can try again if the process didn’t work, or you can disconnect your Vivo Y100 and start using it and your Bluetooth features.
2.2 Restart Android and turn on Bluetooth again

One of the most common solutions in technology is simply to turn it on and off again, which is the case to happen here. By restarting your device, you can clear out any problems you may be suffering from to help it get up and running again. Here’s how;
- Turn your Vivo Y100 off by holding down the Power button
- Wait for several minutes and then turn your phone on again
- Wait for your phone to completely power up, so you’re on the Main Menu
- Navigate Settings > Bluetooth and then enable the setting
- Try to connect your Bluetooth device to what you were trying to do before
2.3 Clear the Bluetooth cache

Every service on your Vivo Y100 using a feature called a cache. This is where information is stored to help the feature run properly and give you the best experience. However, over time this can get messy and can cause problems with your Bluetooth feature.
By clearing the cache, you can restart the service and hopefully clear up any issues or problems you may be experiencing.
- On your phone, navigate Settings > Application Manager, and you’ll see all the apps and services on your phone. Locate and select the Bluetooth service.
- Select the Storage option
- Tap the Clear Cache option
- Go back of the Menu and restart your phone
- Now turn your Bluetooth feature on and turn connecting it to your preferred device
2.4 Remove paired devices

Sometimes, you may have a problem with the Vivo Y100 device you’re trying to connect to via Bluetooth, especially if this is a device you’ve updated. To counter and repair this, you’re going to need to remove the paired devices saved with your device and then reconnect them.
Here’s how;
- From the Main Menu of your Vivo Y100, head to Settings > Bluetooth > Connected Devices.
- Turn Bluetooth on, and you’ll see all the connections your Vivo Y100 is paired with
- Go through these settings and remove/delete/forget every connection on your device
- Now when you go to connect to a device using Bluetooth, repair the Vivo Y100 device, enter the passcode, and use a fresh paired connection.
2.5 Use Bluetooth in safe mode

If you’re having problems with your connection and paired devices, sometimes you may have conflicting software faults in your device that are causing the problems. If this is the case, you’ll need to boot your Vivo Y100 in Safe Mode.
This is an operating state in which your phone will run the bare minimum services it needs to perform. If your Bluetooth works in Safe Mode, you know you have an app or a service that’s causing the problem.
Here’s how to find out;
- Hold the power button down, so the Android power menu turns on
- Long-press the power button again and the restart in Safe Mode option will come up
- The phone will automatically boot into Safe Mode
- Wait a minute on the Main Menu
- Now turn on your Bluetooth and connect it to your preferred device
2.6 Turn on the discoverable feature

To ensure your Bluetooth can connect to other devices, it’s important to make sure you’re making your device discoverable to other Bluetooth devices. If it’s hidden, other devices won’t be able to find it, and sometimes it can bug and prevent connections.
Here’s how to turn on your Bluetooth discoverable feature;
- From the home screen of your Android, navigate to the Menu> Settings > Bluetooth
- Toggle the Bluetooth switch, so it’s on
- Under the available settings, tick the box that allows your Bluetooth device to be discoverable
- Turn your Bluetooth feature on and connect to the Vivo Y100 device you’re trying to connect too
2.7 Exclude Bluetooth issues of the other device

Sometimes, you might not even have a problem with your Vivo Y100, but rather the Bluetooth device you’re trying to connect to, whether that’s a Bluetooth speaker, an in-car entertainment system, or any other kind of Bluetooth device.
By testing out another Bluetooth device to see if it will work with your preferred device, you can rule this out from being the issue.
- Disconnect your Vivo Y100 from the Bluetooth device and turn your Bluetooth off
- Now take another Bluetooth device and connect this to the Vivo Y100 device you’re trying to connect too. This could be another Android device, or even a computer or iOS device
- If the new device doesn’t connect to your Bluetooth device, you’ll know there’s a problem with your Bluetooth device, not your Vivo Y100
- If the Vivo Y100 devices connect, you’ll know there’s a problem with your Vivo Y100
2.8 Place both devices within close proximity

One of the common misconceptions of Bluetooth is just how far the wireless range is of the service. You need to make sure your devices are well and truly close to each other to make sure a stable connection can be formed.
The further away the Vivo Y100 devices are from each other, the less likely the connection will remain secure. As a rule of thumb, Bluetooth can work up to 100 meters, but to play it safe, always try and keep your devices under 50m apart.
2.9 Avoid interference of other Bluetooth sources

The final consideration you’ll want to think about is that Bluetooth radio waves, or wireless waves, can interfere with each other. This means they can bounce off each other or get muddled up and make things confusing from your devices.
With this in mind, you’ll want to make sure you’re limiting the amount of Bluetooth activity in the area where you’re trying to use a device. While uncommon, this could be the problem.
To fix this issue, turn off all the Bluetooth connections in the area. This includes computers, laptops, mobile phones, tablets, and any other Bluetooth devices you may have. Then, try connecting your Vivo Y100 to the Vivo Y100 device you were trying to use. If it works, you know you were experiencing Bluetooth interference.
How To Fix Unresponsive Phone Touchscreen Of Vivo Y100
Smartphones nowadays contribute to our daily workflow, whether you’re a student or a professional. They get more sophisticated and add new features every year, making them more attractive with each new release. However, users sometimes deal with their screen touch not working on Android, raising various concerns.

If you are facing a similar issue, this page has all the solutions to teach you what to do if your phone screen is not working. By exploring the different methods below, you will be able to know how to fix a frozen phone touch screen as an Android user. Read on for more information.
Part 1: Top Causes of an Unresponsive Touchscreen
Android has been the best-selling OS since 2011, with over three billion active users. With the release of Android 13, complaints over touch issues on certain Android phones have popped up over the internet. Meanwhile, software updates over the years can sometimes make their phones stuck on the loading screen, causing worry among Android users.
Here are some of the top causes why your phone screen stopped working, mainly for Android.
- Physical Damage
If your Android phone is not responding to touch, it can be due to a cracked LCD causing temperature variants or magnetic fields to malfunction on your Vivo Y100.

For iOS users, your iPhone will temporarily stop working if it detects extreme temperatures such as a too-hot or too-cold reading. You should turn off your iPhone and let it cool down or warm to a normal temperature.
- Faulty Applications
Certain apps can sometimes make your phone experience touch issues. Your Android screen may work everywhere except a particular app. In this case, the fault is likely on the app, not your smartphone. It’s recommended to download the latest apps with frequent software updates to prevent malicious apps from corrupting or crashing your phone.
- iOS/Android Software Issues
Your phone screen not responding can also be due to software glitches that your smartphone picks up during regular use. Your iOS/Android device will sometimes freeze or hang if you run too many intensive apps simultaneously. The situation can lead to touch issues when using the phone.
- Dirty Screen or Bad Peripherals
It may not respond properly when an Android device is dirty due to water, sweat, or body oils. It will not be able to take inputs, causing your phone to not respond to touch. A poor screen protector and a tightly pressed phone case will also negatively impact your smartphone.
Part 2: What To Do When Your Smartphone Is Not Responding to Touch
Here is a list of things you should do how to fix a frozen phone touch screen, whether you’re using an iPhone or an Android smartphone.
1. Clean Your Smartphone
Your screen touch not working can sometimes get fixed by simply cleaning the screen on your smartphone. Use a soft dry cloth, gently clean your iPhone or Android device, and ensure water, oils, dirt, or other debris are no longer on your display. If you recently dropped your device in water, turn it off and leave it untouched for the next few hours.

2. Remove Extra Peripherals
Unplug any external device connected to your iPhone’s Lightning port or USB-C if your phone screen stops working. For Android users, meanwhile, disconnect any accessories like chargers or wireless headphones. After that, try using the touchscreen. If it works, the outcome proves that the fault appeared due to the external device.
3. Force Restart Your Device
If your phone screen is still unresponsive,maybe it is overloaded. You should force restart your Vivo Y100. It doesn’t delete any data. Here’s how.
Example 1: For Vivo Y100 Smart Phones
Here’s how to force restart your smartphone to fix your phone screen that’s not responding.
- Press and hold the Powerand Volume Down buttons simultaneously for more than 7 seconds to force a reboot.

E****xample 2: For Vivo Y100 Redmi
If your Vivo Y100 Redmi phone is stuck on loading screen or “thinking” for a long time without responding, reboot it in just two steps.
Step 1: Press and hold the power button on the right side of the screen, then a screen showing several options appears.
Step 2: Choose Restart, then Accept if a confirmation message spears. Then wait a few seconds or minutes when your device is performing the reboot.

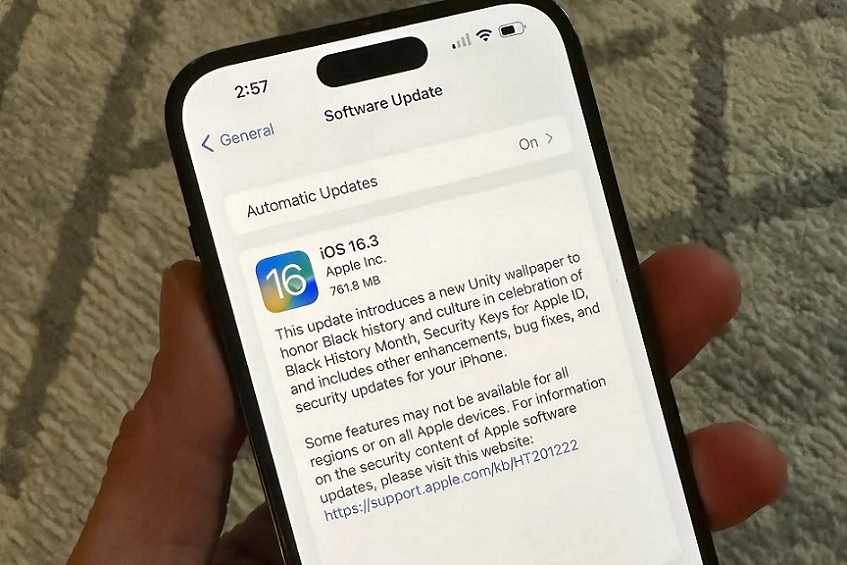
4. Update Your Software
Your smartphone may behave erratically due to software bugs. While these are out of your control, you can quickly fix your phone not responding to touch by simply updating your OS to the latest version. Here’s how.
- For iOS users, go to your iPhone Settings> General > Software Update > Download and Install.
- For Android owners, go to Settings > Software Update. Tap the Check for software updatesto see if a new update is available.
5. Perform a Factory Reset
If nothing helps, your remaining option is to try completing a Factory Reset. Doing this will erase all your data, but this is arguably the quickest way to restore your screen-frozen phone to its factory default settings. Factory Reset is available on Android devices with almost similar steps. Here’s how.
For Android, Vivo Y100 Series
Step 1: Search and tap the Settings option, and open General management.
S****tep 2: Swipe the options, find and tap Reset > Factory data reset, and check the information below. Then swipe and press the Reset button.
Note:
You might be asked to enter the pin of the security lock on the phone if you’ve set one.
S****tep 3: You may need to enter your Vivo Y100 account password if you have bounded an account to your phone after taping Delete all. Then your Vivo Y100 phone will reset. You’ll see its initial setup screen when it turns back on.
Part 3: How to Fix Unresponsive Touchscreen With an Alternative
The methods outlined above usually solve issues on your smartphone not responding to touch. If all else fails, Wondershare Dr.Fone for iOS and Android can fix various smartphone issues within less than 10 minutes. The program enables you to fix common scenarios such as black screen, boot loop, bricked iOS or Android, and much more without any required skills.
Key Features
The key features of Wondershare Dr.Fone for iOS and Android are listed below.
- Fix all iOS and Android Problems in Minutes
Wondershare Dr.Fone for Android and iOS allows you to fix your smartphone within less than 10 minutes. For iPhone owners, common issues such as a black screen, white screen of death, iPhone frozen, stuck on a restart loop, or recovery mode can easily be repaired with Dr.Fone. For Android users, meanwhile, problems, including unresponsive screen, black screen of death, boot loop, and more, are done within minutes.
- Supports up to 1000+ Android Models and iOS 16
The program supports all iOS versions, including the latest iOS 16 and iOS 16 beta. Compared to the iTunes store or other methods, the app can quickly fix any iPhone issues without data loss. For Android users, meanwhile, Dr.Fone supports up to 1000+ Android smartphones making it highly versatile even if you’re using an older Android device or the latest models.
Tech Specs
Here are the minimum system requirements of Wondershare Dr.Fone (iOS) for your computer.
| Computer OS | iOS |
|---|---|
| Windows: 7, 8, 8.1, 10, 11 | Support all iOS versions, including the latest iOS 16 & iOS 16 beta |
| macOS: 12, 11, 10.15, 10.14, 10.13, 10.12, 10.11, 10.10, 10.9, or 10.8 |
Meanwhile, here are the tech specs for Wondershare Dr.Fone (Android)’s minimum system requirements.
| Computer OS | Android |
|---|---|
| Windows 7, 8, 8.1, 10, 11 | Android 2.1 and up |
Pros and Cons
Here are the pros and cons of using Wondershare Dr.Fone (Android)
Pros
- Fone – System Repair’s UI for iOS and Android is clutter free and beginner-friendly. You can start repairing your phone right away after installation.
- Repairing your iOS or Android smartphone within less than 10 minutes saves you precious time.
Cons
- The iOS and Android versions of Wondershare Dr.Fone are sold separately. You’ll have to get each version of the program if you own a smartphone for both iOS and Android.
Pricing
The iOS and Android versions of Wondershare Dr.Fone has different price plans. See them below.
Wondershare Dr.Fone (iOS) offers a quarterly, 1-year, and perpetual license, depending on your budget. Here’s the pricing below.
- Quarterly License (1-5 Mobile Devices) - $6.65/Month – With Auto Renew
- 1 Quarter License (1-5 Mobile Devices) - $7.32/Month – No Auto Renew
- 1-Year License (1-5 Mobile Devices) - $4.99/Month – No Auto Renew
- Perpetual License (1-5 Mobile Devices) - $79.95
Wondershare Dr.Fone (Android) price plans are available for a 1-Year or Perpetual License, depending on your budget.
- 1-Year License (1-5 Mobile Devices) - $39.95
- Perpetual License (1-5 Mobile Devices) - $49.95
- 1-Year Business License (Unlimited Devices) - $399.00
How To Fix Unresponsive Touchscreen With Wondershare Dr.Fone
In this step-by-step guide below, you can fix your unresponsive phone screen using Wondershare Dr.Fone on iOS and Android.
Step 1: Download and install Wondershare Dr.Fone for iOS or Android on your computer. Launch the app afterward and connect your smartphone.
Step 2A (For iOS): Choose the correct model of your iPhone to download the appropriate firmware package.
Step 2B (For Android): Choose the correct Brand, Name, Model, Country, as well as Carrier, then click Next.

Step 3: Follow the on-screen instructions provided on the main program window and wait for the repair process to complete.
Part 4: People Also Ask
Some common questions you should know when taking care of an unresponsive phone touchscreen are listed below.
1. Why Did My iPhone Screen Go Black After Not Responding to Touch?
Your iPhone screen with a touch issue will sometimes go black after not responding to touch due to several issues. It could be hardware, software, issues with a particular app, software crash, or you have a low battery. If it’s a drained battery, you’re in luck; all you have to do is charge it. Otherwise, you’ll have to perform a force restart on your iPhone to try to reboot it.
2. How Do I Keep My Android From Crashing?
Keeping your apps updated should help you solve app crashing issues that can impact your Android OS. These apps build up large caches throughout your normal usage. Clearing cached data from time to time can drastically improve your smartphone’s performance and prevent touch issues. To remove your app cache, go to Settings > Storage and tap Cached Data.
3. Can I Use Dr.Fone for Free?
Wondershare Dr.Fone for iOS and Android is free to download and install. You can also test the first few steps and see if the program supports your device. However, when you click the Fix Now button to start the repair process, you will be required to enter a valid license to activate the program.
 safe & secure
Conclusion
Knowing the common causes of an unresponsive phone touchscreen is the first step to preventing it from happening to your smartphone. While there are ways to fix it when it does happen, prevention is better than cure, as most experts say. However, if the methods outlined above don’t work, your best bet is to use a dedicated program such as Wondershare Dr.Fone for Android and iOS.
Wondershare Dr.Fone works on almost all modern smartphones today and can fix a stop-working phone screen within less than 10 minutes. It’s beginner-friendly and doesn’t require advanced technical know-how to use right away.
Authentication Error Occurred on Vivo Y100? Here Are 10 Proven Fixes
There are times when users get an authentication error while they connect to a Wifi network. The problem is mostly found in Android whenever a device tries to establish a connection to Wifi. If your device is also experiencing an authentication problem Wifi, then don’t worry. It can easily be resolved. In this post, we will make you familiar with the root cause for the Vivo Y100 Wifi problem and how you can resolve whenever authentication error occurred on your device.
Part 1: Any idea about the Wi-Fi authentication problem?
Wi-Fi authentication has to be done every time you wish to connect to a Wi-Fi network over your smartphone or laptop. To authenticate yourself and connect to the protected Wi-Fi network, you need to have the password of it. But if after you’re putting in the correct password and still experiencing the wifi authentication problem. Here’s what you need to know.
Authentication error occurs when the “deal” between the Wi-Fi router and device fails due to certain reasons. First, the Vivo Y100 device sends the password of the network and the “connect” request in an encrypted format to the Wi-Fi router. Then, the router decrypts the password and compares the password saved on it. Now, if the password matches, it sends affirmation for the “connect” request, and then the Vivo Y100 device is allowed to connect to the network.
Part 2: Why Authentication Error Occurred when Connecting to Wifi?
There could be plenty of reasons for facing an authentication error on your device. Most of the time, it occurs whenever a Wifi router seems to malfunction. Furthermore, if your phone has been recently updated, then chances are that there could be an issue with its drivers. A security attack can also make your device malfunction as well. An unstable connection or a router blockage can also be a reason for this issue.
In this scenario, whenever you try to connect to a Wifi network (even after supplying the correct password and username), it doesn’t connect to it. Instead, it displays an authentication error occurred promptly. Thankfully, there are plenty of ways to overcome the authentication problem Wifi. In the next section, we have provided three different solutions to fix the Vivo Y100 Wifi problem (as it mostly happens on Android devices).
Part 3: 10 Solutions to Fix Wifi Authentication Error
Before we make you familiar with different fixes for the Wifi authentication error, it is important to check your router beforehand. Chances are that you could be getting the authentication error because your router is not functioning properly. You can restart it and try to connect any other device to it as well to check it. After making sure that there is no problem with your network or router, follow these suggestions to overcome the authentication error occurred issue.
Check if extra characters added in Wi-Fi password
Ensure that no other extra characters are being added in the Wi-Fi password while you’re entering it. Key in the password carefully while viewing the characters, and then check if the authentication error occurs or not.
One-Click to Fix Wifi Authentication Error by Android System Repair
Android system repair is considered the most effective way to fix Wifi Authentication Error. As the bottom-layer Android system files may be corrupted unconsciously with days of phone use, the Wifi Authentication Error may be one of the symptoms.
So Android repair requires programming knowledge to do it?
No! With Dr.Fone - System Repair (Android), you can do Android repair in just a few steps and get all issues like Wifi Authentication error fixed easily.
Dr.Fone - System Repair (Android)
An easy-to-operate tool to fix Android system issues like a Wifi authentication error
- Fixes all Android system issues like a black screen of death, Wifi authentication error, etc.
- One-click to fix the Wifi authentication error. No technical skills required.
- Supports all the new Vivo Y100 devices like Galaxy S8, S9, etc.
- Easy-to-follow instructions provided on each of the screens.
3981454 people have downloaded it
Here are the steps to fix Wifi Authentication Error by Android system repair:
Note: Android repair is effective to permanently fix Wifi Authentication Error, but may wipe out the existing phone data. Backup all the important Android data to PC before you go on.
- After the Dr.Fone tool is downloaded, install, and launch it. You can see the following screen.
- Connect your Vivo Y100 to the computer, and select “Android Repair” in the middle.
- Select all the details that match your device, and click “Next”.
- Next up, you should boot your Vivo Y100 in download mode by following the on-screen instructions.
- Allow the program to download the corresponding firmware. After that, the Android repair will start and get the Wifi Authentication Error fixed in minutes.
Use static IP address instead of DHCP
DHCP, or Dynamic Host Configuration Protocol is the default IP address assignment for the Wi-Fi settings on many devices. Whereas DHCP can cause IP address conflict during the dynamic IP address assignment. So, you’d better change “DHCP” to “Static” to see if the authentication error persists.
Step 1: Head to the “Settings” of your Vivo Y100 and then opt for “Wireless and Networks” followed by “WLAN/WiFi”.
Step 2: Now, hit on the WiFi network that is showing “authentication error occurred”.
Step 3: Depending on your Vivo Y100 model, look for “IP Settings” and tap on it. Now, switch the “DHCP” to “Static”.
Step 4: Note down the static IP address fields and wipe off all the fields. Punch it in again and then save it.

Check carefully for duplicate Wi-Fi names before you connect
Perhaps, you might connect to a WiFi with a similar name. There are good chances that some users do not modify their WiFi network name and possibly, your neighbor may have the same WiFi network, service provider. Therefore, ensure you connect to the correct WiFi network.
Reset the Wifi network
One of the easiest ways to fix the authentication problem of Wifi is to reset the network. To do this, you would be required to forget the respective network first and then connect to it again. This can be done by simply following these steps.
1. Firstly, you need to forget a Wifi network. To do it, go to your phone’s Settings > WiFi and network. From here, you can see a list of all the Wifi hotspots that your phone connects to. Select the network you wish to forget.

2. When you would select a network, it will provide the basic information related to it. Just tap on the “Forget” button and agree to the pop-up message. This will erase the network’s information from your device.

3. Afterward, turn on your Wifi again and tap to the network you wish to connect to. Simply provide the credentials and tap on the “Connect” button to reestablish the connection. This way, you can reset the network successfully.

Modify network connection
If the above solution won’t work, then you would be required to walk the extra mile to fix the Vivo Y100 Wifi problem. After you reset a network connection, if still getting issues regarding the authentication of the network, you need to modify the connection. In this technique, you will be changing the IP settings on your phone to alter the way it establishes a secure connection. You can do it by following these steps.
1. To start with, visit your phone’s Settings and open the Wifi page.

2. This will display a list of all the Wifi networks that are associated with your device. Just long-tap on the Wifi network that you wish to modify. It will open another pop-up window. From here, tap on the option of “Manage network settings”. Sometimes, users also get an option of “Modify network settings” here as well. Simply select it to proceed.

3. It will display basic information related to your Wifi network. Just tap on the “Show advanced options” button to access more options related to the network setting.

4. From the IP Settings menu, change the field from DHCP to Static. This will let you establish a static connection between your device and the router.

5. As soon as you will change it to static, you will get different fields related to your network’s IP address, gateway, DNS, and more. Simply fill these fields and tap on the “Save” button once you are done.

Now, try to connect to the Wifi hotspot again. You would be able to overcome the authentication problem of Wifi.
Change Network Security Type
It has been observed that, when we connect to Wifi, our device chooses a wrong security type. This clashes with the default security protocol of the router and authentication error occurred due to this. If your device is facing the same issue, then it can be fixed by simply changing its security type. To do this, follow these instructions:
1. To change the security type of a network, you need to “Add the network”. If you already have the Wifi network saved, then simply forget the network by following the above-mentioned tutorial.
2. Now, turn on your device’s Wifi and tap on the option of “Add network”. Here, you would be asked to give a network name and select the security type. To manually select it, tap on the “Security” option.

3. From here, you will get a list of various security protocols that you can pick. Select “WPA/WPA2-PSK” and save your selection.

Now, try to connect to the network again. Most likely, it will let you fix the authentication error on your device.
Update Android firmware to the latest
There are instances where an outdated OS version of your Vivo Y100 may create a hindrance in establishing a connection between your device and the WiFi network. You need to update your Android firmware to the latest version and then check if the problem persists or not.
Step 1: Launch “Settings” of your Vivo Y100 and then get into the “About Phone” option.
Step 2: Now, opt for the “System Update” option. If the update is available, get your device updated to the latest OS version.
Restart the router and reset Android network settings
Sometimes, the WiFi router may hang up while establishing a connection and therefore, the wifi authentication problem occurs. Try restarting your Wi-Fi router and then check if your device connects successfully. If this doesn’t work, try to reset your Android Network Settings .
Bonus tip: Turn Airplane mode on/off
By simply turning on the Airplane mode (and later turning it off), you can easily fix the authentication problem Wifi most of the time. You can find a toggle button for Airplane mode on the notification bar of your phone. If you can’t find it there, then go to your phone’s Settings > Connection > More Networks and turn on the feature of “Airplane Mode”.

Let it do for a while. Afterward, turn it off and try to connect to the Wifi network again.
After following these quick and easy suggestions, you would be able to fix the Vivo Y100 Wifi problem for sure. Even if you use any other Android device, then its authentication error can easily be resolved after these effective solutions. Go ahead and give these expert solutions a try and let us know about your experience as well. If you have any other solution to fix the authentication problem Wifi, then share it with us as well in the comments.
Also read:
- [New] In 2024, Is Cash Involved with Criticism Displays?
- [New] The Best Cloud Storage for Your Photos Free and Paid Included
- [SOLVED] Tower of Fantasy Keeps Crashing on PC
- [Updated] Speedy Strategies Storing Slideshow Scripts for 2024
- 2024 Approved The Artisan’ Writes Crafting HDR Magic with iPhone
- Halo Infinite Lag Issues? Try These 7 Tips for a Smooth Gaming Experience
- How To Fix Unresponsive Phone Touchscreen Of Oppo Find X6 | Dr.fone
- How to Watch Hulu Outside US On Vivo Y36 | Dr.fone
- In 2024, Complete Tutorial to Use VPNa to Fake GPS Location On Samsung Galaxy A24 | Dr.fone
- In 2024, Maximize Impact Sharing YouTube Videos on Social Media (FB)
- Nubia Z50S Pro Bootloop Problem, How to Fix it Without Data Loss | Dr.fone
- Play Store Not Working On Asus ROG Phone 7? 8 Solutions Inside | Dr.fone
- Spotify Keeps Crashing A Complete List of Fixes You Can Use on Vivo V27e | Dr.fone
- Title: How to Quickly Fix Bluetooth Not Working on Vivo Y100 | Dr.fone
- Author: Abel
- Created at : 2025-01-04 17:01:44
- Updated at : 2025-01-10 16:05:18
- Link: https://fix-guide.techidaily.com/how-to-quickly-fix-bluetooth-not-working-on-vivo-y100-drfone-by-drfone-fix-android-problems-fix-android-problems/
- License: This work is licensed under CC BY-NC-SA 4.0.