
How To Unbrick a Dead Itel P40 | Dr.fone
How To Unbrick a Dead Itel P40

Discovering your phone died, especially among Itel P40 models, can be disheartening. Looking online for ways to unbrick your Oneplus 8T can take up so much of your time. The unavailability of your device can disrupt your routine and connectivity. However, unbricking is the crucial solution to regain the functionality of your Itel P40 device.
This guide teaches effective methods to unbrick your Itel P40. The page will also discuss the early warning signs and healthy habits to prolong your Itel P40. Read below to learn more.
Part 1. Early Warning Signs of a Hard-bricked One Plus Device
When a phone “bricks,” the Itel P40 device becomes completely unusable and non-functional. It essentially turns into a “brick.” A bricked Itel P40 device can be preceded by certain warning signs that you should be attentive to. Here are some of them below.
- **Corrupted Device and Boot Failures.**If your Itel P40 freezes or fails to boot up properly, it can indicate underlying software issues that might lead to bricking.
- **Inability to Enter Fastboot Mode.**If you find it increasingly challenging to access the fastboot mode, it could signify impending trouble.
- **Consistent Black Screens.**Experiencing recurring black screens could indicate problems within the operating system. In the long run, this might escalate to bricking.
- **Unexpected Reboots and Crashes.**Frequent and unprovoked reboots, app crashes, and system instability might point toward software inconsistencies. Similar to consistent black screens, this could eventually lead to bricking.
Common Reasons for Your Itel P40 Phone To Be Bricked
Understanding the factors that can trigger bricking in Itel P40 devices is essential for preventing such scenarios.
Failed Updates or Interrupted Installations
When a firmware update is interrupted due to power loss, sudden device shutdown, or other disruptions, it can result in incomplete software installation and potential bricking.
Unauthorized User Modifications
Engaging in root access, flashing custom ROMs, or applying unsupported system modifications can destabilize the Itel P40 device’s software, paving the way for bricking.
Incorrect Bootloader Unlocking
Mishandling the process of unlocking the bootloader, a crucial step for customization can lead to system inconsistencies and eventual bricking.
Compatibility Issues With Custom Software
Installing unofficial custom software, such as custom recoveries or third-party kernels, might not be compatible with the Itel P40 device’s hardware or official software. That can cause conflicts that can lead to bricking.
Malware or Virus Infiltration
The presence of malicious software can cause significant disruptions to the Itel P40 device’s functioning. It can lead to bricking if left unchecked.
Part 2. How To Unbrick One Plus Device Using Various Methods
The solutions below to unbrick your Oneplus are helpful methods to revive your device. Here’s an overview of these methods.
Method 1. Restore With Recovery Mode
Restoring using Recovery Mode can solve most problems that cannot be solved with a normal phone restart. Here’s how.
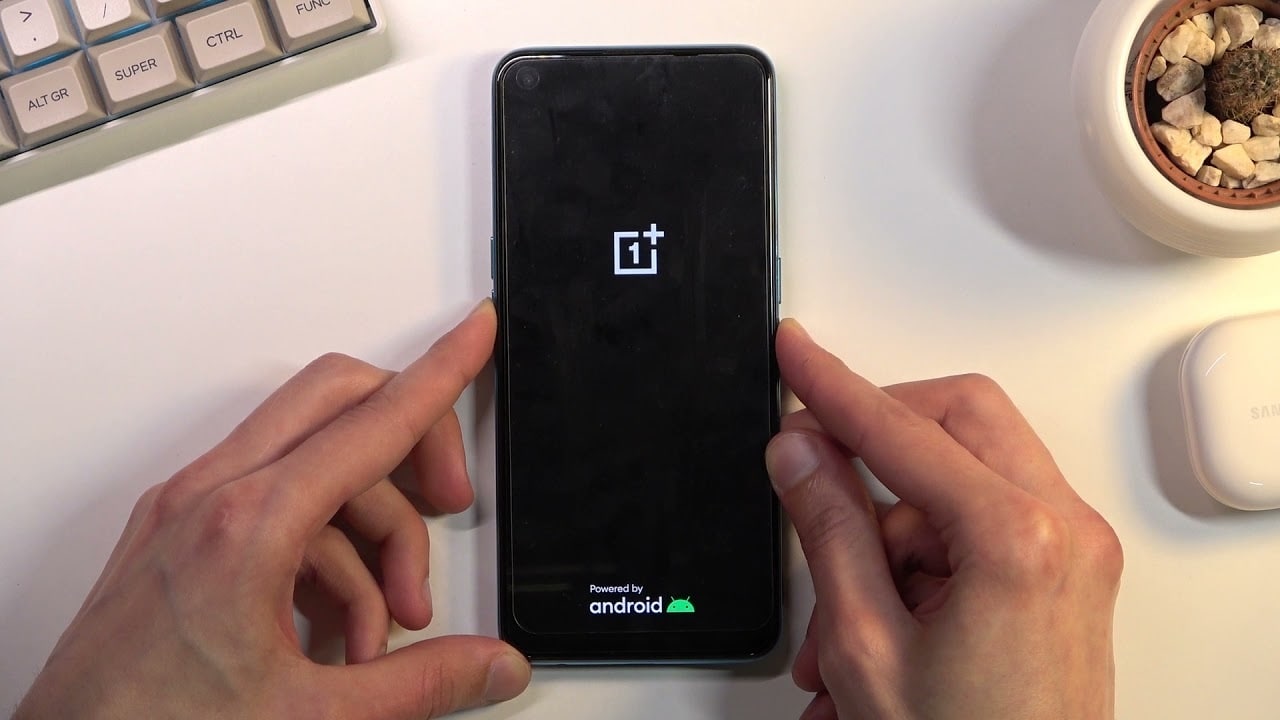
- Step 1: Turn off your Itel P40 device. Press and hold the Power button and Volume Down until the Itel P40 logo is displayed.
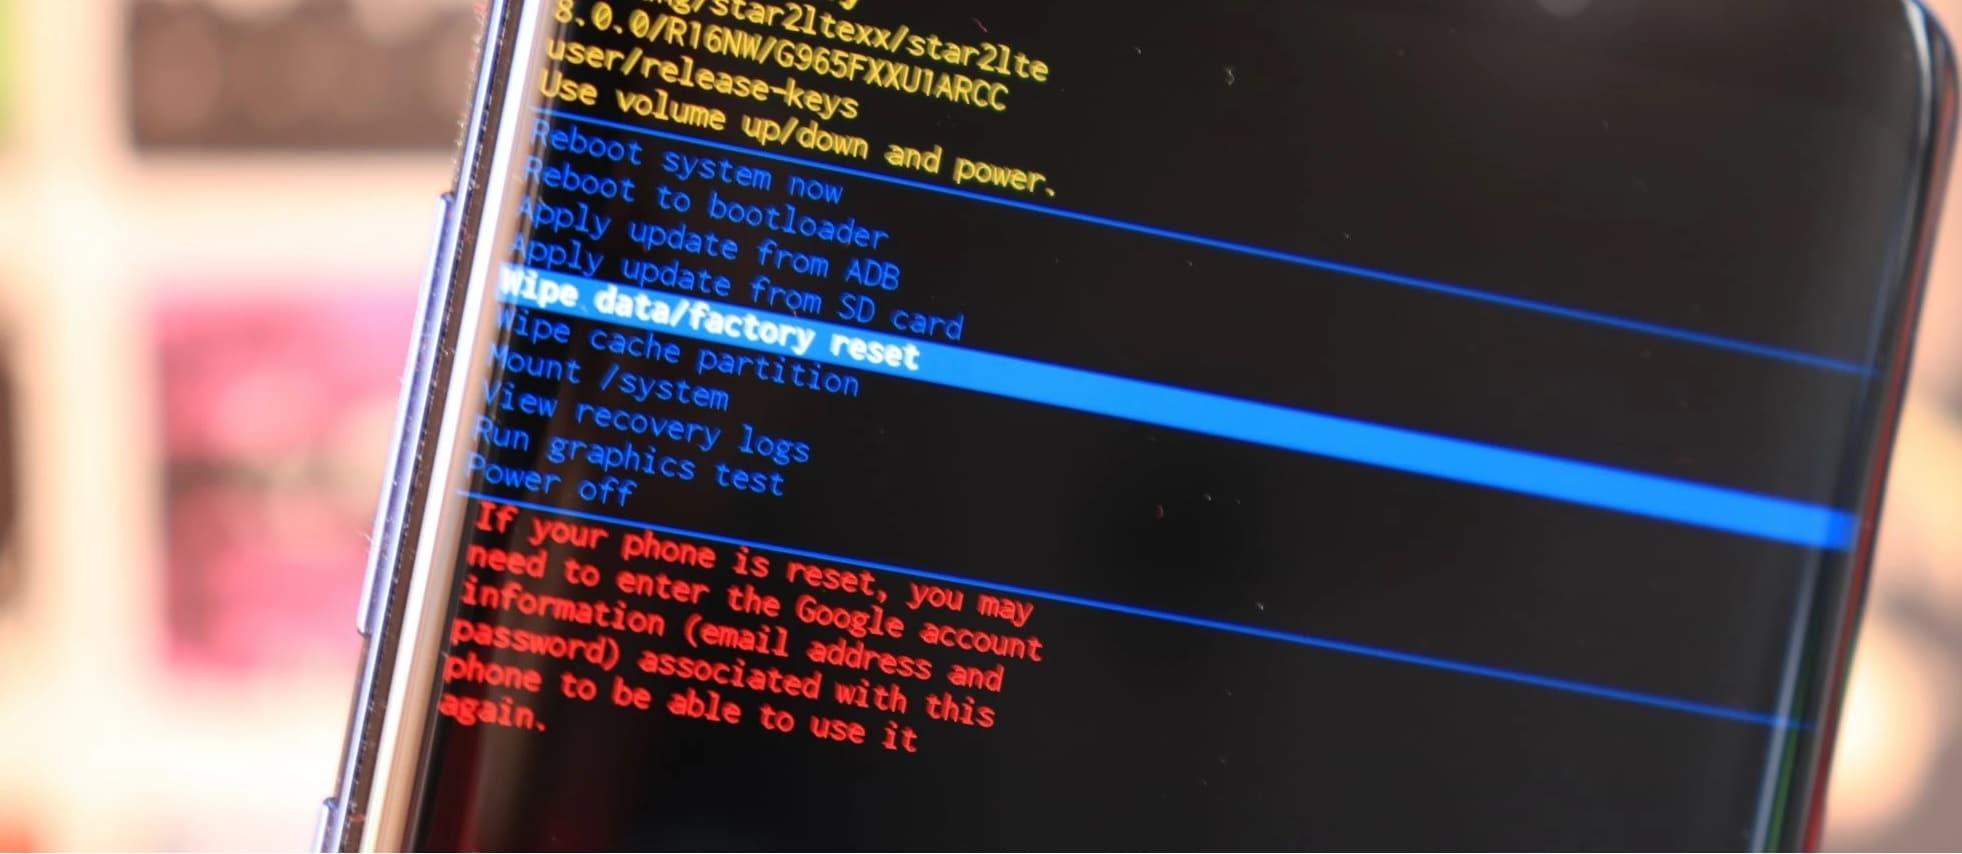
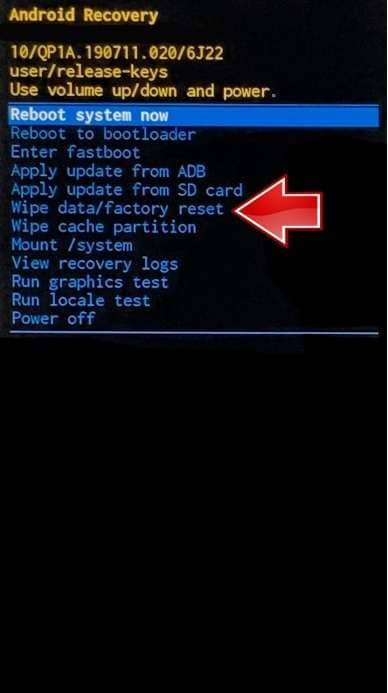
- Step 2: Move through the menu using the Volume Up and Volume Down buttons until you reach Recovery Mode. Press the Power button to choose it.
- Step 3: Select the Wipe data/factory reset option. Choose Yes to proceed and wait for the process to finish. Choose Reboot system now to see the results.
Method 2. Contact the Manufacturer
Engaging Itel P40’s official support can provide insights and potential solutions. This is advantageous if your device is under warranty.
Method 3. Professional Repair Shops
Certified repair shops have the expertise to diagnose and address bricking issues, offering tailored solutions.
Method 4. Software Tools
Leveraging specialized software tools like Wondershare Dr.Fone - System Repair (Android) simplifies the process, even for non-technical users.
Part 3. Healthy Habits To Consider To Prolong Your One Plus
Maintaining the longevity of your Itel P40 device requires adopting proactive habits. Here are vital tips to consider.
- **Regular Software Updates.**Keep your Itel P40 up to date with the latest firmware releases. These updates often include security patches, bug fixes, and feature enhancements contributing to overall device stability.
- **Battery Care.**Avoid frequent deep discharges and overcharging. Use original charging accessories and refrain from exposing the Itel P40 device to extreme temperatures.
- **App Management.**Review and uninstall apps you no longer use. This reduces clutter and conserves system resources, promoting smoother device operation.
- **Cache and Storage Cleanup.**Clear app caches and delete unnecessary files from your device. It optimizes storage space and prevents sluggishness caused by excessive data accumulation.
- **Screen Protection.**Apply a screen protector and sturdy phone case to shield your device from scratches, cracks, and impacts. This safeguards the physical integrity of your Itel P40.
- **Safe Charging Practices.**Avoid using your device while charging, as this generates excess heat. Also, refrain from using non-certified chargers, which can harm the battery and device components.
- **Avoid Overloading the Itel P40 device.**Limit multitasking and avoid running too many apps simultaneously. This minimizes strain on the Itel P40 device’s RAM and processor, ensuring smoother performance.
- **Privacy and Security.**Implement robust, unique passwords and enable biometric authentication methods. Regularly review app permissions to enhance data privacy.
Tips: Unlock Your One Plus 6, 8T, or 10 Pro With Dr.Fone - Screen Unlock (Android)
Dr.Fone - Screen Unlock (Android) is powerful software designed to unlock Itel P40 devices quickly. This tool is compatible with various Itel P40 models, including the Itel P40 6, Itel P40, and Itel P40 10 Pro, ensuring a wide support reach.
![]()
Dr.Fone - Screen Unlock (Android)
Unlock Itel P40 Without Password
- Unlock your Itel P40 quickly and securely
- Easily remove passwords and screen locks of all types
- Enjoy a streamlined experience with no technical background required
- Feel confident with solutions backed by a high success rate
3,016,652 people have downloaded it
How To Unlock Your One Plus With Dr.Fone - Screen Unlock (Android)
Below is a guide on unbricking the Itel P40 models using Dr.Fone - Screen Unlock (Android).
Step 1: Access Screen Unlock > Android
Navigate to the Screen Unlock section and select Android. Proceed by clicking on the Unlock Android Screen option.

Step 2: Choose Your Device Brand and Initiate Data Wipe
Identify your device brand for unlocking the screen. After selecting your device brand, you will be prompted to enter a specific mode. Once in this mode, Dr.Fone will commence the Android screen unlock process.

Step 3: Successful Screen Unlock
Allow the unlock process to run its course. If unsuccessful, click ‘Try Again’ for a second attempt. Upon successful screen unlock, click ‘Done’.

 safe & secure
You May Also Like:
How To Fix iPhone Bricked After iOS 17/iOS 16/iOS 15 Update
iPhone Got Bricked? Here Is The Real Fix To Unbrick It!
How to Fix It If Your Itel P40 Phone Got Bricked?
How to Fix the Soft Bricked Android Phone?
Conclusion
For Itel P40 owners, your device’s revival rests in your hands. By embracing the abovementioned methods, you can reclaim your device from its bricked state. Act decisively to unbrick your Itel P40 device and relish its seamless performance again.
For those who find themselves locked out of their Itel P40 devices, there’s a reliable solution at your fingertips. Try Dr.Fone - Screen Unlock (Android) to regain access to your device swiftly and securely.
safe & secure
Restore Missing App Icon on Itel P40: Step-by-Step Solutions
The growing conversation around the missing app icons on Android issue has caught our attention. While it seems confusing, it’s a problem that some Android users have encountered.
After all, the presence of app icons on our Android device’s home screen is important for convenient access to our frequently used applications. When your Itel P40’s icons suddenly disappear, it can leave you feeling lost about how to use and access your apps.
No worries, though. We’ve got you covered with a simple guide in this article. Just follow the steps, and you’ll get those missing app icons back on your Itel P40.
Part 1: Make Sure if the Missing App Is Installed
Before proceeding with troubleshooting the missing app icon on your Android device, it’s essential to confirm whether the app is still installed or if it has been accidentally deleted. To do it, you can have a quick check on Google Play:
- Step 1: Go to the Play Store.
- Step 2: Tap your Google profile at the top right and find Manage apps and devices.
- Step 3: Open Manage and select the “Installed” tab.
![]()
Now, see whether you can find the app icon that disappeared on your Android. If you can’t find it, it means the app has been accidentally deleted, and you can install it back on your device. However, if it’s confirmed to be installed on your Android but remains missing from your home screen, you can continue the following practice.
Part 2: How To Find the Missing App Icon on Android
“All my apps disappeared from my home Android screen. What should I do?”
If you’ve confirmed that the missing app is installed, but its icon is nowhere to be found on your home screen, don’t fret—there are several solutions you can take to locate and restore the missing app icon on Android.
1. Check hidden apps
How could the Android phone icon be missing? Well, app icons can disappear from your home screen for different reasons. One of the common reasons is you might have accidentally hidden it in your phone. To find and check whether the app is hidden, the steps can be different depending on the phone model you are using.
However, as a general guide, you can follow these steps:
- Step 1. Go to your phone’s Settings.
- Step 2. Use the search bar to look for “Hidden app.”
- Step 3. Once you find the “Hidden app” settings, watch the list to see if the missing app is there. If it is, you can toggle off the switch to unhide it.
![]()
2. Move the app to the home screen from the App Drawer
If your app icon disappeared on your Android, you can also easily restore it by adding the app to the home screen from the app drawer. Follow the step-by-step guide below:
- Step 1. Open the App Drawer on your Android. To do this, swipe from the bottom to the top, starting from your home screen. The App Drawer is where all your installed apps are neatly listed.
- Step 2. Once you open the App drawer, locate the app icon that has disappeared from your home screen. For example, you lost the phone icon on Android. Then, look for the phone icon from the App Drawer.
- Step 3. Long-press the Icon of the missing app and move it to the desired location on your home screen. You can drag it to an empty space or a specific folder.
- Step 4. Release to drop the app icon onto the home screen.
![]()
3. Re-enable disabled app
App icons can also disappear on the Android home screen if you unintentionally or intentionally disable them. Certain phone models even offer a functionality known as ‘Freezer,’ allowing users to temporarily halt the apps. While in a frozen state, the app remains inactive and doesn’t appear on the home screen until you unfrozen it.
To re-enable the disabled app, you can follow the steps here:
- Step 1. Open the Apps & Notifications on the Settings.
- Step 2. Select the app which icon is missing on your home screen. For example, tap the phone app if the phone icon disappears on your Android.
- Step 3: In the App Info, tap Enable.
4. Reset Android to factory settings
If the previous methods don’t work, you might need to do a factory reset on your Itel P40. But before doing that, it’s important to back up your data first because a factory reset will clear all your data and cache when you press the reset button.
How to reset Android to factory setting:
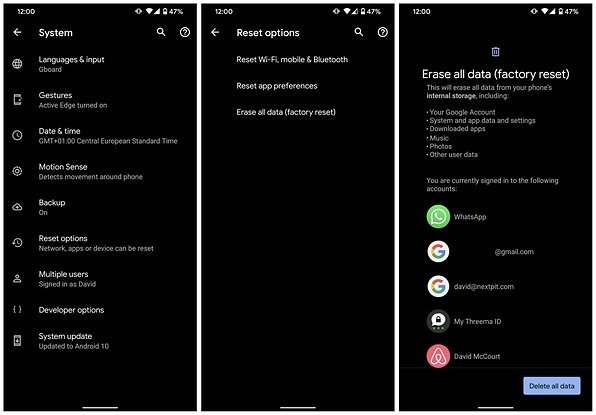
- Step 1: Go to your Android Settings.
- Step 2: Select Backup and Reset > Factory data reset. Then, choose to erase all data.
Please be mindful that performing a factory reset on Android will reset your Android completely to its initial state.
![]()
Part 3: How to Fix System Error on Android Easily with Reliable Software
Missing app icons on Android can sometimes be a result of errors in your Android system launcher, causing inconvenience and potential disruptions to your device’s operation. To address this issue effectively, you can turn to Dr.Fone’s advanced system repair tool. This tool is designed to handle various system issues, providing an easy and reliable solution.
How to fix the Android system using Dr.Fone’s system repair tool:
- Step 1. Open the Repair Tool
Start by launching Wondershare Dr.Fone on your computer. Go to the Toolbox section and connect your Itel P40. Choose System Repair and pick Android as your device type.

 safe & secure
4,136,839 people have downloaded it
- Step 2. Begin Repair
Click Start on the new screen to kick off the repair. Since you’re dealing with the Android system, select System Damage.

- Step 3. Fill in the Itel P40 device Details
The platform will detect your Itel P40’s brand. Confirm the Name, Model, Country, and Carrier. If your device is unlocked, choose OPEN in the Carrier section. Agree to the warning, click Next, and proceed with the repair.

- Step 4. Activate Download de
Follow the instructions to put your Itel P40 into Download Mode. Once you are in Download Mode, the firmware will be downloaded automatically.

- Step 5. Confirm Installation
Remember, the repair may erase data. It’s advisable to back up your data first before starting the repair. Enter “000000” to confirm the repair process, shown by a progress bar. Once finished, click Done and see if your phone has returned to normal.

More Articles About Android System:
9 Solutions for Android Process System isn’t Responding Error
How to Fix Android App Not Installed Error Quickly?
Authentication Error Occurred? Here Are 10 Proven Fixes
Conclusion
When the app disappears from the home screen of your Android, it can hinder your ability to access and use the app efficiently. There are several reasons why an app might disappear from your Android home screen, and addressing the issue depends on the specific circumstances.
Whether it’s due to accidental deletion or a system glitch, we have discussed various methods to recover the missing app and ensure smooth functionality in this article. In cases of system-related issues on your Itel P40, it’s advisable to rely on trustworthy software such as Dr. Fone’s system repair tool for a comprehensive resolution.
How To Fix Unresponsive Touch Screen on Itel P40
With the increase in our reliance on smartphones, having touchscreen problems on your device can be annoying. Sometimes, it’s even more frustrating than a physically broken screen because you don’t know where the issue is coming from.
If your touchscreen is malfunctioning or doesn’t work correctly, you cannot interact with your device. On this page, you’ll learn general phone touch problems on Android and how to get rid of them. Now explore the article to learn more.

Part 1: Why Is My Android Experiencing Touch Screen Problems
Below are some of the most common reasons you’re experiencing touch problems on your Android smartphone.
- The touchscreen problemfreezes your phone, lags, or hangs.
- Some parts of the screen work fine, but some don’t.
- Your screen responds inaccurately (typing “a” gets you “q” or “z”).
- The touchscreen is automatically operating itself, resulting in ghost touch.
- It doesn’t respond to any taps, and the phone’s screen has stopped working.
- The device is physically damaged, or the screen is cracked or broken.
- Outdated devices are prone to the black/white/blue screen of death.
Part 2: Tips, Fixes, and Workarounds To Fix Your Itel P40 Touch Problems
If any of the outlined reasons above are the cause of your touch screen malfunctioning, here are some solutions to fix it.
Method 1: Remove the Screen Protector and Phone Case
Some phone cases and screen protectors cause touch problems on your Android screen. This issue is prevalent if you recently changed your phone case or screen protector. It may be due to incompatibility, but you should remove them to see if your phone starts responding again.
Method 2: Clean Your Android Smartphone
A touchscreen malfunctioning can also be a sign of a dirty display. Since the screen relies on contact between your fingers and the touchpad to perform actions, this also applies to foreign particles such as dirt, debris, smudges, oil, and more. Clean your touchscreen with wipes or a soft cloth by gently wiping over the screen.
Method 3: Stop Using Your Android Device for a While
Touch problems also arise due to abnormal temperature changes. Your phone might experience ghost touch if it’s too cold or hot. For your screen to function correctly, it needs to be in a temperate environment. Remember to take breaks between phone usage, especially when the phone gets too hot. Avoid using your device under hot conditions, direct sunlight, or anything affecting your phone’s normal temperature.
Method 4: Restart Your Android
Performing a reboot sounds trivial with such a complicated issue. But sometimes, it’s often the most successful way to fix a touchscreen problem on an Android device. Restarting your Android shuts down and resets all background services, which may have led to your issue.
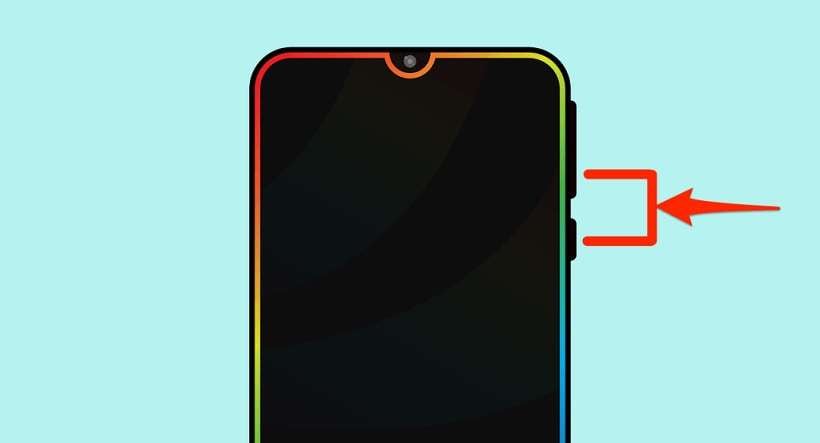
To restart your Android, press and hold the Power button for several seconds to switch off your phone. In other smartphones, you may need to hold down the Power button as well as the Volume Down button at the same time.
Method 5: Factory Data Reset Your Android
Before attempting to have your device checked for any hardware defects, you should try completing a Factory Reset. To do this, go to Settings > Backup and Reset. Next, tap on Factory data reset > Delete all.
Performing a Factory Data Reset will erase all your data and restore your device to its factory default settings. Creating a backup before doing this step is recommended, as you will lose all your personal data once the process starts.
Method 6: Put Your Android into Recovery Mode
If all else fails, placing your Android into Recovery Mode should be a last resort. Doing this method works similarly to the method above. You should perform this method if the screen is unresponsive and only the buttons on your Android are functional. Here’s how.
Note
Placing your Android into Recovery Mode is different depending on your Android smartphone. Refer to your owner’s manual to see which method is right for your Itel P40.
Step 1A: Press and hold the Power button and Volume Down buttons at the same time. Continue holding both buttons until the screen starts.
Step 1B: If your Itel P40 still has a Home button, press and hold the Home button and the Power button at the same time. Continue holding them until the screen starts.
Step 1C: If step 1A did not put your Android into Recovery Mode, press and hold the Power and Volume Up and Down buttons simultaneously. Continue pressing all three until the screen starts.
Step 2: Use the Volume buttons to navigate the choices, select Wipe data/factory reset, and confirm your choice with the Power button.
Step 3: Wait for the process to complete and for your Itel P40 to restart automatically.
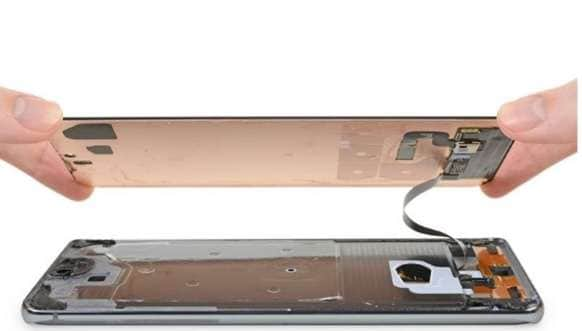
Method 7: Replace Your Android Touchscreen
If doing all the earlier workarounds and fixes couldn’t resolve the touchscreen problem, it could be the screen itself. While replacing the touchscreen yourself is possible if you have the technical know-how, it’s still best to bring it to a professional to prevent further damage. You should have your Itel P40 checked by a technician if the screen is getting weak, has water damage, or has failing screen components.
 “
“
Method 8: Bring it to an Authorized Service Center
Your phone touch problem might not be caused by the screen, even when you had it replaced. If your Android is still unresponsive, it’s best to bring your smartphone to an authorized service center or directly to the phone manufacturer, especially when all efforts are exhausted.
Part 3: How To Fix Android Touch Problem With an Alternative
If all the general phone touch problems on your Itel P40 persist, you should strongly consider Wondershare Dr.Fone to do the job. The program can fix all Android system issues without any required skills. Problems caused by the operating system or software, such as the black screen of death, boot loop, ghost touch, and more, are done within less than 10 minutes with the program.
Key Features
Dr.Fone – System Repair (Android) has many features you can immediately take advantage of. Here are some of them below.
- Fix All Android Problems In Minutes
Wondershare Dr.Fone allows you to fix all touchscreen problems on your smartphone within less than 10 minutes. Moreover, it has a high success rate making it one of the most reliable tools available today.
- Supports up to 1000+ Android Models
The program supports almost all Itel P40 models and other Android devices, whether unlocked or from a carrier. Dr.Fone is equipped with all the proper firmware to flash your Itel P40 with just a few clicks. In addition, it has handy on-screen instructions to help you complete the whole process with ease.
Pros and Cons
Here are the pros and cons of using Dr.Fone – System Repair (Android) to know if you’re still undecided.
Pros
- The user interface is clutter-free, making it highly beginner-friendly.
- The fast processing time to fix your Itel P40 means you can do more in less time.
Cons
- The free version only works until you see if your Itel P40 is compatible with the app. You will be required to enter a valid license once you initiate the repair process.
- If you own an iOS device, you’ll have to get the iOS version.
How To Fix Black Phone Screen With Wondershare Dr.Fone
Follow the step-by-step guide below to start fixing general phone screen problems on Android using Wondershare Dr.Fone.
Step 1: Download and install Wondershare Dr.Fone on your computer. Next, launch the program and connect your Itel P40 to your computer.
Step 2: Click Start to initiate the setup on a new window. From there, select the Brand, Name, Model, Country, and Carrier of your Itel P40 and click Next.
Step 3: Follow the on-screen instructions on the main program window to initiate the repair process. After that, wait for your Android smartphone to return to its original state.

Part 4: FAQs
Here are some FAQs you should remember when experiencing phone touch problems.
1. Does a Cracked Screen Affect Touch on an Android?
If you continue using a smartphone with a cracked screen, there are several implications. Your device will be vulnerable to further damage and might develop touchscreen problems,and your sensors will gradually begin to malfunction. The capabilities of your device are also compromised the longer you delay repairing it. Moreover, a cracked screen can put your fingers at risk of injury due to potential glass splinters.
2. How Do I Temporarily Fix a Cracked Screen?
If you can’t take your cracked screen to a repair shop, apply a small amount of vegetable oil or petroleum jelly to the screen. Doing this will not fix the issue but will make the cracks less noticeable. On the other hand, you can also apply a screen protector to safeguard your phone against further damage. The screen protector slows down or prevents the cracks from getting worse.
3. Can I Use Dr.Fone for Free?
You can download and install Dr.Fone – System Repair (iOS) or (Android) for free to evaluate the program’s offerings. You can do the first few steps to see if the app supports your device. However, you need to get the full version and enter a valid license code to repair your smartphone.
safe & secure
4,471,551 people have downloaded it
Conclusion
If the touchscreen is malfunctioning on your smartphone, one of the fixes above should help solve the problem. If it did not solve the issue, consider using Dr. Fone – System Repair for iOS or Android when you need an all-in-one solution to all your phone screen problems.
However, if your screen is broken or cracked, going to an authorized service center is still your best bet, especially when your screen urgently needs a replacement. Delaying it further may hurt your wallet in the long run, so it’s best to fix it as soon as possible.
Also read:
- [New] Google Cardboard Versus Samsung Gear VR The Showdown for 2024
- [Updated] In 2024, The Essential Guide to Zooming with Gmail Emails Professionally
- [Updated] Steps to Remove Following Requests on Instagram
- 2 Ways to Monitor Oppo Reno 10 Pro 5G Activity | Dr.fone
- Enhancing PC Performance: Overcome Forza Horizon N's Frame Rate Issues
- How To Restore a Bricked Oppo K11x Back to Operation | Dr.fone
- In 2024, Spotlight on Snapchat Utilization Strategies
- Motorola Moto G73 5G Stuck on Screen – Finding Solutions For Stuck on Boot | Dr.fone
- Play Store Stuck on Downloading Of Oppo A78 5G? 7 Ways to Resolve | Dr.fone
- Restore Missing App Icon on Honor Magic 5 Step-by-Step Solutions | Dr.fone
- Title: How To Unbrick a Dead Itel P40 | Dr.fone
- Author: Abel
- Created at : 2024-12-13 20:33:35
- Updated at : 2024-12-16 17:26:02
- Link: https://fix-guide.techidaily.com/how-to-unbrick-a-dead-itel-p40-drfone-by-drfone-fix-android-problems-fix-android-problems/
- License: This work is licensed under CC BY-NC-SA 4.0.