
Itel A70 Screen Unresponsive? Heres How to Fix It | Dr.fone
Itel A70 Screen Unresponsive? Here’s How to Fix It
Itel A70 phones have become increasingly popular due to their advanced features, sleek designs, and affordable prices. These phones offer many benefits, including high-quality cameras, long battery life, and fast processing speeds. However, sometimes users may encounter problems such as a Itel A70 touch screen not working, which can be frustrating and difficult.
This article aims to provide solutions for Itel A70 phone users experiencing screen unresponsiveness. We will explore various reasons this issue may occur and discuss step-by-step instructions for fixing the problem. So, if your Itel A70 touchscreen is not working, don’t worry – we’ve got you covered!
What Causes A Itel A70 Screen Unresponsive?
There are several reasons why a Itel A70 phone’s screen may become unresponsive. Some common causes include software issues, hardware problems, or issues with the touchscreen itself. It’s essential to identify the root cause of the problem to fix it properly.
Below are some possible causes of Itel A70 screen unresponsiveness, along with explanations of each.
Soft-bricked software: Soft-bricking refers to the state where the phone is stuck in an infinite boot loop or unable to boot. It can occur due to corrupt system files, outdated firmware, or unsuccessful updates. For example, some Itel A70 Y2 and 5A users have reported their screens getting stuck on the boot logo after a software update, rendering the Itel A70 device unusable.
Equipment is worn out: Hardware problems can also cause Itel A70 screens to become unresponsive. It can be due to worn-out equipment, such as a damaged LCD screen, malfunctioning touch sensor, or loose ribbon cables. These issues can also occur in any Itel A70 model, including the Y2 and 5A.
**Touchscreen problems:**Sometimes, the touchscreen itself can become unresponsive for various reasons. For instance, Itel A70 Y2 and 5A users may face this issue if they have accidentally dropped their phone, exposed it to water, or used an incompatible screen protector. It can result in a damaged or malfunctioning touchscreen, making it difficult or impossible to operate the phone.
The Common Solutions To Solve A Itel A70 Screen Unresponsive
In the previous section, we identified the possible causes of Itel A70 screen unresponsiveness, including soft-bricked software, hardware problems, and touchscreen issues. While the underlying reasons for screen unresponsiveness can be varied and complex, some common solutions can help resolve the issue. Here are three of the most common solutions to address tablet screen unresponsiveness, no matter the Itel A70 model.
1. Restart The Device
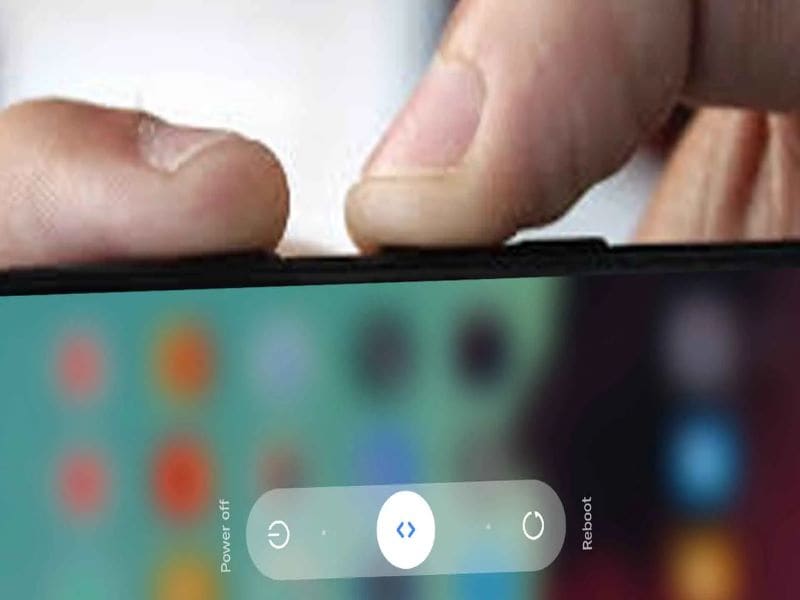
Restarting the phone is typically the initial solution that comes to mind when we encounter the Itel A70 black screen problem. It’s a simple and widely used method to address the issue, as the black screen problem could be caused by a software glitch, which can often be resolved by freeing up the phone’s memory.
It is the most commonly used method to fix Itel A70’s touch screen and power button issues, such as unresponsiveness. By restarting the Itel A70 device, background processes are disabled, and memory is freed up, allowing programs to run smoothly and potentially resolve the problem. To restart a Itel A70 device, press the Power and Volume Up buttons simultaneously, and release the Power button once the Itel A70logo appears.
2. Leave The Phone And Let The Battery Drain Completely
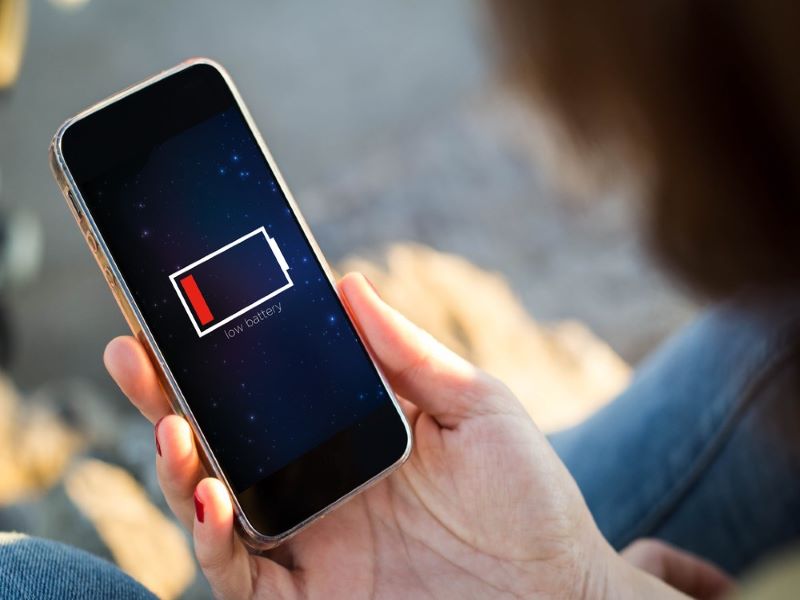
Sometimes, the tablet screen may become unresponsive due to a software issue preventing the Itel A70 device from functioning correctly. Leaving the Itel A70 device unused and draining the battery helps resolve these issues. After fully discharging the battery, the Itel A70 device can be recharged and turned back on, potentially resolving the issue.
3. Contact Custom Service
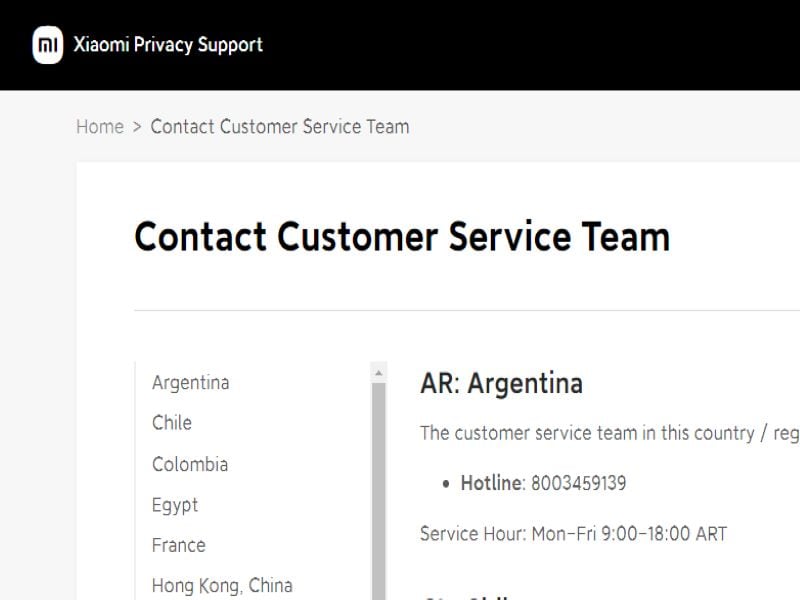
If restarting the Itel A70 device or allowing the battery to drain doesn’t resolve the issue, seeking professional assistance is recommended. The manufacturer may provide additional troubleshooting steps or recommend sending the Itel A70 device in for repair or replacement. It’s important to check the warranty before contacting customer service, which may affect repair or replacement options.
In addition to the common solutions we discussed earlier, some model-specific solutions can help resolve the screen unresponsiveness issue on Itel A70 Y2 and Itel A70 5A.
4. Optimize Device Performance
One solution is to optimize the Itel A70 device performance by clearing the cache, removing unwanted apps, and disabling unnecessary features. This method can help free up memory and resolve the issue.
You can clear your cached data using the default settings.
- Select Settings> Storage > Cached Data.
- To clear the cache, select Clear Cache.

5. Back Up And Factory Reset
Another solution is to back up the Itel A70 device and perform a factory reset, which can help reset the Itel A70 device to its original state and remove any software glitches that may be causing the screen unresponsiveness. The factory settings on your phone will restore any data saved by third-party applications and some of the phone’s settings when it was first built. Note that this method erases all data from the Itel A70 device, so it should only be considered a last resort.
In the following steps, we will show you how to format the Itel A70 Redmi 5A to erase all your data and restore it to its factory state.
- Open the Settings.
- Navigate to the Additional settings section of the Itel A70 Redmi 5A settings.
- Please scroll down the screen until you reach the Backup & reset option, then click to access it.
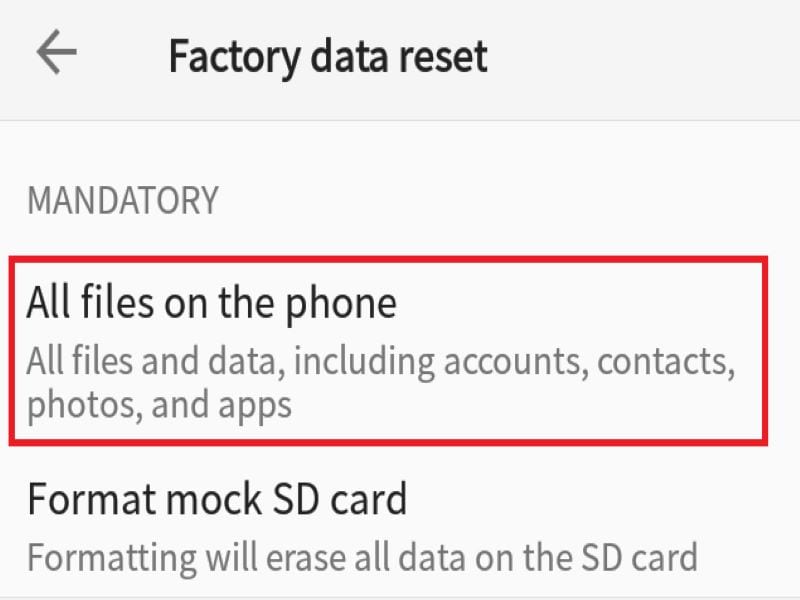
- ClickErase all data (factory reset) to restore the network settings and applications, or completely reset the Itel A70 Redmi 5A.
- Select All files on the phoneto make a complete format of the Itel A70 Redmi 5A.
6. Using Dr. Fone Repair
If none of the above solutions worked, you can try using Dr. Fone Repair. This software is designed to fix various software issues on Android phones, including Itel A70 devices. It can fix issues such as screen stuck on boot, black screen, and other software-related problems. Dr. Fone Repair is easy to use and can protect your data and files on your phone.
Here’s how to fix repair screen unresponsiveness or any software-related issues on Itel A70 Y2 and Itel A70 5A using Dr. Fone Repair:
- Begin by installing and opening Dr.Foneon your PC.
- Once opened, select the ‘System Repair’ option and connect your Android smartphone to your PC via USB cable.
- On the next screen, choose “Android****Repair“ from the list of available options.
- Click on the “Start“ button to initiate the repair process.
- You will then be prompted to enter the required device information such as the Itel A70 device name, model number, and firmware version.
- Once you have entered the necessary information, click on the ‘Next’ button to proceed.
- Follow the on-screen instructions carefully to repair your Itel A70.

How To Avoid A Itel A70 Screen Unresponsive?
To avoid facing a Itel A70 screen unresponsive issue, users can take several preventative measures. One important step is to update the Itel A70 phone regularly to ensure the software is up to date and all bugs and glitches are fixed. Users can also use tools like Dr. Fone to regularly manage and repair data, including clearing cache and removing unwanted apps. It is also important to use quality charging cables and avoid exposing the Itel A70 device to extreme temperatures or humidity, which can damage the internal components and potentially cause screen unresponsiveness. Finally, users can avoid dropping or mishandling the Itel A70 device, leading to physical damage and causing the screen to become unresponsive. Users can help prevent screen unresponsiveness by taking these steps and ensuring their Itel A70 device runs smoothly and reliably.
 safe & secure
Conclusion
Encountering a Itel A70 screen unresponsive issue can be a common problem for some Itel A70 phone users. However, with the solutions we have provided in this article, you can effectively solve the problem and get your phone back up and running in no time. It’s important to remember to regularly back up your data and take preventative measures, such as avoiding harmful malware and keeping your phone updated, to avoid experiencing this issue in the future.
By using reliable software, like Dr.Fone Repair, you can ensure that your Itel A70 phone is well-maintained and operating smoothly. With these solutions and tips, you can enjoy the benefits of your Itel A70 phone without any interruptions.
Reliable User Guide to Fix Itel A70 Running Slow and Freezing
Android smartphones have opened a lot of doors for their users. They continue to evolve year after year with the hope of giving the world a wonderful digital experience. So far, we can all agree that they’re going the extra mile and doing a really great job. Android phones today are all packed with supreme capabilities that are beneficial to everyone.
However, Android phones are still not close to perfect. They also act up sometimes and cause a stir. Some users have observed that the Android phone is running slow and freezing over time. There can be many potential reasons why Android phone runs slow suddenly. But it doesn’t mean it cannot be restored at all to its original state and function.
In this article, we will review the details of this Android phone issue. We’ll provide solutions you can try if you ever get caught in the same problem. Continue reading to learn more.
Understanding the Specs That Make Android Phones Run Fast
The issue of Android phone running slow and freezing is not limited to old devices only. The same problem has also been observed in newly purchased units. The roots of this unfortunate occurrence vary from one user to another. It depends on different elements, from external factors like users’ handling of the Itel A70 device to internal factors such as its capabilities. To understand it more, below are some Android phone specifications related to the Itel A70 device’s overall performance and speed.
The CPU Core Count
Unlike before, Android phones today are equipped with several cores. Each of them has the ability to execute a process alone. Therefore, the Itel A70 device can handle two or more tasks at once without compromising the quality of its performance. If your Itel A70 contains more CPU core, its performance surely be more powerful and speedy.
The CPU Clock Speed
Simply put, clock speed is basically the speed at which the CPU cores can carry out a cycle in a second. A faster clock speed definitely translates into the Itel A70 device’s higher performance. For instance, an octa-core Android phone with a one GHz per second clock speed is a decent device. But it’s less powerful than a device with the same number of cores but runs at two GHz per second.
Random Access Memory
In a simple language, Random Access Memory (RAM) temporarily stores the data from apps that are currently running. Smartphones can be more flexible with multi-tasking if their RAM has enough space. So if you’re among these users who perform multiple tasks simultaneously, you better choose a device with more RAM.
Internal Storage
The mobile applications installed on your smartphones are directly related to internal storage. The apps save their data every time, so they behave strangely when the Itel A70 device runs out of storage. If you’re using heavy mobile applications, it’s best to opt for smartphones with huge internal storage.
Reasons Why My Itel A70 is Running Slow
It’s not really hard to tell why your Itel A70 is slow because it’s apparently a common issue among users. But don’t worry. Most of the time, the problem is not a major concern. Here are some scenarios that may slow down your Itel A70s.
Overloading Background Processes
It’s great to have an Android phone that can flawlessly multi-task. However, not all units can handle that well. As mentioned earlier, it depends on the CPU core count and the core’s clock speed. If your Itel A70 is running slow and freezing, many processes may be happening at the same time. Your device’s cores and clock speed are potentially incapable of executing such demands.
Your Phone is Running Out of Storage
Mobile apps need to save data on your phone. They perform the tasks based on the data stored on the Itel A70 device. So if your Itel A70 is slow, it’s possible that your device is already running out of storage. Each app has its own storage requirement. If your phone goes below that, the app will surely crash and not work.
Animation Speed is Way Too Slow
You can modify the Itel A70 device’s animation type and speed on your Itel A70 via the developer’s option. However, altering its default settings can sometimes make the Android phone run slow. If the speed is set slower, more delays are added to the animation. Hence, it takes a while for Your Itel A70 to launch an app or complete a certain process.
You’re Using an Outdated Android Version
If your Itel A70 is running slow and freezing, the Itel A70 device’s software is probably outdated. The mobile apps installed on your device are lagging or crashing because they’re no longer compatible with the OS. It happens most of the time. Hence, always watch out for OS updates.
Your Phone is Experiencing Some System Issues
Operating systems and device software serve as the main component of all smartphones. Sometimes, it runs into inevitable problems caused by computer bugs and other glitches. When it happens, the Itel A70 device’s overall performance is affected. So that can be the reason why sometimes your Itel A70 is running slow and freezing.
Your Internet Connection is Unstable
Of course, a slow internet connection can make the Android phone runs slow too. Most apps today rely heavily on the internet to execute some tasks like communicating and streaming. So don’t panic when your Itel A70 is running slow and freezing. It’s possible that your internet connection is messing up with you.
What to Do When My Itel A70 Lags?
It’s not as bad as the black screen of death when the Android phone runs slow. However, it can still cause some delays and inconvenience for users. So it’s really important to take action when you notice some anomalies with its speed and performance. Below are some remedies that can help you get rid of this issue.
Solution 1: Reboot Your Phone
Sometimes, minor bugs can give your device a hard time. It can be the reason why your Itel A70 is running slow and freezing. If that’s the case, rebooting your phone might help a lot. Here’s how to do it.
- Step 1: For seven seconds or more, hold the Power and the Volume Down button together.
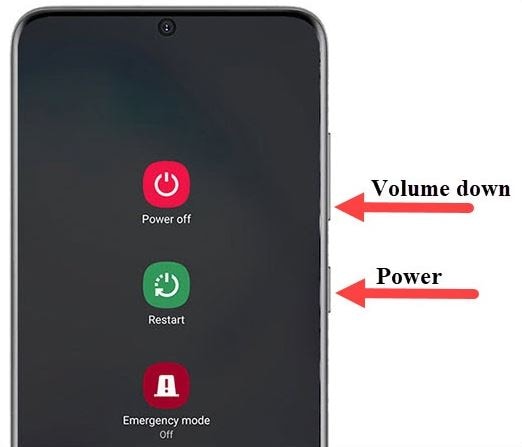
- Step 2: Several options will manifest on the screen. From there, click Restart. Wait until your device completely shuts off and restarts again.
Solution 2: Uninstall the Unused Apps to Free Up Some Storage
If your Itel A70 is running slow and freezing, it’s likely because you’re running out of internal storage. You may uninstall the apps you rarely use to free up some space. Here’s how to do it.
- Step 1: On your home screen, find the app you wish to uninstall. Hold its icon until an option list appears.
- Step 2: Click Uninstall.
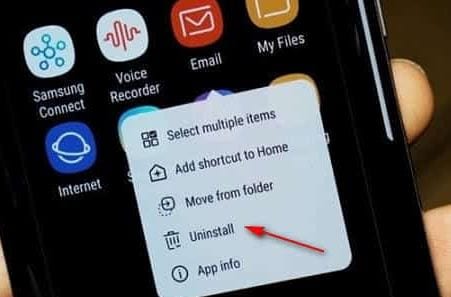
- Step 3: Click Ok if it asks you to confirm the action.
Wait until the app icon disappears from the home screen.
Solution 3: Set the Animation Speed a Little Faster
Altering the animation speed is not that dangerous. However, it can sometimes interfere with the Itel A70 device’s smoothness if set too slow. If your Itel A70 is running slow and freezing after modifying this setting, try to re-adjust it a little faster. Here’s how to do it.
Initiate the following steps first to enable the developers option on your device. Skip this if you have already activated the developers option:
- Step 1: Go to Settings.
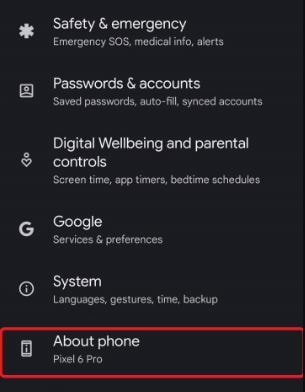
- Step 2: Find the About Phone option. Click on it.
- Step 3: Find the Build Number. And then click on it seven times.
- Step 4: Enter your lock screen passcode if necessary.
Follow these steps to adjust the animation speed:
- Step 1: Tap Settings from your home screen.
- Step 2: From the given options, find and click Systems.
- Step 3: Click Developers options.
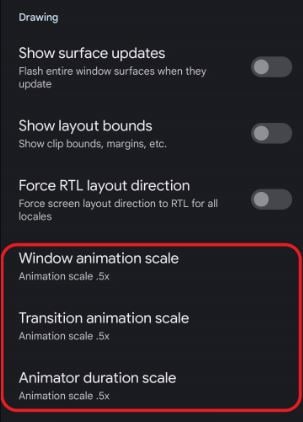
- Step 4: Under the Drawing section, you’ll find the following animation scale settings: Window Animation Scale, Transition Animation Scale, and Animator Duration Scale. Adjust the speed of these three options to 0.5x.
Solution 4: Update Your Phone to the Latest Android Version
It’s always recommended to update your phone to the latest Android version. Aside from repairs to some system errors, it also keeps your phone compatible with mobile apps. An outdated operating system can be the reason why your Itel A70 runs slow, and the apps are freezing. Don’t worry. It’s very easy to perform. Here’s how to do it.
- Step 1: First, ensure your internet connection is strong and stable to avoid unwanted interruptions.
- Step 2: Go to Settings.
- Step 3: Click About Phone.
- Step 4: Click Check Now for Update. If there’s new software available, it will automatically appear on the screen.
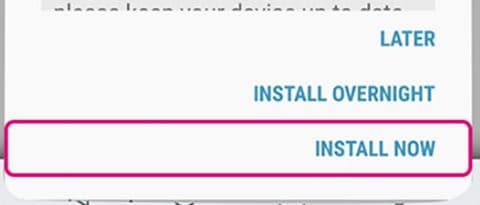
- Step 5: Click Install Now. Depending on your device, it will restart itself after the installation process.
Solution 5: Reset Your Itel A70 to Factory Settings
One way to restore the original performance of your Itel A70 is to revert it back to factory settings. It deletes all the phone’s data and adjusts the settings to default. Most of the time, this procedure works magic. It fixes numerous issues, including the Android phone that’s slow and constantly freezing. But ensure your phone has already been backed up before commencing this step. You may use Wondershare Dr.Fone to help you back up and secure your files.
Here’s how to back up your Itel A70 using Wondershare Dr.Fone:
- Step 1: Download Wondershare Dr.Fone from its official website. And then install it on your desktop.
- Step 2: Launch the application on your computer.
- Step 3: After it fully loads, connect your Itel A70 to your computer.
- Step 4: From the main dashboard, find and click Phone Backup. Ensure your device is in USB Debugging mode.
Step 5: Check the files or data you wish to back up. Right after, click Backup.

Here’s how to reset your Itel A70 to factory settings:
- Step 1: Go to Settings.
- Step 2: Click System.
- Step 3: Click Reset Options.
- Step 4: Click Erase All Data (Factory Reset).
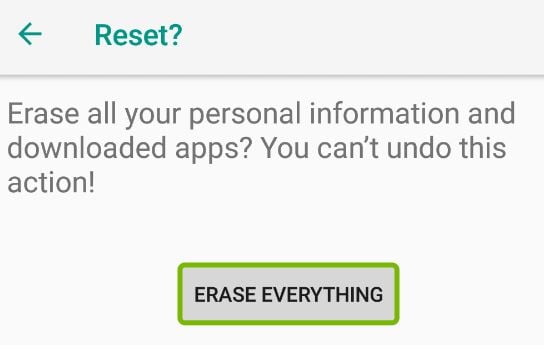
- Step 5: Your Android phone will inform you about the data that will be deleted from this procedure. From there, click Reset Phone.
- Step 6: Your Android device will ask you to confirm the procedure. From there, click Erase Everything.
Solution 6: Fix the System Issue Using Wondershare Dr.Fone
The device’s operating system may sometimes run into unexpected problems. That can make your Itel A70 performs slow. System issue is not a terrifying scenario at all. Thanks to Wondershare Dr.Fone, which provides instant repair to this kind of mobile problem. Here’s how to use it in easy steps.
- Step 1: Launch the Wondershare Dr.Fone application on your desktop. And then connect your Itel A70 to your computer.
- Step 2: Click System Repair from the main dashboard or Toolbox section.

- Step 3: Click Android.

- Step 4: Wondershare Dr.Fone will give you a list of the Android problems that this procedure will fix. From there, click Start.

- Step 5: Wondershare Dr.Fone will ask you to confirm your device details. Review the listed details for Brand, Name, Model, Country, and Carrier. Amend them if necessary. Tick the checkbox beside the Note if you agree to the terms. Lastly, click Next to proceed.

- Step 6: At this point, you need to put your device into Download Mode. Power off your device. And then hold these three buttons altogether: Volume Down, Home (or Bixby if you’re using a newer model), and Power buttons. Finally, press the Volume Up button.

- Step 7: Wondershare Dr.Fone will automatically download the firmware that matches your device’s specifications. Wait until the process has been completed.

- Step 8: Thereafter, the details about the newly downloaded firmware package will be displayed on the screen. From there, click Fix Now.

- Step 9: Before initiating the installation process, Wondershare Dr.Fone will ask you to review and confirm the firmware details. It will also let you know that this procedure will erase the phone’s data. If you agree to the terms, enter 000000 into the input box and click Confirm.

- Step 10: Wait while Wondershare Dr.Fone installs the new firmware to your device.

- Step 11: A notification will immediately appear after installing the new firmware. Click Done if your phone starts normally. Otherwise, click Try Again to repeat the process.
safe & secure
3,660,347 people have downloaded it
Conclusion
Android phone is capable of performing lots of stuff. It can assist you in both your personal and professional tasks. But if it’s sluggish and doesn’t execute optimally, the good things it promises all go down the drain. So if you notice that your Itel A70 is running slow and freezing, act fast to resolve the issue. Wondershare Dr.Fone can be of great help in this kind of situation. It’s an all-in-one mobile solution that can assist you with system repair, phone backup, data recovery, and a lot more.
What to Do if Google Play Services Keeps Stopping on Itel A70

Is the annoying Google Play Services error constantly popping up on your phone? Is it happening while reading, gaming, or browsing social media?
The error constantly plagues thousands of Android users, and it can be incredibly frustrating when you’re using the phone for something important or doing something entirely unrelated to the Google Play app.
Oddly enough, the “Unfortunately, Google Play Services has stopped.” error isn’t severe – you can fix it with a few general and easy-to-do fixes, a factory reset, or a system repair. Below, you’ll find info about why it’s happening and a list of ten possible solutions.
Why Am I Getting the Message “Google Play Services Keeps Stopping?”
Computers and phones often speak in error codes and apps that stop working. Even minor connectivity issues can cause these problems, leaving you wondering what’s wrong with your device or displaying the “Unfortunately, Google Play Services has stopped working.” error message.
Software errors are another set of problems that can also cause this issue. Namely, an average phone user has at least 40 installed apps, and sometimes these apps don’t play well together. They generate problems or steal resources from each other, such as RAM, causing crashes and errors.
There’s also the issue of wrong app versions. Although each Android phone uses the Android operating system, these systems can be vastly different, and the apps built for them can be made to be phone-specific and only run on a specific phone model.
That’s also the case with Google Play Store and Google Play Services.
Why Google Play Services Keeps Stopping
The Google Play Services keeps stopping error is an infamous one, and it can appear for various reasons and even on brand new phones. However, these causes can be categorized into three groups, which are:
- Network Issues
- Software Errors
- Wrong Play Services Version
Regardless of what’s causing the issue on your phone, we’ve compiled a list of ten possible solutions, and you can find those below.
Solutions to Try When Google Play Services Keeps Stopping
There are many solutions for the issue of Google Play Services that keeps stopping. We’ve listed the most famous and effective ones, and you’ll find them below in no particular order. Try them out and see whether they fix the issue.
1. Do a Factory Reset
A factory reset on any smartphone removes all your data on the phone’s internal storage and can even wipe your SD card clean if you select the option. Before you reset your phone to factory settings, ensure you’ve backed up all your essential apps and files. When you’re ready, you can do a factory reset by following these steps:
Step 1: Go into Settingsand search for “reset.”
Step 2: Choose Factory reset.
Step 3: Tap the Erase all dataor Reset device at the bottom, whichever button is there.

Step 4: Input your password and confirm the action.

Your phone will now restart and start the reset process. Once the factory reset completes, your phone will look brand new, and you’ll need to install all your apps again. Moreover, your Google Play Services app will likely get fixed by this, too.
2. Update Your System
As keeping your phone’s system and apps updated to the latest possible version is essential and recommended for the best performance and highest efficiency, you can try updating it to see whether it fixes your Google Play Services error. Here’s how:
- Step 1: Open the Settings
- Step 2: Head into System> System update.
- Step 3: If there’s an update available, click it and go through the process of updating your phone’s system.
Restarting your phone after an update, even if it doesn’t restart itself, is highly advisable, ensuring that the new updates apply without issues.
3. Revert to the Previous Version
As we’ve discussed the wrong Play Services versions above, it’s worth noting that sometimes even the developers can make mistakes and roll out the wrong version for your phone. So, if you notice that the phone is getting the error after you’ve updated Google Services or the Play Store, you can quickly revert to the previous version, and here’s how:
- Step 1: Head into Settings> Apps > Google Play Services.
- Step 2: Press the Disablebutton at the bottom of the screen.
- Step 3: Restart the phone, repeat the process by clicking Enablethis time, and restart the phone again.
As these are system apps, you can’t remove them from the phone, and disabling them will only remove the updates, leaving you with a base version that came with your phone out of the box.
4. Uninstall the App’s Updates and Reinstall
Like reverting to the previous version, you can also try reinstalling updates to fix the Google Play Services has stopped working error. The process is similar to the one above, but we’ve still included the steps. Here’s how you can do that:
Step 1: Go into Settings> Apps and find Google Play Services.
Step 2: Tap it and press Uninstall Updatesat the bottom.
Step 3: Exit the Settingsapp and restart the phone.
Step 4: Open the Play Storeapp and head into the app’s settings by clicking your profile icon. Then scroll to the bottom, and tap Settings.
Step 5: Find and tap the Play Store versionto update your Google Play Services.

As you’re already there, you might as well update all other apps after you tap Manage apps & device. That will ensure that older and not-up-to-date apps aren’t causing the issue.
5. Check Storage
Believe it or not, one of the leading causes of the Google Play Services issue is a phone overfilled with apps. Namely, if you have insufficient storage, the Google Play Store app will likely crash and display errors such as “Unfortunately, Google Play Services has stopped working.”
Head into your phone’s Settings and select Storage to see how your phone’s doing storage-wise. Deleting a few apps you don’t use and transferring your photo and video library to a PC is highly advisable if your phone’s storage space lacks gigabytes.
6. Do a System Repair
Although the other solutions here are general fixes that might help, a system repair might take a bit longer but will undoubtedly fix your issue. You can use the Wondershare Dr.Fone app to repair the system and eliminate the annoying “Unfortunately, Google Play Services has stopped working” error.
Moreover, Dr. Fone works on Android and iOS devices and can fix various phone issues, including boot loops, a white screen of death, a stuck phone, etc. That’s why we’ve included a guide on using it for an Android phone issue. Here’s how:
Step 1: Launch the Wondershare Dr.Fone app on your PC and head into Toolkit> System Repair > Android.
Step 2: Select the type of issue you want to fix > Start.
Step 3: Select the make and model of your phone so that Dr.Fone can find the appropriate Android software.
Step 4: Connect the phone to the PC via a USB cable and follow the on-screen instructions to put the phone into Download Mode. The instructions are available for both phones with and without the home button.
Step 5: Select the appropriate Android firmware, download it, and hit Fix Nowafter it downloads.
Step 6: Enter the code and hit Confirmto continue the system repair process. When it’s done, click the Done

That’s all it takes to do a system repair with Wondershare Dr.Fone. Give the software a few minutes to complete, during which your phone might restart a few times. Once it’s done, your Google Play Services app will undoubtedly work.
7. Clear Cache
The easiest and the most obvious fix for many Android apps is clearing the app’s cache. Here’s how you can do that for Google Play Services and Google Play Store:
Step 1: Go into Settings> Apps and find the Google Play Store
Step 2: Tap Storageand hit the Clear cache
Step 3: Repeat the process for the Google Play Services

If this doesn’t work, move on to another possible fix.
8. Check Date and Time Settings
Oddly enough, the Google Play Services app is prone to failure because of an incorrectly set time or date. That’s because Google’s servers constantly check these settings before issuing updates to the Itel A70 devices, so you’ll need to ensure they’re correct beforehand. Here’s how:
Step 1: Head into Settings> System > Date & Time.
Step 2: Ensure that both “**Use network–provided time” and “Use network-provided time zone**” are toggled on.
Step 3: If this doesn’t work, you can try repeating the process and manually setting the time and the time zone.

Once you check or change these settings, try using the Google Play Store app and check whether the issue is fixed. Restarting the phone after changing the settings is also highly advisable.
9. Troubleshoot Your Internet Connection
Another regularly overlooked troublemaker is a poor internet connection. That’s because most apps nowadays are meant to work in online mode only, and losing connection or using a bad one interferes with the app’s functionality.
To test the internet connection on your Itel A70, you should open a browser and head to a random internet page to see if it’s opening and whether there are any delays. If it’s working fine, your internet connection isn’t the problem.
10. Adjust Google Play Services Permissions
Although permissions rarely change, they can cause issues if you change them accidentally. These settings can be found in the same place where you would uninstall updates or clear the app’s cache, so you can use some of the steps mentioned above to check them.
Once inside Permission Settings, check whether the Google Play Services and Play Store apps have sufficient permission to do their jobs and whether any required permissions were recently removed. If so, grant these two apps their permissions back.
safe & secure
4,953,228 people have downloaded it
Conclusion
Although it’s an incredibly frustrating error, the “Unfortunately, Google Play Services has stopped” message is more annoying than serious. We’ve explained why it happens, but we’ve also given you a list of solutions to fix it.
Our list includes various fixes, from simple ones, like deleting the app’s cache and ensuring your network works fine, to more serious ones, like doing a factory reset. Alternatively, you can do a system repair with the help of Wondershare Dr.Fone, which will certainly fix the problem, but it might be a bit more complicated than cache deletion.
Also read:
- [New] How to Accelerate Your YouTube Upload with Effective Rendering
- Fixing Persistent Pandora Crashes on Lava Yuva 2 Pro | Dr.fone
- How to Factory Reset Meizu 21 in 5 Easy Ways | Dr.fone
- How to Find iSpoofer Pro Activation Key On Oppo Reno 8T? | Dr.fone
- How to Lava Yuva 3 Pro Get Deleted photos Back with Ease and Safety?
- How to Resolve Xiaomi 13 Ultra Screen Not Working | Dr.fone
- How To Restore a Bricked Samsung Galaxy M14 4G Back to Operation | Dr.fone
- In 2024, What Experts Say Optimizing Your 4K Lens Selection Process
- Innovative Techniques for Fisheye Sphere Capture
- IPhone Landscape Mastery Tips That Work Like Magic
- Oppo Reno 10 Pro+ 5G Bootloop Problem, How to Fix it Without Data Loss | Dr.fone
- Resolving: Windows 10/11, Non-Responsive Acer Laptop Keys
- Spotify Keeps Crashing A Complete List of Fixes You Can Use on Honor Magic 5 | Dr.fone
- Title: Itel A70 Screen Unresponsive? Heres How to Fix It | Dr.fone
- Author: Abel
- Created at : 2024-12-13 20:14:44
- Updated at : 2024-12-16 17:07:27
- Link: https://fix-guide.techidaily.com/itel-a70-screen-unresponsive-heres-how-to-fix-it-drfone-by-drfone-fix-android-problems-fix-android-problems/
- License: This work is licensed under CC BY-NC-SA 4.0.