
My Videos Arent Playing on Motorola Moto G14 – What Can I Do? | Dr.fone
My Videos Aren’t Playing on Motorola Moto G14 – What Can I Do?
There’s a reason Android holds over two-thirds of the mobile operating system market share. It’s a powerful OS that gives you the utmost freedom and flexibility, allowing you to customize your phone to suit your needs.
However, regardless of the capabilities of Android phones and the features that come with their OS, just like any other smartphone, they’re prone to glitches and annoying issues – especially with their video files.
You may encounter videos not playing on your Motorola Moto G14 more frequently than you like. Whether it’s video files you’ve recorded using your phone or files you’ve downloaded, this glitch can get pretty annoying pretty fast. Fortunately, there are several solutions you could try to fix it.
See what you can do if videos won’t play on your Android.
Why Are My Videos Not Playing On Android?
Considering how most smartphone manufacturers tend to emphasize the unbelievable quality of their cameras, perfect night modes, seamless slow-motion recordings, superb resolution, and more, you’d expect all images and videos to function flawlessly on your Android. Unfortunately, that’s not always the case.
Occasionally, you could find that the videos you access from your gallery won’t play, sending you the message that “video cannot be played” or “can’t play video.” Other times, you might find that YouTube videos won’t load correctly or your downloaded videos won’t open in your media player.
There could be a wide variety of reasons that is happening, including:
- Corrupted video
- Corrupted SD card
- Outdated media player
- Outdated OS
- Incomplete download from the source
- Low storage
- Video downloaded from a suspicious source
An array of hardware and software issues could lead to you being unable to play videos on your Android. However, that doesn’t mean you should immediately send your device for repairs or delete the videos that won’t play. There might be a few better solutions you could try.
What You Can Do if Your Videos Aren’t Playing On Android Phone
Since there are many reasons for having problems with videos not playing on your Android, you could also try many solutions.
1. Do a Factory Reset
While a factory reset shouldn’t always be the first solution you go to, it can usually prove to be the most effective one.
A factory reset, aka a master reset or a hard reset, returns all your software configurations to the original state when the phone was first manufactured. In the process, all your data is lost – any photos and videos you have on your phone and the apps you’ve installed will be deleted. You’ll be logged out of all your accounts and won’t have access to your message history, contacts, and more.
While it seems like an extreme step, it can help fix any video issues you might encounter due to software bugs.
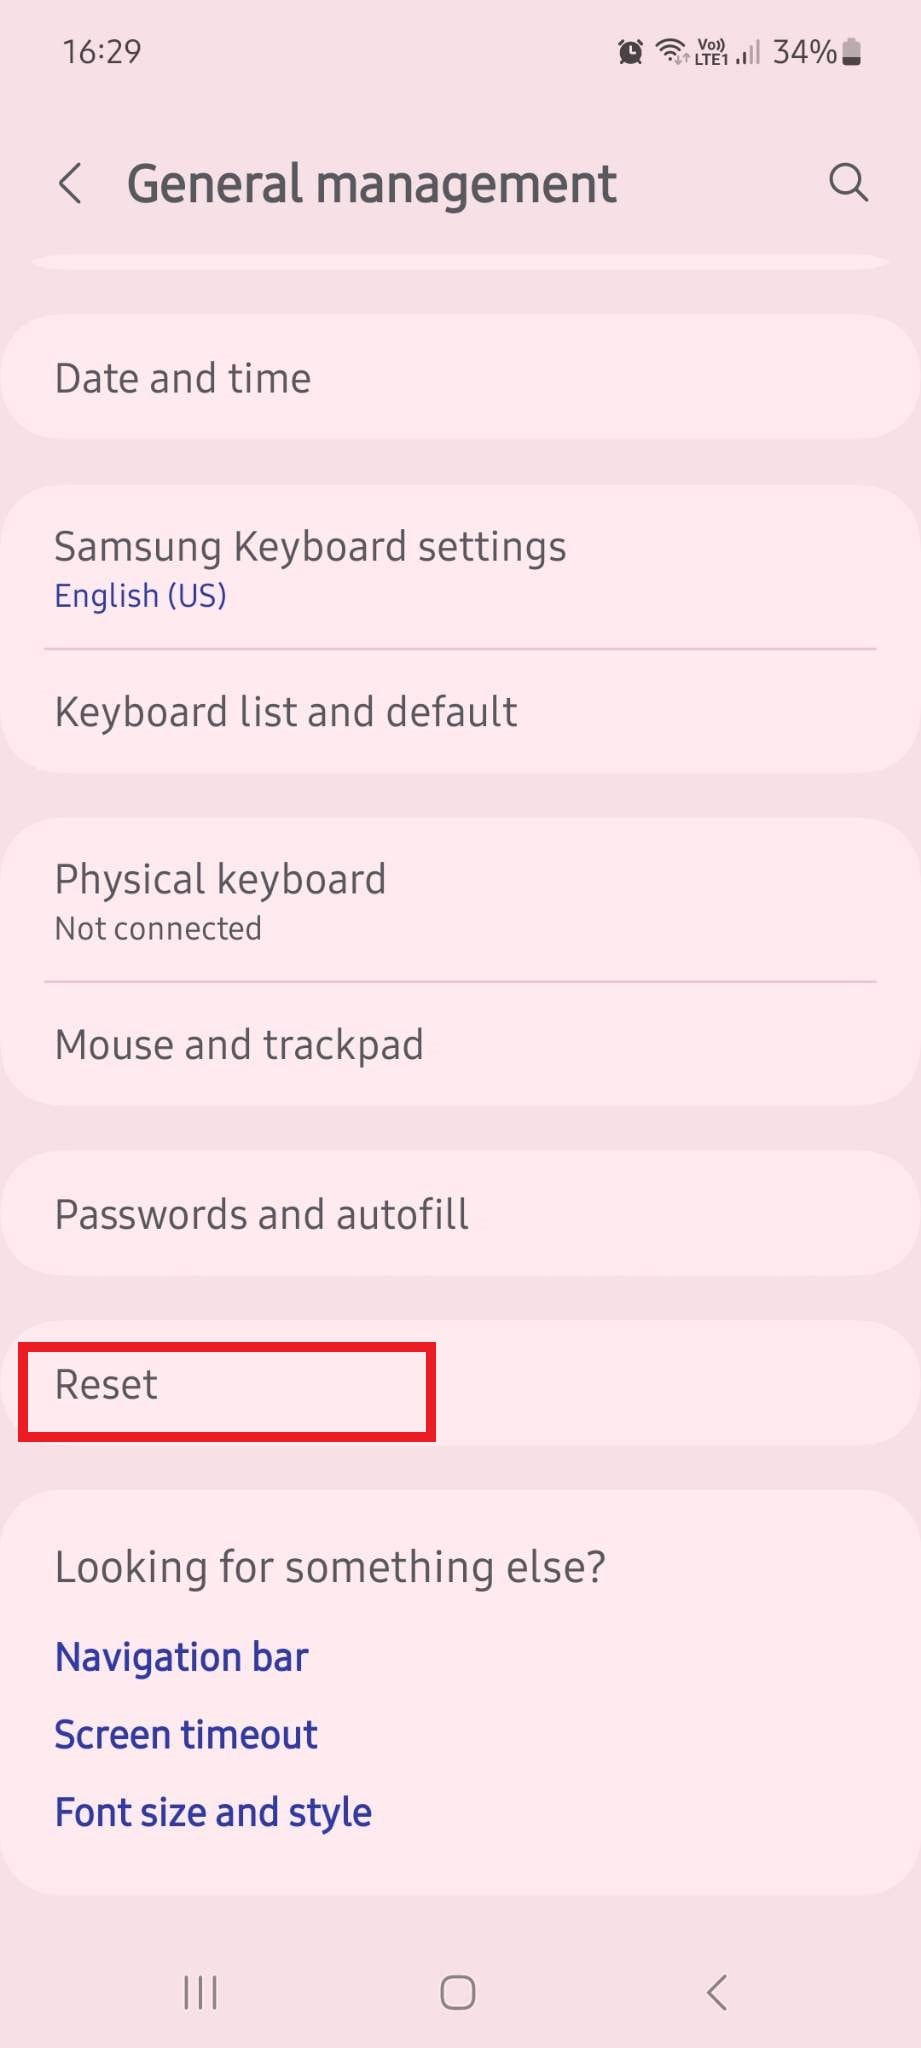
Though there could be slight variations between different phones, you can usually perform a factory reset by going to Settings > General Management > Reset > Factory data reset > Reset.
2. Restart Your Motorola Moto G14
While a factory reset is all but guaranteed to fix the issues you’re encountering with your videos, sometimes a simple restart might do the trick just fine. A restart works by clearing your RAM (Random Access Memory).
In a nutshell, RAM stores short-term data that helps your processor complete tasks quickly. This data is always easily accessible, and it’s what helps your phone quickly open webpages and apps you’ve recently used.
Over time, however, your RAM can get filled with unnecessary data and data fragments, which, in turn, can confuse your processor.
Restarting your phone will clear your RAM and potentially eliminate any data fragments causing your videos to be unplayable.
3. Check the Video Format
As a general rule of thumb, the videos you capture should be in a format your device supports. However, the videos you’ve downloaded might not be. That’s why checking the files’ video format before trying other possible fixes is in your best interest.
If the format isn’t supported, installing the right video player with the necessary compatibility is the most straightforward fix. Some of the most popular video players for Android include VLC for Android, GOM Player, MX Player, Bsplayer, and RealPlayer. You can easily find all of them in the Google Play Store.
4. Check the Internet Connection
If you’re having problems playing downloaded or online videos, check your internet connection to see if there’s an issue there. If your internet’s down, any downloaded videos might not have downloaded correctly, and any online videos that haven’t been loaded will not play.
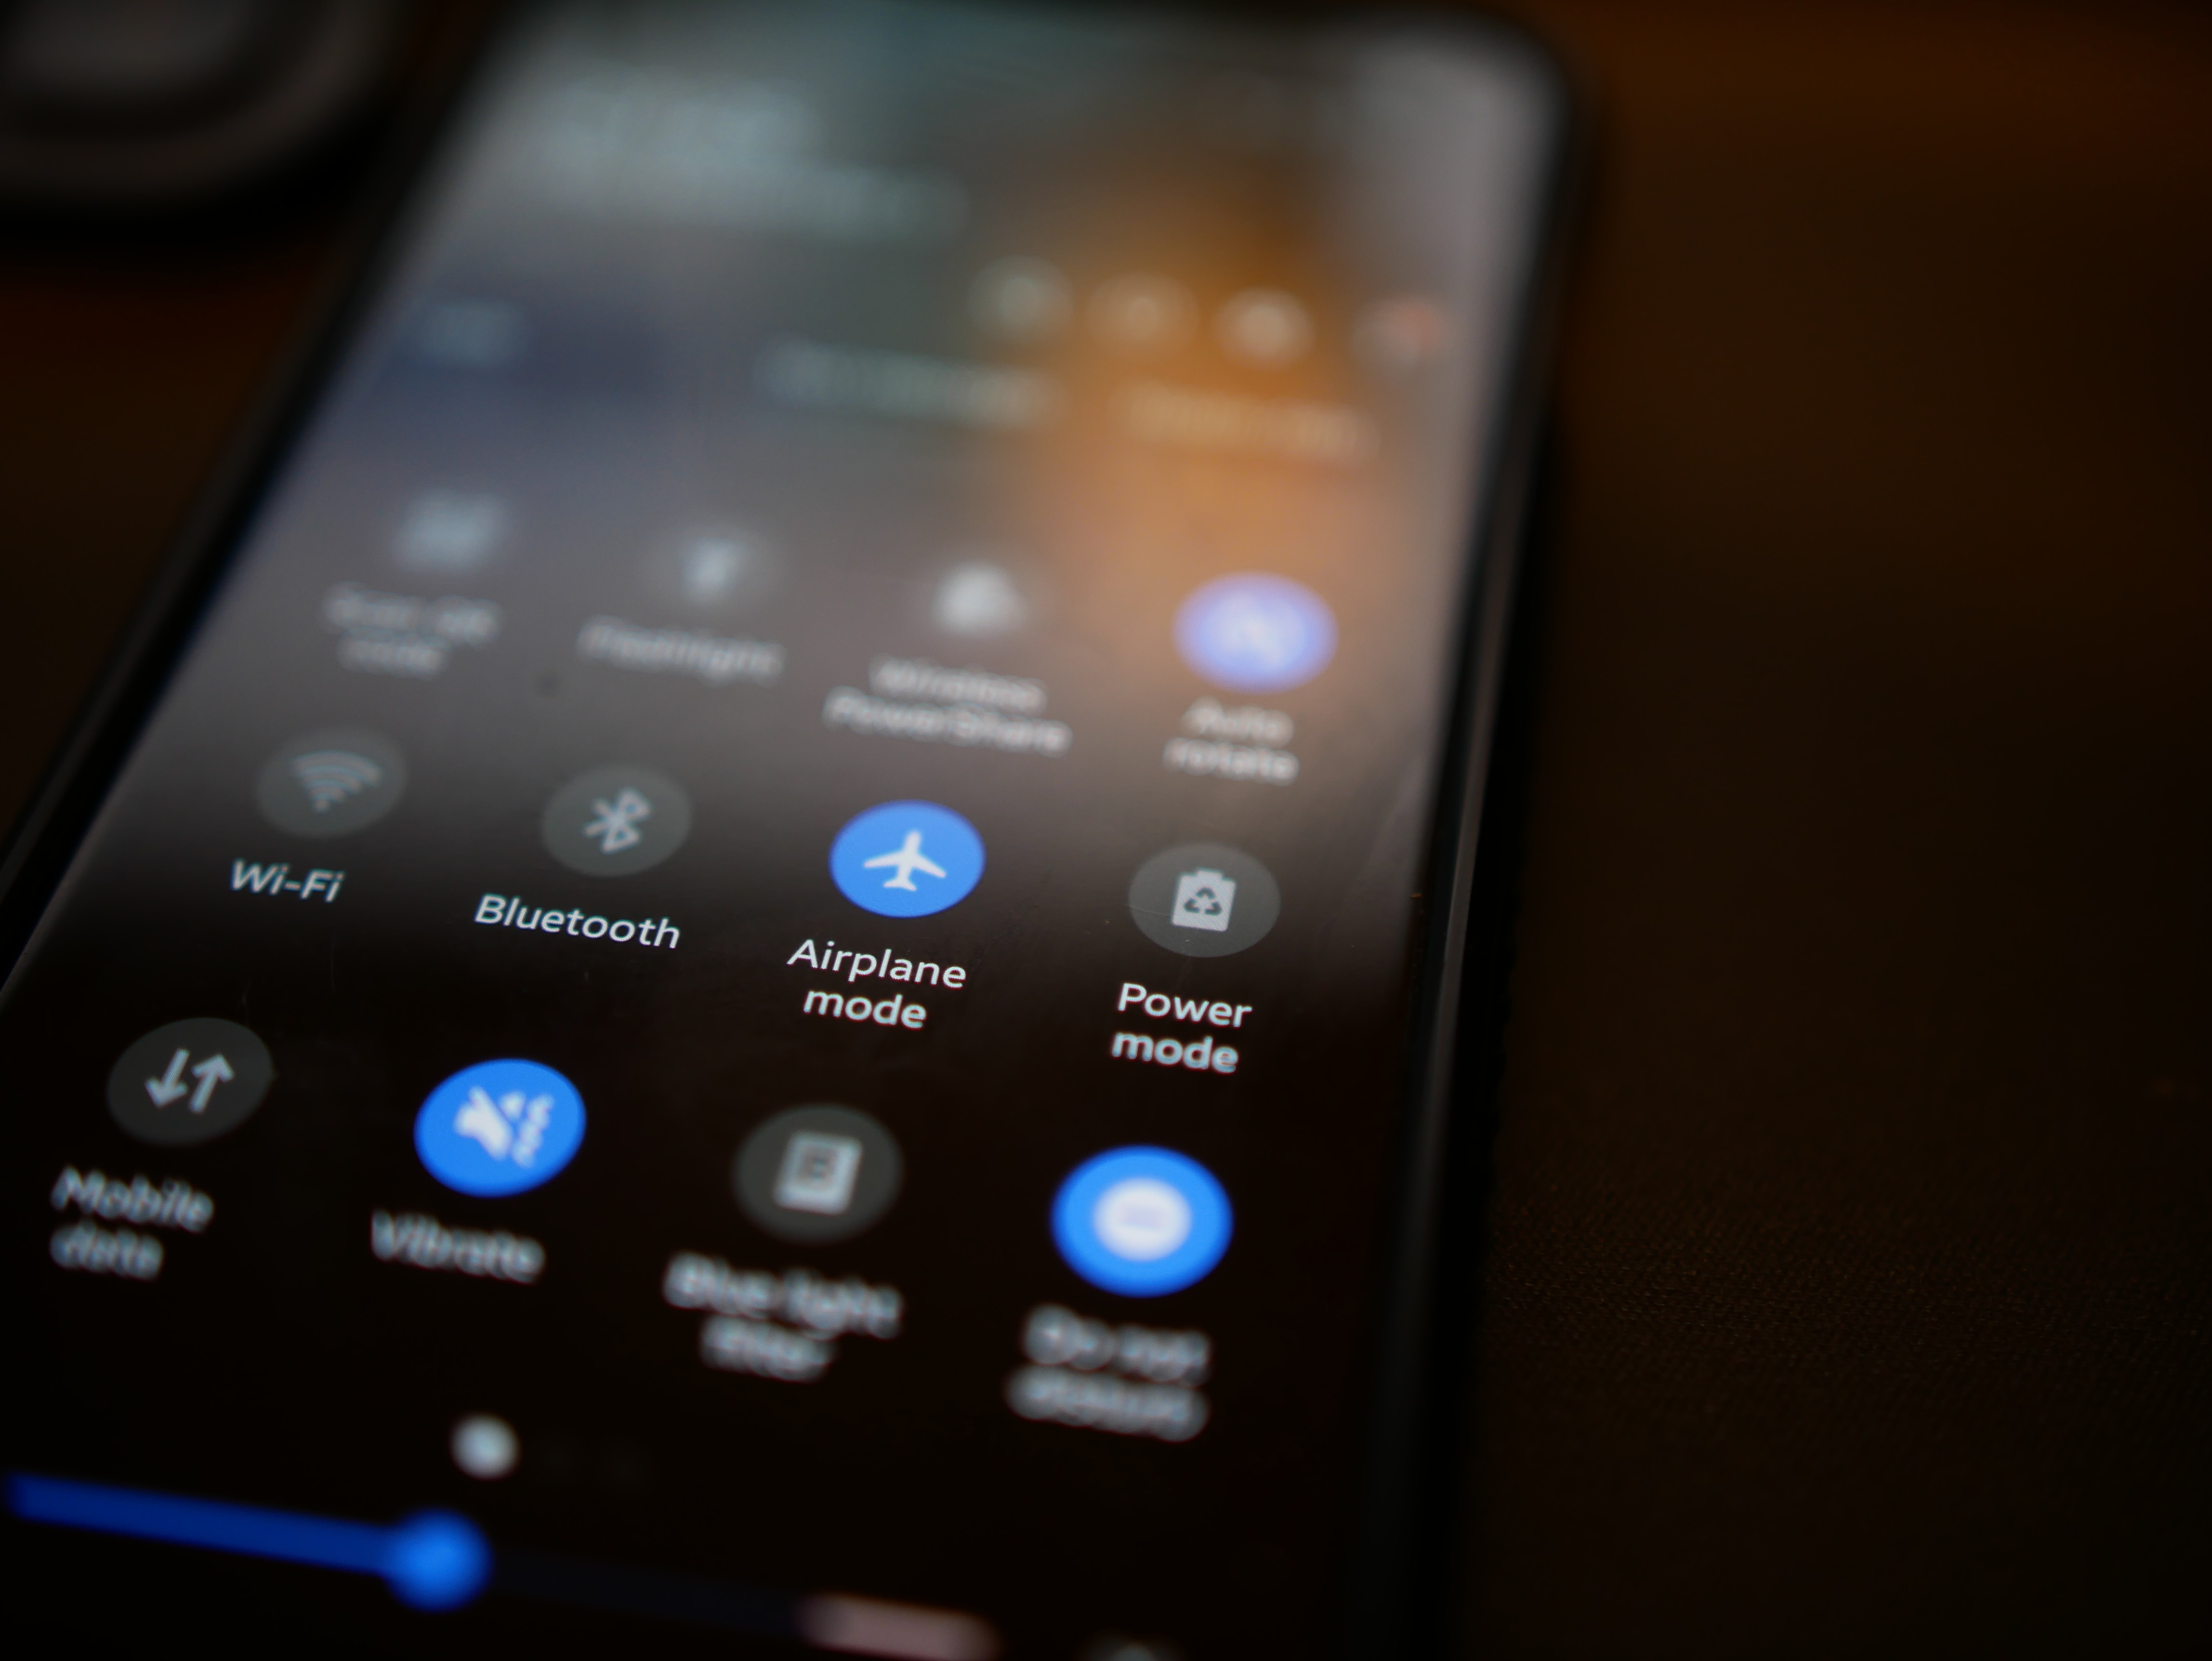
Make sure that you turn the Airplane mode off and your Wi-Fi on. Check the connection and test your internet speed to see if everything works properly.
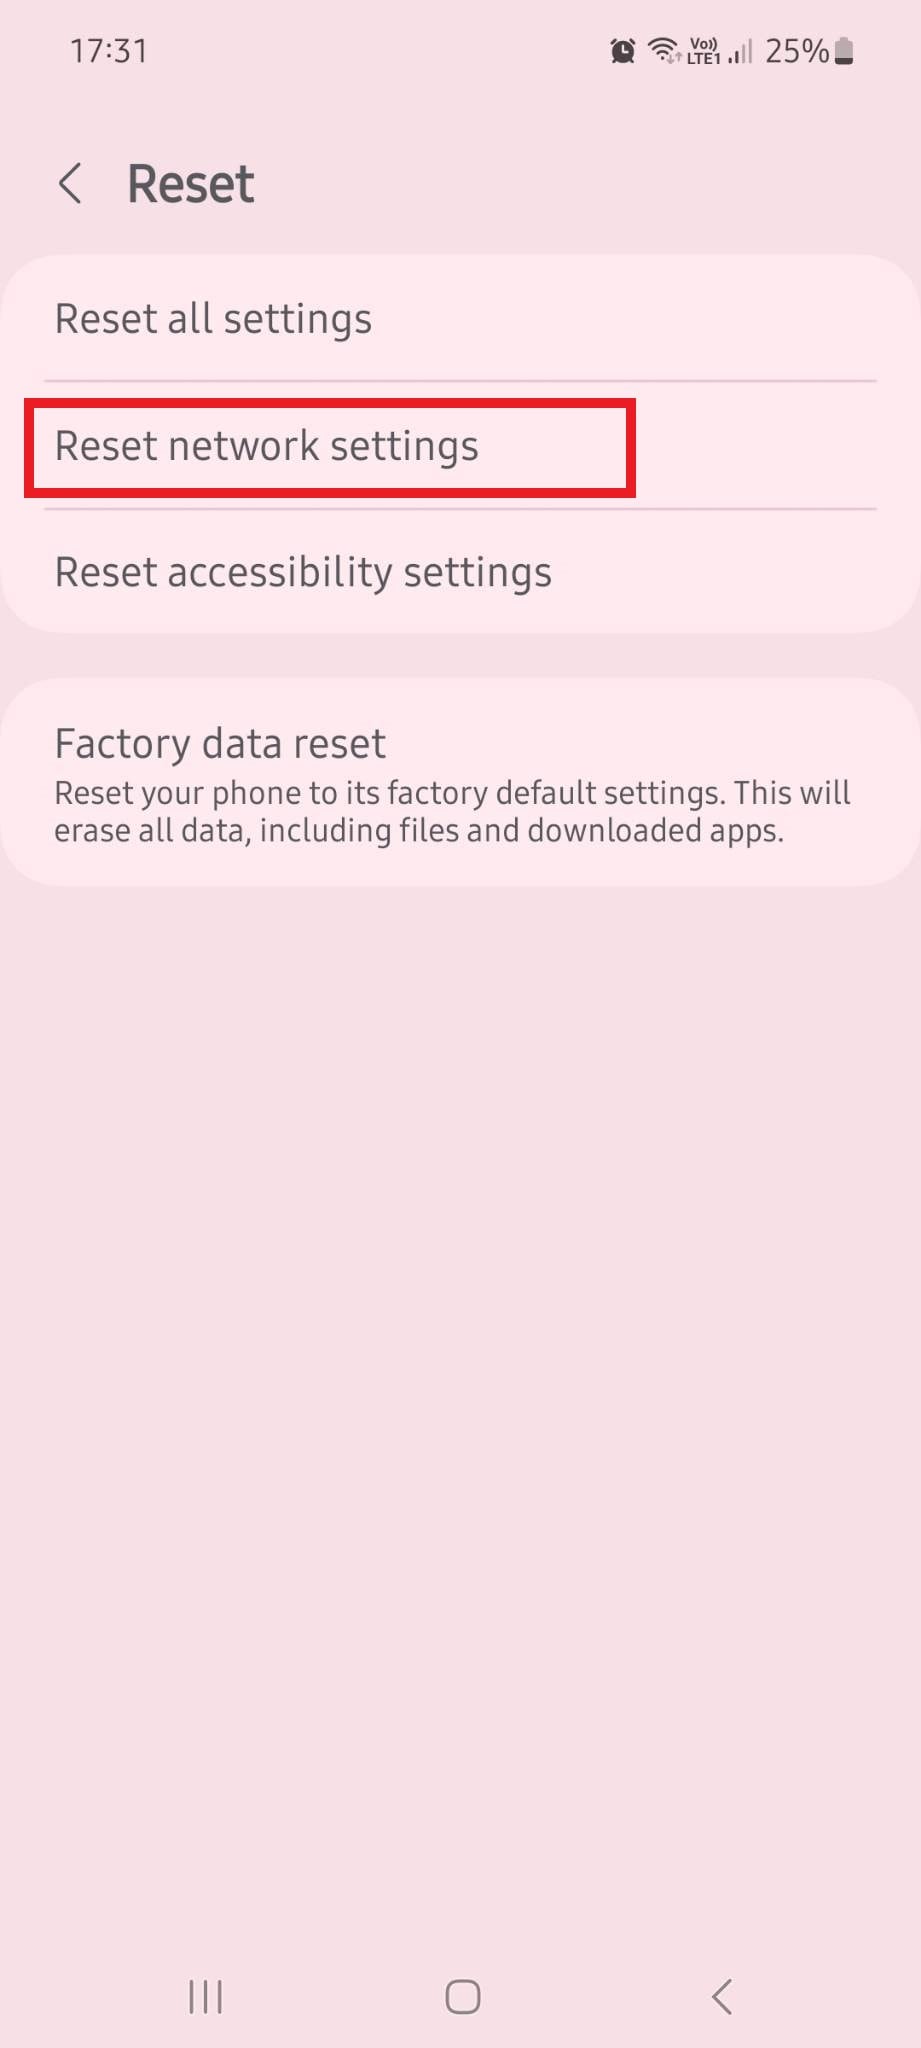
You might need a network reset if your phone can’t connect to a Wi-Fi network. The path might differ between Android devices, but you should be able to find the option for a network reset at the exact location of your factory reset. Go to Settings > General Management > Reset > Reset Network settings > Reset settings.
5. Clear the Cache
The cache stores a copy of your most commonly used data, helping decrease loading time and improve your phone’s performance. However, too much cache data can take up too much space and cause data corruption, preventing you from accessing some of your apps.
On average, you should clear your phone’s cache every few months to ensure that everything runs smoothly. If you encounter issues with your videos not playing on Android, clearing the cache could be just the fix you need.
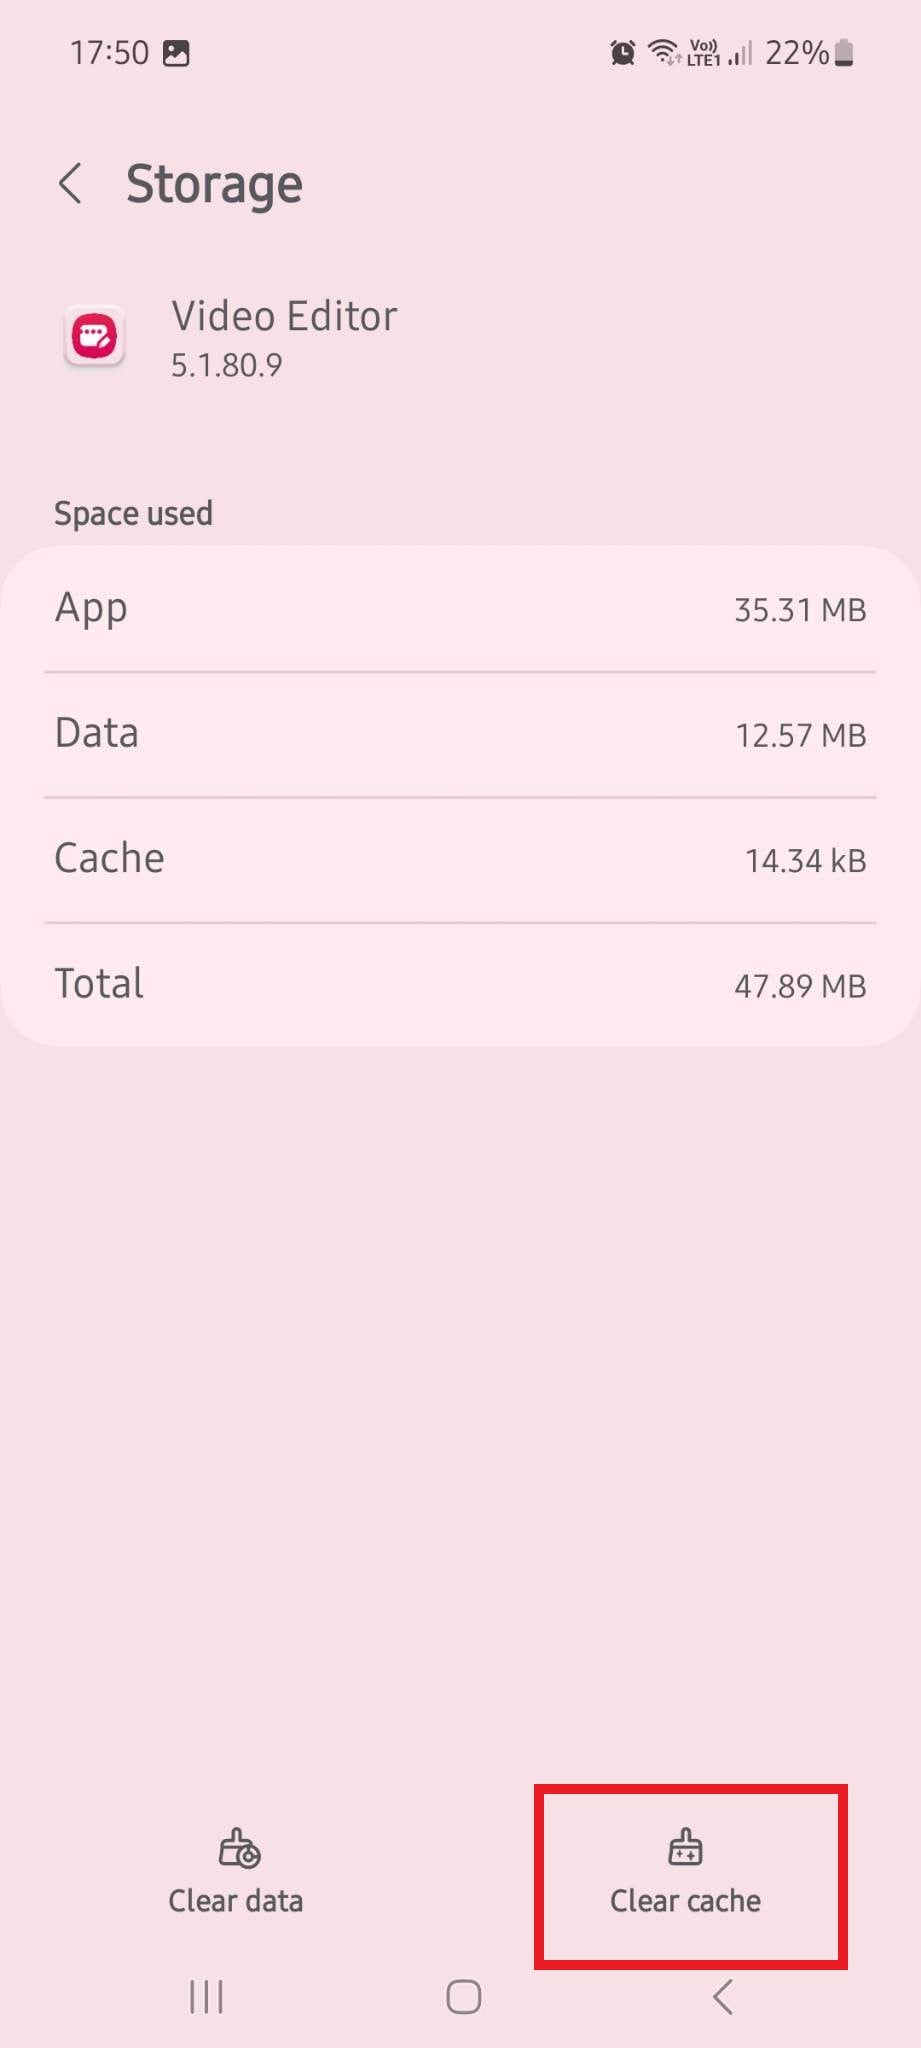
To clear the cache from your apps, you’ll want to go to Settings > Apps. From there, select the app you want to remove the cache from, scroll down to Storage, then choose Clear Cache.
6. Update Android OS
An outdated Android OS is usually the culprit behind many bugs and glitches you may encounter on your phone. It can prevent you from playing video files, accessing apps, taking photos, and more. It can lead to data corruption and loss, expose you to malware and cyberattacks, and compromise phone performance.
Regularly updating your OS to its latest version is always in your best interest. It can solve the problem of your videos not playing and protect you and your sensitive data.
7. Repair Your Android OS

You might already have the latest version of Android OS, but that still doesn’t mean your OS is functioning as it should. Maybe your phone was interrupted while downloading or installing the new OS version. Maybe your phone had underlying OS issues, or you accidentally downloaded files you shouldn’t have. Whatever the case is, if your videos don’t play due to an OS problem, you’ll need to repair your OS.
The best way to do it is with a reliable Android OS repair solution like Wondershare Dr.Fone.
Fast, efficient, and powerful, Wondershare Dr.Fone can repair your Motorola Moto G14 in several simple steps:
- Step 1: Download and launch Wondershare Dr.Fone on your PC.
- Step 2: Go to Toolbox, then use a cable to connect your Motorola Moto G14 to your PC.

- Step 3: Select System Repair > Android.
- Step 4: In the new window, select Start.

- Step 5: Fill in information about your phone’s Brand, Name, Model, Country, and Carrier.
- Step 6: Agree with the warning and select Next.

- Step 7: Follow the on-screen instructions to put your device in Download Mode.
- Step 8: Wondershare Dr.Fone will automatically start downloading the necessary firmware, so wait for the process to finish.

- Step 9: When the download is complete, select Fix Now to install it.
- Step 10: Type 000000, then select Confirmto continue fixing your device.

- Step 11: Wait for the Repairing Nowprocess to finish.
- Step 12: Once the process is complete, click Done.
If the reason your videos wouldn’t play on your Motorola Moto G14 was a fault in the OS, everything should be functioning well after repairing your phone with Wondershare Dr.Fone.
Remember that repairing your device with Wondershare Dr.Fone might result in data loss. Back up all your essential data before fixing your OS using this software to stay safe.
8. Update the Video App
Sometimes, it’s not the outdated OS version causing issues but rather the out-of-date video app. Like OS updates, app and other software updates often contain fixes for common problems and security patches. Not every update is there simply to introduce new features.
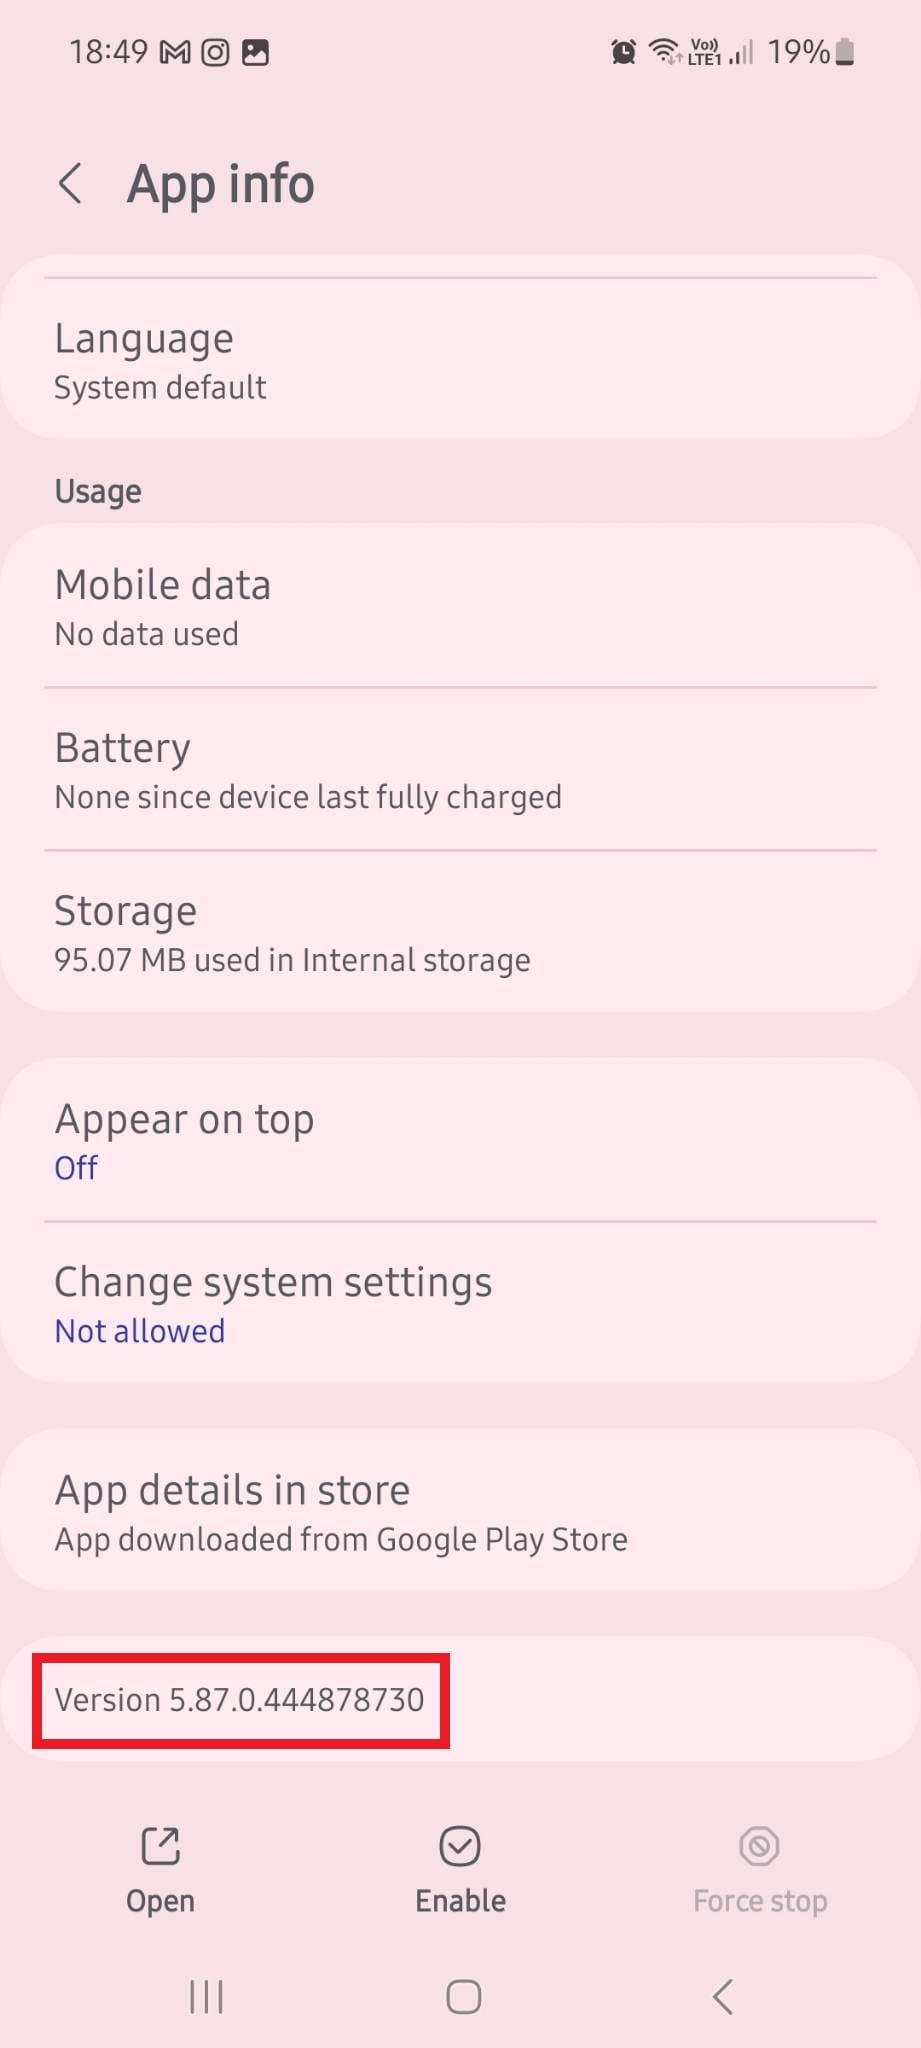
To check whether you’re using the latest version of your video player, go to Settings > Apps. Find your video player app, tap it, and scroll down to the bottom of the page to see the version installed on your phone.
9. Clear Cookies and Browsing Data
If online videos are causing problems, not your recorded or downloaded ones, you might be due for a quick cookie and browsing data clearing.
Cookies are usually there to improve the user experience, allowing you to load websites faster and enjoy improved performance. However, if your cookies and browsing data occupy too much space, they could pose problems.
You’ll first need to launch your mobile browser to clear cookies and browsing data. If you’re using Google Chrome, the process is simple and streamlined. Tap the three dots in the upper right corner and go to Settings. From there, go to Privacy and security > Clear browsing data > Clear data.
10. Reinstall Video Apps
If you still have issues with videos not playing on your Motorola Moto G14, you could try deleting and reinstalling your video apps. Sometimes, simply updating the video app might still retain the glitch causing problems. However, if you delete it in its entirety and then install it again, the issue should be gone.
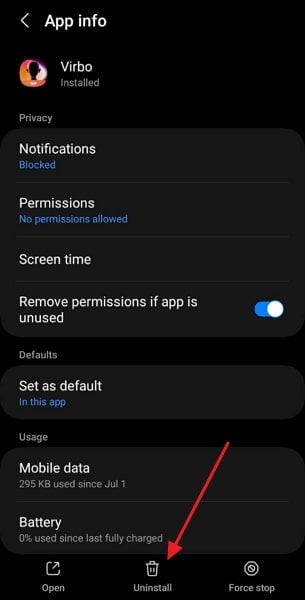
To uninstall the video app on your Android, go to Settings > Apps. Locate the app you want to delete, then tap Uninstall at the bottom of your screen.
To reinstall it again, go to the Google Play Store, search for the video app you want to have, then click Install.
 safe & secure
4,974,400 people have downloaded it
Conclusion
Like other smartphones, Android devices occasionally encounter glitches when playing video files. In most instances, the solution can be as simple as restarting your device. In others, you might have to perform a full factory reset or use software like Wondershare Dr.Fone to repair your Android OS.
Whatever the case is, don’t despair. There’s usually a solution that can fix the problem and ensure your device works as expected.
Motorola Moto G14 Camera Not Working Unexpected Error? Fix It Now
For all its glory and goodness, the Android OS often has its users pulling their hair in frustration at just how buggy the OS can be at times. So, if you’re having one of those days today, we are here to help. Camera app is one of the most used apps on smartphones today. People only launch the app when they want to take a photo, for everything else there’s a dedicated photo gallery app. What happens when you launch the camera app only to realize it threw an error and you missed your photo moment? Don’t throw the phone, not yet. Let us help you out.

Part I: Why Is Android Camera Not Working?
There are a few reasons why the camera app is not working on your Motorola Moto G14.
Low Memory
Camera app does rely heavily on system resources, so in case you have too many apps open and for some reason the OS is not able to manage the resources appropriately for the camera app to function as it should, you will get a camera error.
Low Storage
The camera app needs storage space to save the photos it takes. So, in case your phone is running low on storage space, the camera app would likely malfunction as it would have no way to store the photos it would be taking.
General Bugs And Glitches
OS bugs and general glitches within the OS and the camera app can cause camera not working issue anytime during everyday operation. This is part and parcel of any technology.
Hardware Issues
In the rarest cases, there might have developed an actual hardware issue with the camera system on your Motorola Moto G14. The likely culprit is misuse and abuse, such as a dropped phone or maybe the phone was too hot for extended periods of time, causing hardware issues.
Part II: How To Fix Android Camera Not Working Issue?
So, how to get the Android camera not working problem solved? There are a few ways you can try fixing the camera not working issue on your Motorola Moto G14 right where you are, without needing to take the Motorola Moto G14 device to the manufacturer’s service center.
II.I: Restart The Handset
One of the first things to do any time an app or your phone or tablet does not work like it should, restarting the Motorola Moto G14 device refreshes everything just enough to resolve most commonly occurring issues.

Use the power button on your smartphone to restart your Android handset and see if this resolves the issue.
II.II: Close And Relaunch The Camera App
If the camera app (or any app for that matter) has been in the background for a while and then it is brought to the foreground, there are always chances of it crashing for any reason, or not working as expected. So, closing the app completely and relaunching it is recommended.
Step 1: Launch the app switcher on your specific Android device the way your device manufacturer suggests you to. Usually, it is a swipe up and hold gesture to get into the app switcher.

Step 2: Next, you can choose to close just the camera app or, better yet, close all apps by tapping the Close All button. Flicking any app upwards (quick upward swipe) is how you close an app. If there is no Close All button anywhere, repeat the gesture for all open apps.
II.III: Check App Permissions
These days, thanks to strides in the privacy initiatives, apps need permissions before they can function the way they do. Most of the times, apps such as camera do have the necessary permissions, but sometimes it is possible that the permissions are set incorrectly. To check if the camera app has the requisite permissions, do the following:
Step 1: Go to Settings > Apps > Camera > Permissions.

Step 2: Tap Camera.

Step 3: See if the selected option is Allow Only While Using This App. If not, select it.
II.IV: Clear The Camera App Cache
Clearing the camera app cache is sometimes helpful. To do that:
Step 1: Go to Settings > Apps > Camera and tap Storage Usage.

Step 2: Tap Clear Cache.

II.V: Clear The Photo Gallery App Cache
The camera app is closely tied to the photo gallery app that comes baked in into Android OS. That is because photos that the camera app takes are stored in the photo gallery app. Consequently, if there were any issues in the photo gallery app, that could lead to the camera app not working on Android problem. Here’s how to clear the photo gallery app cache:
Step 1: Go to Settings > Apps > Photos > Storage Usage.

Step 2: Tap Clear Cache.
II.VI: Check For App Updates
This does not happen always, but sometimes, with known bugs and issues, there may be an update released that fixes those bugs and issues that prevent some users from using a given app reliably. Checking for updates is a good step to make sure that your camera app is updated to the latest version possible.
Step 1: Go to Play Store and tap your profile picture on the right.

Step 2: Tap Manage Apps and Device.

Step 3: If there are updates available, Tap Update All to update all apps.
II.VII: Cool The Phone Down
We do not realize the immense power that is packed into the thin smartphone form factor these days. If you have been using the phone to video chat for a while now, you might not realize that the phone has become hot, especially if you are using a desk stand. Same for shooting high-resolution videos; the phone does get quite hot shooting high-resolution videos.
If this is the case, close all apps and let the phone cool down. You might even want to shut the phone off to help cool it faster.
II.VIII: Nudge The Camera System
You may want to tap your camera system (the lenses and surrounding area) gently to see if that gets the camera working. In case it did, this is indicative of a hardware issue, and you should get it checked at the service center at your earliest convenience.
II.IX: Fix Android Camera Not Working Issue In One Click (With Dr.Fone)
Now, if the above fixes have not worked, you might want to repair your Android OS once before you make that appointment with the service centre. And, we have just the app to help you fix your camera not working on Android problem quickly.
Wondershare Dr.Fone is a multi-module app that works on both Windows and macOS and is the only app you will ever need to resolve nearly all of your smartphone and tablet issues that you are likely to encounter. Need to take backups? Dr.Fone Phone Backup has you covered with the ability to take and restore even selective backups, and to any location such as your computer or an external disk as well. Want to transfer WhatsApp chats to a new phone? Use WhatsApp Transfer to do just that! Bought a new phone? Use Phone Transfer to transfer contents from old phone to new, and then use Dr.Fone Data Eraser to securely wipe your old phone before giving it away!
Today, we will use Dr.Fone’s System Repair (Android) module to fix Android camera not working issue quickly.
Download Dr.Fone here.
safe & secure
Step 1: Launch Dr.Fone app on your PC or Mac.
Step 2: Click System Repair module and then Android.

Step 3: For now, don’t bother with the scenarios given and click Start to go to the next screen.
Step 4: Your Android device will be detected by Dr.Fone. If anything seems incorrect, use the dropdown options to change it, and click Next.
Step 5: Your phone needs to be put into Download mode before it can be repaired. Follow the instructions shown onscreen and click Next.

Step 6: Dr.Fone automatically downloads the most recent firmware for your device and when it is ready, waits for your input. Click Fix Now to start the repair process.

Step 7: You will need to enter a 6-digit code (digit zero, six times – 000000) to confirm and begin the repair process.
When the repair is complete, Dr.Fone shows the final screen as below:

safe & secure
Conclusion
The camera app on your smartphone is one of the most important apps you use. This is not a game; this is an app that makes previous memories possible for you. So, when you get any of those incorrigible errors that are impossible to make sense of, what do you do? This guide gives you 9 fixes to fix Android camera not working error quickly and easily.
9 Solutions to Fix Motorola Moto G14 System Crash Issue
Android crash, better known as Android system crash is not a recent issue and has troubled many users in the past as well. It means when your device crashes suddenly and refuses to turn on again or when your device freezes and becomes unresponsive. It may also happen that your Motorola Moto G14 crashes abruptly but boots up normally only to crash again after a few minutes or hours. Android Crash sounds like a very serious problem and something that could damage your device or permanently destroy the software, but Android system crash can be dealt with easily. Just in case you suffer from an Android crash and want to know how to fix the Android system crash issue, rest assured that this problem is fixable. There are various ways to tackle the situation, to be discussed further, and you may choose the one that best suits you.
In this article, we will also talk about a unique technique to retrieve the data from your device on which Android system crash issue occurs. So let’s go ahead and read on to know more to fix the Android crash error.
Part 1: How to rescue data the Android system crashes?
When you encounter an Android system crash, before looking for solutions to fix it, make sure you retrieve all your data and information stored on your device. This might sound tedious but a very important step indeed.
Dr.Fone - Data Recovery (Android) is currently one of the most popular tools to retrieve data from not only broken or damaged, locked devices, and unresponsive devices but also from devices that face an Android system crash. You may try the software for free for scanning the data to understand its work. Dr.Fone’s Data Extraction tool not only retrieves and back-up contacts and messages but also your photos, videos, audio files, WhatsApp, docs, call logs, and other file folders. It is also equipped to retrieve data from the Motorola Moto G14 device’s internal memory as well as Google drive.
Dr.Fone - Data Recovery (Android)
World’s 1st data retrieval software for broken Android devices.
- Recover data from broken devices or devices that are damaged in any other way such as those stuck in a reboot loop.
- Highest retrieval rate in the industry.
- Recover photos, videos, contacts, messages, call logs, and more.
- Compatible with Motorola Moto G14 devices.
3,623,313 people have downloaded it
You may follow the steps given below to rescue your data from crashed Android devices.
1. Download and install the software on your PC. Run the software and then select the Data Recovery feature. Using a USB, connect your Motorola Moto G14 to the PC.
2. Select “Android” > “Recover from Broken Phone” in the lower right corner.

3. Choose the “Touch screen not responsive or cannot access the phone” to continue.

4. You will now see device options before you. Select yours and move on to feed in your device name and model details.

5. Now press the volume down, power, and home button on your device together to boot the phone in Download mode.

6. As long as your phone is in Download mode, the software will start to analyze phone data.
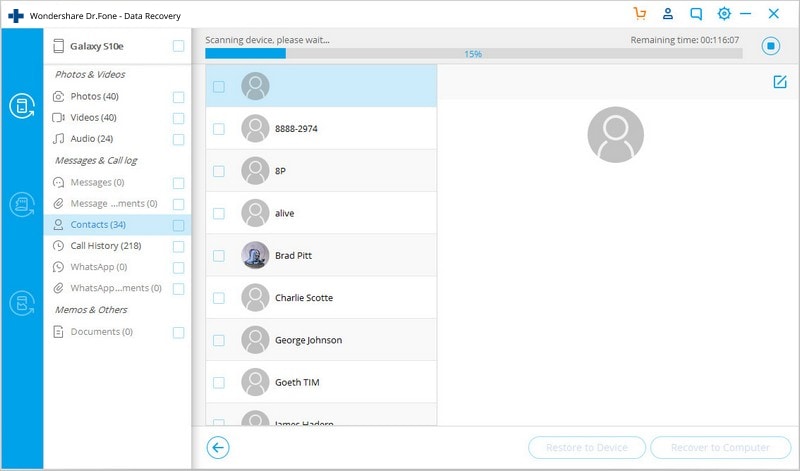
7. Finally, the process will take a few minutes to scan and display your phone data. Select “Recover to Computer” to retrieve all data on your PC as a backup.

Using Dr.Fone Damage Extraction software is intuitive and very safe. It prevents data loss and allows you to adopt various ways to recover your device from the Android system crash issue.
safe & secure
Part 2: Why does my Android phone system keep crashing?
Encountering a persistent issue like the Android phone system constantly crashing can be highly frustrating and disruptive. This part delves into the underlying causes of this problem. By understanding these reasons, you can take informed steps to troubleshoot and rectify the issue, ensuring a smoother and more enjoyable smartphone experience.
- Software Glitches and Bugs
- Incompatible or Poorly Optimized Apps
- Outdated Operating System
- Corrupted System Files
- Malware and Security Threats
- Hardware Overheating
- Physical or Hardware Issues
A crashing Android phone system can be attributed to a variety of factors, ranging from software glitches and compatibility issues to hardware-related problems. Keep reading to get it solved!
Part 3: Restart your Motorola Moto G14
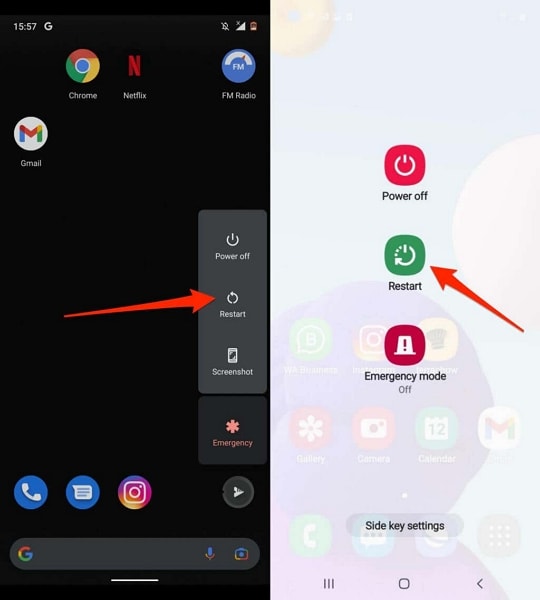
Once you have successfully retrieved your data, consider solving the Android crash issue as soon as possible. Before you redirect to a proper solution for repairing your Motorola Moto G14 system, you can try restarting your device as a quick remedy. Restart the Android device to clear temporary system data and potentially resolve any software glitches causing the crash, which can be done as follows:
Instructions: Hold your Motorola Moto G14’s “Power” button on the side of the phone. As the following window appears on the screen, select the “Reboot” option to restart the Android device successfully.
Part 4: Shut down unnecessary running apps
Another quick solution to avoid Android devices crashing is to shut down unnecessary apps running in the Motorola Moto G14 device’s background. To cater to that, you need to try out the following steps as a remedy to shutting down unwanted applications:
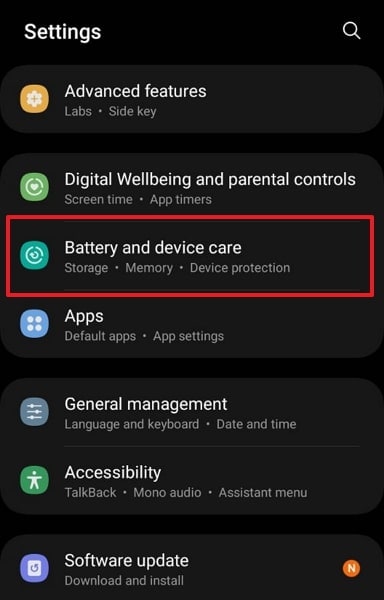
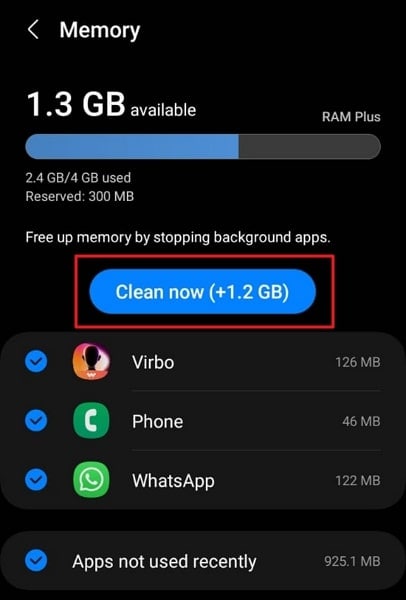
Step 1: Open the “Settings” of your Motorola Moto G14 and continue to the “Battery and device care” section from the available options. Continue to the “Memory” section on the next window to lead to the applications taking up space on your Motorola Moto G14.
Step 2: As you progress further, you need to select the “Clean now” button to shut down all unnecessary background applications running on the Android.
Part 5: Uninstall incompatible Apps to fix Android crash issue
If your Android system crash takes place frequently but the Motorola Moto G14 device turns on normally after that, there is a chance that some Apps may be causing the problem. Unnecessary and large App files burden the Motorola Moto G14 device system and force it to crash every now and then. Make sure you download, install and store only those Apps which are fully compatible with your Android system. DO NOT download Apps from other unknown sources and use only Google Play store for the purpose. All other incompatible Apps must be deleted to prevent them from tweaking your software.
To uninstall unwanted and incompatible Apps, please follow the steps below.
1. Visit “Settings” and search for “Application Manager” or “Apps”.
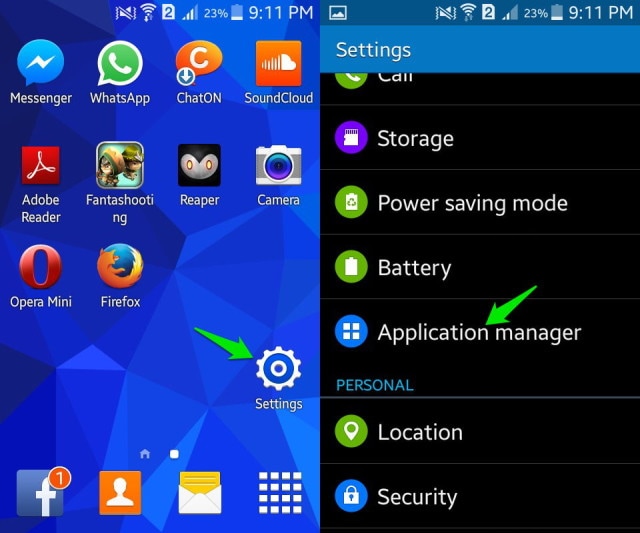
Select the App you wish to uninstall. From the options that appear before you, click on “Uninstall” to delete the App from your device.
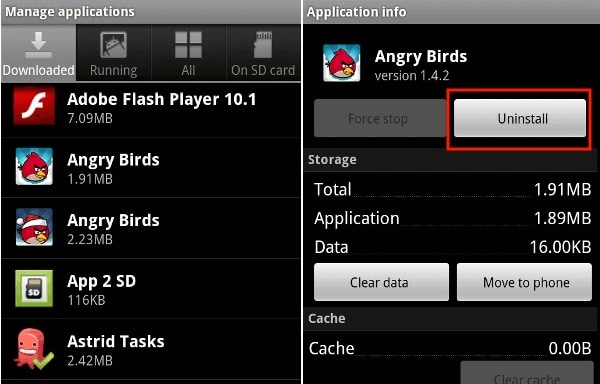
You may also uninstall an App directly from the Home Screen (only possible in certain devices) or from the Google Play Store.
Part 6: Check Android storage and free up space
If you are constantly facing issues of your Motorola Moto G14 crashing, there is a possibility that your device’s storage is full. The need to free up space arouses the need to know about the potential steps for checking storage and cleaning up space, which is discussed as follows:
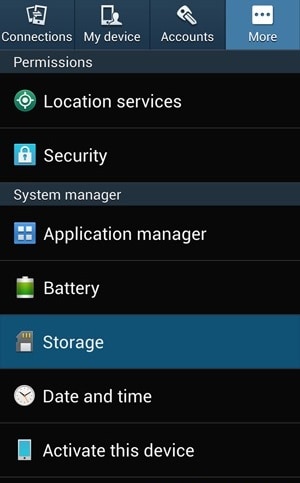
Step 1: You need to navigate into “Settings” and look for the “Battery and device care” section. As you lead next, select the “Storage” option to check the Android storage and see how it is segregated.
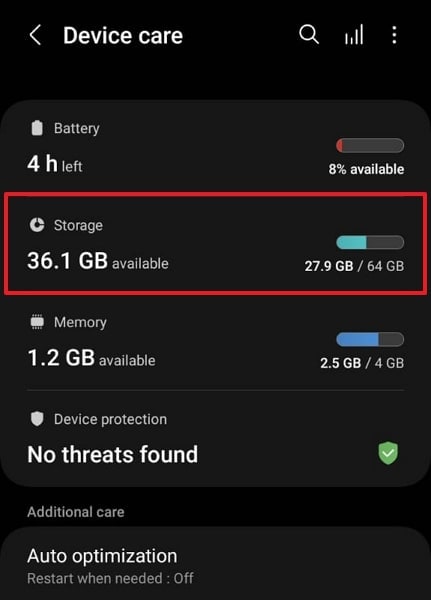
Step 2: As you navigate to the next screen, you can free up space by removing the applications from your Android. For that, tap on “Apps” to open a section containing the list of applications installed on the Android.
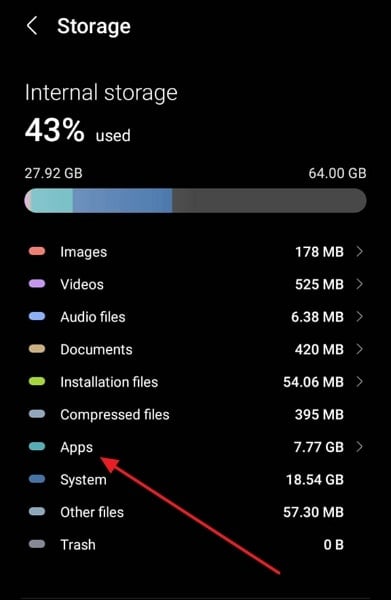
Step 3: Go through the list of applications and select any app you want to remove. As you navigate next, select “Uninstall” to lead to removing the app from the Android device.
Part 7: Clear cache partition to fix Android crash issue
Clearing cache is a good idea because it cleans your device and reduces the burden on the Android software and gives it enough space to function normally and carry out its operations.
In case the Android system crash issue is temporary, follow the steps given below to clear your device’s cache:
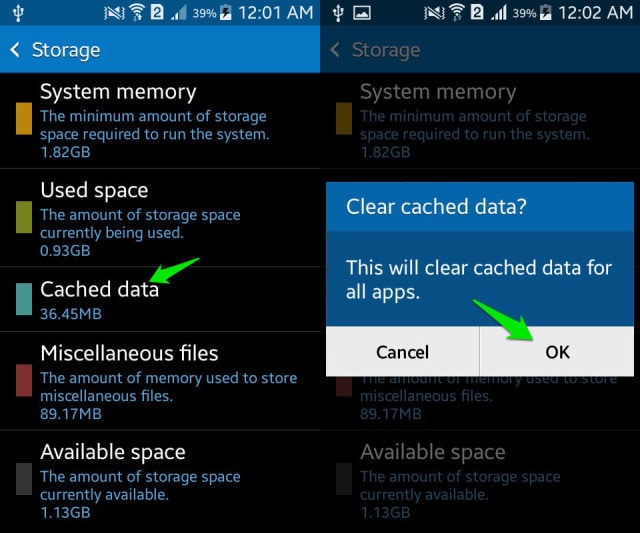
1. On your Motorola Moto G14, visit “Settings” and find “Storage”
2. Now tap on “Cached Data”, and then click “OK” to clear all unwanted cache from your device as shown above.
However, if the Android crash problem is such that your phone has frozen, becomes unresponsive, and does not turn on, you must first boot into the Recovery Mode screen.
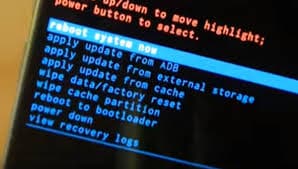
1. Press the volume down button and power button together until you see a screen with multiple options before you.
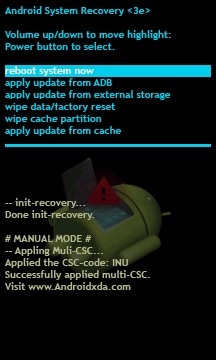
2. Once you are on the Recovery Mode screen, use the volume down key to scroll down and select ”Wipe cache partition” as shown below.
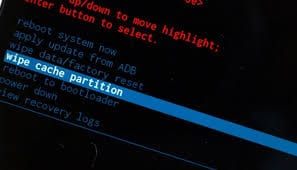
3. After the process is completed, select “Reboot System” which is the first option in the recovery mode screen.
This method will help you erase all the clogged-up and unwanted files and resolve the Android system crash issue. If clearing cache doesn’t help, try formatting your SD Card.
Part 8: Remove the SD card to fix the Android crash issue
Removing and formatting your SD Card to fix the Android System crash issue is helpful when a corrupted SD Card disturbs the Android software forcing it to shut down suddenly.
To format your SD Card, just follow the instructions below.
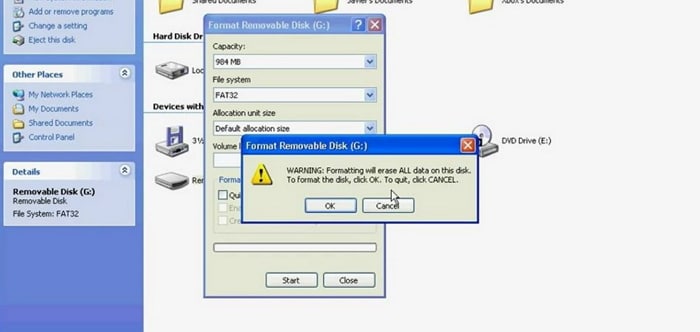
1. Firstly, eject it from the Motorola Moto G14 device.
2. Then using an SD Card reading tool, insert the Card in your PC. Open Computer and then right-click on the SD card to format it.
Part 9: Update to the latest software version
Updating the Android device will cast out all glitches that prevent it from operating properly. For that, let’s look into the steps explaining how to update your Android software version to the latest option:
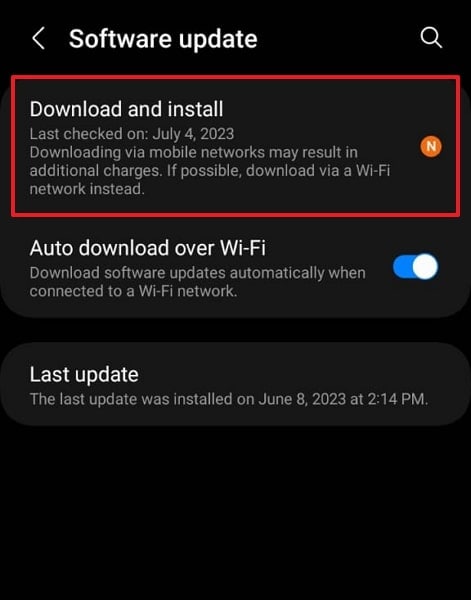
Step 1: As you lead into the “Settings” of your Android, scroll down and look for the “Software Update” option.
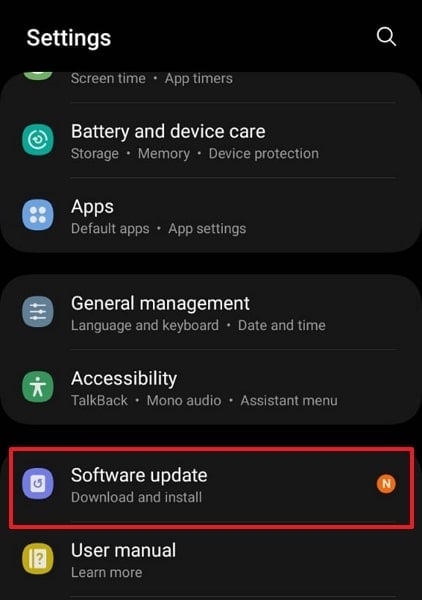
Step 2: On leading to the next screen, select the “Download and Install” option to continue updating your Android to the latest version.
Part 10: Use Wondershare Dr.Fone – System Repair To Fix Android System Crash
If you are not getting any specific solution to the problem, you can try fixing the Android system crash problems using specific tools. These third-party tools can be an excellent option for resolving system errors in Android devices. Wondershare Dr.Fone – System Repair (Android) is a great tool designed to resolve all system issues in Motorola Moto G14] and other smartphones.
It features a great system providing a one-click Android repair option for fixing all kinds of problems. Along with fixing all basic and advanced Android system issues, it features support for multiple Android devices.
Key Features of Wondershare Dr.Fone – System Repair (Android)
![]()
Dr.Fone - System Repair (Android)
Repair Android System Errors without Any Trouble.
- Fix your Android to normal, no skills required.
- Fix various Android system issues, stuck in boot loop , black screen , or won’t turn on , looping on start, etc.
- The high success rate in resolving Android system issues.
- Compatible with a wide range of Android devices and OS versions
- User-friendly interface with easy-to-follow steps.
3981454 people have downloaded it
As we redirect to resolving Android system errors using Wondershare Dr.Fone – System Repair, let’s look into some essential features that make up the entire tool:
- Features support for all the latest Android devices up to Motorola Moto G14 S22.
- It can help you resolve issues like Android’s black screen of death, being stuck in the boot loop, and many more.
- Provides an easy interface to execute procedures, making it a simple tool with no learning curve.
Steps To Repair Android System Crash Issue Using Dr.Fone – System Repair (Android)
Let’s redirect to the steps that can be used to repair Android system crash issues using Wondershare Dr.Fone – System Repair (Android):
Step 1: Launch and Open System Repair Tool
You need to download and install the latest version of Wondershare Dr.Fone on your computer. Proceed to launch and navigate into the “Toolbox” section. Look for the “System Repair” option and initiate the process while ensuring the Android device is connected to the computer through a USB cable.
Step 2: Start Repairing the Android
After selecting the nature of the Motorola Moto G14 device you want to repair, navigate to a new window where you need to click “Start” to initiate the system repair process.
Step 3: Define the Parameters of Device
You will be redirected to a new window where you need to define and verify some parameters before repairing the Android. Select the “Brand,” provide a “Name,” select a “Model,” and provide a country where it has been bought. Define the “Carrier” and click “Next” after confirming.
Step 4: Put Android in Download Mode
Whatsoever Android you own, you need to put it in Download Mode, depending on the buttons that the Motorola Moto G14 device has. The repairing process initiates as you enter the Download Mode, and new firmware is downloaded on the platform.
Step 5: Fix the Firmware of Android
Once it downloads and is verified, click the “Fix Now” button to repair the Android successfully. You may need to provide a PIN to confirm the process. Once provided, the next screen shows the progress of the repair process. As it completes, click the “Done” button to conclude fixing the Android system crash issue.
safe & secure
Part 11: Factory reset the Motorola Moto G14 device to fix the Android crash issue
Factory Resetting is advisable only when nothing else works. Also, there are two ways of doing it depending on whether the Android crash is permanent or temporary.
Follow the steps given below to factory reset your device while it is switched on:
1. Visit “Settings”.
Now select “Backup and Reset”.
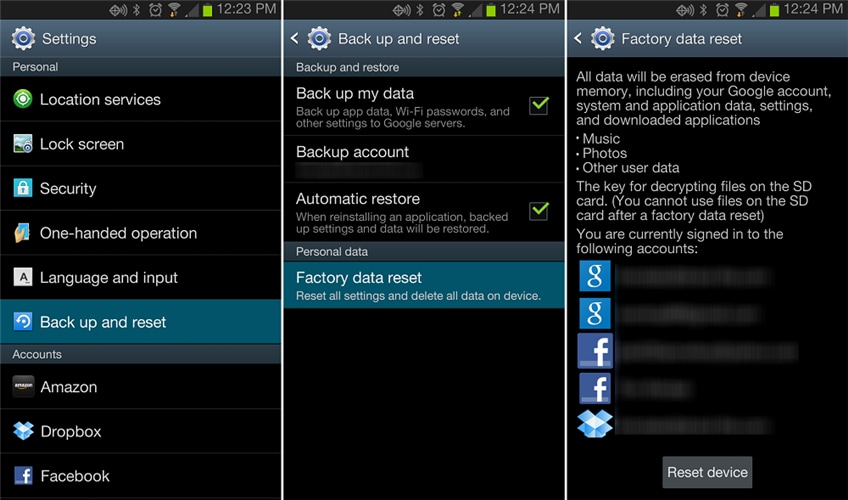
In this step, select “Factory data reset” and then “Reset Device” to confirm Factory Reset.
The process of factory resetting your Motorola Moto G14 is risky and cumbersome, as it deleted all data, but it helps to fix the Android System crash error.
You may also follow the instructions given below to Master set your device in Recovery Mode if it won’t turn on after an Android system crash has taken place:
When you are at the Recovery Mode screen, scroll down using volume down key, and from the options given, select “Factory Reset” using the power key.
Wait for your device to perform the task and then:
Reboot the phone in Recovery Mode by selecting the first option.
Bottomline, the tips given above have helped many to solve the Android system crash issue. So do not hesitate to try them, but don’t forget to extract your data with Dr.Fone’s Data Recovery tool.
safe & secure
Also read:
- [New] In-Depth Look 10 Must-Have Terraria Mods
- Boost Your Setup with HP Thunderbolt G2 Docking Station - Secure Your Device with Proven Drivers (Download Now)
- Cambia Tus Fotos De Formato AVI a MP4 Sin Coste Adicional Con Nuestra Herramienta en Línea
- Gmail Not Working on Nubia Red Magic 9 Pro+ 7 Common Problems & Fixes | Dr.fone
- Guide: Converting Your GyaO Yahoo Videos Into High-Quality MP4/AVI Format on PC & Mac
- How Do I Stop Someone From Tracking My Nokia C22? | Dr.fone
- How to Fix Unfortunately, Contacts Has Stopped Error on OnePlus Nord CE 3 Lite 5G | Dr.fone
- How To Restore a Bricked Honor Magic 6 Pro Back to Operation | Dr.fone
- How To Unbrick a Dead HTC U23 Pro | Dr.fone
- How to Unlock iPhone 13 mini with IMEI Code?
- In 2024, How To Simulate GPS Movement With Location Spoofer On Honor Magic 6 Lite? | Dr.fone
- Oppo A79 5G Camera Not Working Unexpected Error? Fix It Now | Dr.fone
- Quick Driver Setup for Your Dell Latitude E6420 Laptop
- Reasons for Honor Magic 6 Stuck on Startup Screen and Ways To Fix Them | Dr.fone
- Reliable User Guide to Fix Honor 90 Running Slow and Freezing | Dr.fone
- Restore Missing App Icon on Vivo Y36 Step-by-Step Solutions | Dr.fone
- Spotify Keeps Crashing A Complete List of Fixes You Can Use on Motorola Moto G23 | Dr.fone
- Title: My Videos Arent Playing on Motorola Moto G14 – What Can I Do? | Dr.fone
- Author: Abel
- Created at : 2024-12-08 16:52:34
- Updated at : 2024-12-10 17:25:01
- Link: https://fix-guide.techidaily.com/my-videos-arent-playing-on-motorola-moto-g14-what-can-i-do-drfone-by-drfone-fix-android-problems-fix-android-problems/
- License: This work is licensed under CC BY-NC-SA 4.0.