
Nokia XR21 Not Connecting to Wi-Fi? 12 Quick Ways to Fix | Dr.fone
Nokia XR21 Not Connecting to Wi-Fi? 12 Quick Ways to Fix
Nowadays, it’s pretty much essential to have your Nokia XR21 or smartphone connected to the internet. Whether you’re watching videos, looking something up, or using any kind of app, you need the internet for these applications to function correctly.
This is why it can so annoying when it gets to a point where the internet connection isn’t working. However, the problem of a web page not loading correctly is just the tip of the iceberg.
There are plenty of problems you could experience, whether it’s the Wi-Fi network keeps disconnecting on its own without any warning, perhaps a security issue where the passcode or IP address isn’t being registered properly, or even if the connection is just being super slow, even if there’s no reason too.
Luckily, despite there being so many problems out there, there are also many solutions. Today, we’re going to share with you the complete definitive guide to help you get your Nokia XR21 connected and free from problems and issues.
Part 1: Restart your Nokia XR21
Begin by powering off your Nokia XR21 and unplugging your router. Wait for about a minute before plugging in the router and turning on your device. This simple reset can often restore stable connections and fix Android wifi not working.

Part 2: Turn on Airplane mode and turn off
Turn on Airplane Mode for a few seconds, then turn it off. This maneuver refreshes your device’s network connections and might rectify the Android not connecting to wifi issue.

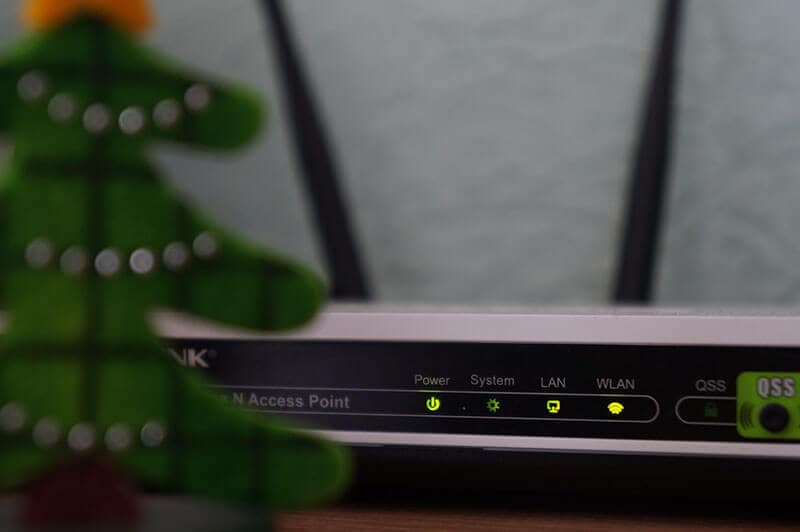
Part 3. Check Wi-Fi Router settings
The third step you’ll want to take is making sure the internet router in your house is working properly and is actually sending internet data to your Nokia XR21. Of course, if you have other internet-enabled devices connected to the same router and they’re working fine, you know this isn’t the problem.
However, if you’ve got a problem with Wi-Fi not working on your Android and other devices in your home or office, you know you’ve got a router problem. Here’s how to solve it.
- Go to your internet router and check the indicator lights
- While this depends on your device, a green or blue light will mean the connection is good, whereas a red light indicates a problem
- Press the Restart button on your router and wait ten minutes before reconnecting your device and connecting again
- Call up your internet provider to see if there’s an internet connection issue in your area
- Open your web browser and log into your router settings to ensure your Nokia XR21 is connected to the Wi-Fi network and is allowed to send and receive data
Part 4. Boot your Android in safe mode
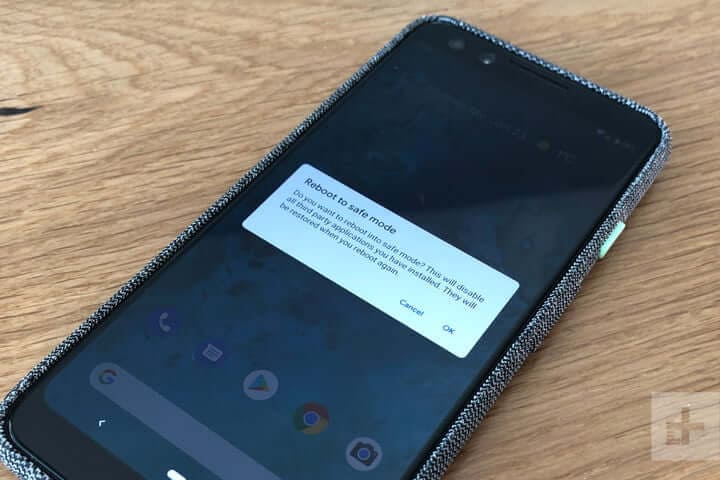
If you’re unable to connect to the internet, but other devices have no issues, you may find the issues is coming from within your Nokia XR21 itself. Fortunately, there are ways you can see whether this is the problem.
The best way to do this is to boot your device in Safe Mode. The process for doing this will depend on the make and model of your Nokia XR21, but the basic process goes as follows;
- Turn off your Nokia XR21 by holding down the Power button and tapping Power Off. Wait a few minutes to ensure the Nokia XR21 device is completely off
- Press and hold the Power button to turn your phone on, but the press and hold both the volume up and volume down buttons at the same time
- You will see the words ‘Safe Mode’ appear on your screen as the Nokia XR21 device loads
- Now you will be booted in Safe Mode. Try connecting to the internet again to see if it works
If your device connects to the internet while in Safe Mode, you’ll know you have a problem with an app or service that’s running on your device. If this is the case, you’ll need to go through your apps and delete them and then reinstall them one at a time until you find the app or service that is causing your internet problems.
Part 5. Check the Android Wi-Fi adapter
If you’re using a Wi-Fi adapter on your device to connect to the internet, you’ll need to make sure this is working. This could be an adapter on your Nokia XR21 itself, especially if you’re using an older device, or if you’re using an adapter to boost the ranger of your router network.
You need to check both of these to make sure your connection is working properly.
- If using an Android Wi-Fi adapter, make sure all the Nokia XR21 device drivers are up to date, and if you’re using an app, make sure the app is updated, and all the settings allow an internet connection
- If you’re using a router adapter, make sure it’s set up properly, and your Nokia XR21 is connected to the adapter using the correct passwords. Try connecting another device to see if the internet connection is working on there
- Whichever method you’re using, try disconnecting your Nokia XR21 and forgetting the network, and then reconnecting and entering the right password to refresh the connection
Part 6. Check SSID and IP address on Android
To make a Wi-Fi connection work, your Nokia XR21 needs to match two codes that connect and relate to your router to establish the connection and work correctly. These are known as the SSID and the IP address.
Every wireless device will have its own codes and making sure they’re matched to the network you’re connecting to is crucial to ensuring the internet is working on your Nokia XR21. Here’s how to check on your Nokia XR21 to make sure everything is correct.
- Tap the Settings menu option, followed by Wi-Fi on your Nokia XR21
- Turn on your Wi-Fi network and connect it to your router
- Find the router name (SSID) and make sure it’s exactly the same as the SSID written on your router
- Once connected, tap the Wi-Fi network and you will see the IP address. Check both your phone and the router codes to make sure this number matches
When these numbers are matching, if your Android is still not connecting to wifi, you’ll know this wasn’t the problem.
Part 7. Fix Android system issues in one click
If none of the solutions above are working, this could indicate a real problem with the firmware and operating system of your Nokia XR21. Fortunately, a fast solution to get everything working again is to completely repair the software of your phone.
You can do this easily using powerful Android recovery software known as Dr.Fone - System Repair (Android) . This is the leading repair tool on the market and is designed to fix and repair any firmware and software problems you may be having.
Dr.Fone - System Repair (Android)
A one-click tool to fix Wi-Fi not working on Android
- Can repair Android from any problem including the black screen of death
- A trusted software application used by 50+ million people around the world
- The most user-friendly mobile repair application available right now
- Supports over 1,000+ Android models and devices
- A world-class customer support team to help you whenever you need them
3,483,527 people have downloaded it
To help you have the best and the most accurate experience when using the Dr.Fone - System Repair (Android) application, here’s a complete step-by-step guide on how to use it.
Step One Make your way over to the Wondershare website and download the Dr.Fone - System Repair (Android) software. Install it onto your computer by following the on-screen instructions.
Once installed, connect your Nokia XR21 to your computer using a USB cable, and open the software, click “System Repair”.

Step Two Click the “Android” option in the menu and then click “Start” to begin the Repair process.

Step Three On the next screen, go through the options and use the drop-down menus to make sure the information is correct for your individual device. Accept the terms and conditions of the software, and then click the “Next” button.

Step Four Confirm you want the software to carry out the repair process by typing the ‘000000’ code into the pop-up box and pressing Confirm. Make sure you read everything displayed in this box beforehand to know what’s happening.

Step Five Now put your phone into Download Mode by following the on-screen instructions, so your device is ready for the repair process. The method for getting your phone into Download Mode will vary depending on your device, so make sure you’re following the right instructions.

Step Six Once the software has detected your device in Download Mode, it will automatically begin the repair process. You need to make sure your device stays connected throughout this time, and your computer stays on.

The whole process is automatic, so you won’t need to do anything until it’s finished. Once completed, you can disconnect your phone and start connecting it to the internet as normal!

 safe & secure
Part 8. Check the Wi-Fi connectivity on another phone

When experiencing problems with your Wi-Fi network, it’s worth noting the problem might not be with your phone, but rather the Wi-Fi network itself. This is why it’s important to make sure you check the connection on another device.
Of course, if you’re already using another phone on your Wi-Fi network, you know this isn’t the case. However, if you’re not sure, here’s what you need to do;
- Get another Android or iOS phone or tablet
- Open the Settings menu and connect to the Wi-Fi network you’re having problems with
- Enter the password and connect to the network
- Open a web browser on the phone and try loading a web page
- If the page loads, you know the Wi-Fi network isn’t the problem
- If the page doesn’t load, you know you’ve got a problem with your Wi-Fi network
Part 9. Change the password of the Wi-Fi
Each Wi-Fi network router will give the opportunity to choose and change the password you have to let devices connect to your network. It’s important you try changing this because you never know if someone else has accessed your network and could be blocking your device. Here’s how it works;
- Log onto your computer and open your Wi-Fi settings
- Depending on the brand and method of your individual router, navigate to the Wi-Fi password settings menu
- Change the password to something complicated using all available digits and characters
- Save the password and restart the router to disconnect all devices
- Now connect your Nokia XR21 to the router using the new password
Part 10. Reset network settings on Android
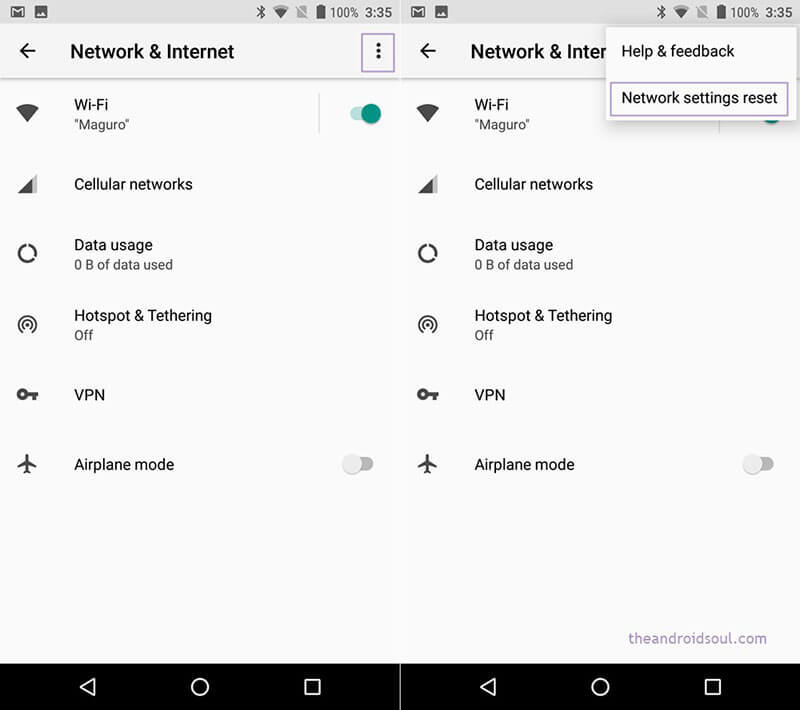
Just like the method above where you’ll be effectively resetting the network settings on your router, if this hasn’t worked, you’ll be able to reset the network settings on your Nokia XR21, hopefully removing the bugs and allowing you to connect.
Here’s how you can do this easily on your Nokia XR21;
- From the home screen of your Nokia XR21, open the Settings menu
- Tap the Backup & Reset option
- Tap the Reset Network Settings option
- Tap the Reset Network option
- If you need to, enter the PIN number or passcode for the Android device, and the Nokia XR21 device will confirm the reset has taken place
- Reconnect your Nokia XR21 to your Wi-Fi network for the changes to take effect
Part 11. Clear partition cache in recovery mode
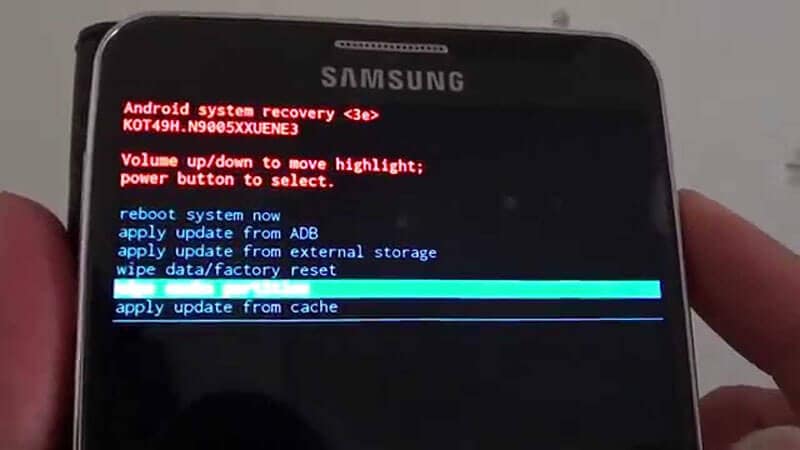
As you continue to use your Nokia XR21, the partition cache will fill up with data your device needs and doesn’t need. However, by clearing your device’s partition cache, you can make clear up some space which should help your device have enough memory to connect to the internet.
- Turn off your Nokia XR21
- Turn it on by holding down the power button, volume button, and home button
- When your phone vibrates, let go of the Power button, but continue to hold the volume button
- When a menu is displayed, use the volume buttons to navigate the menu
- Select the Android System Recovery option, followed by Wipe Cache Partition
- Restart your device and connect to the internet
Part 12. Reset factory settings

If worse comes to worst, another option you have is to factory reset your Nokia XR21. As we’ve spoken about above, while using your phone from the day you started using it, your device will fill up with files and data which can become messy and causes bugs.
However, by factory resetting your device, you can start again from the factory default from which you first received it, ultimately clearing the bugs. Make sure you back up your device before proceeding because it will erase your personal files.
- Open the Settings menu on your Nokia XR21
- Navigate to System > Advanced > Reset Options
- Tap the Reset phone option, and enter your PIN code if required
- Tap Erase Everything
- Wait for your phone to complete the process
- Restart your device and connect to the internet
safe & secure
How to Exit Android Factory Mode On Nokia XR21?
You’ve often heard that recovery mode will solve just about any problem your Nokia XR21 is experiencing. This is mostly true and one of the components of Android’s recovery mode, factory mode or factory reset is one of the most efficient ways to solve various problems on your device. While factory mode is often a good thing, there are times when your device can enter factory mode on its own. Other times, you can safely enter factory mode but not know how to get out.
Fortunately for you, this article will explain all aspects of factory mode and especially how to safely exit factory mode.
Part 1. What is Android Factory Mode?
Factory mode or what is commonly known as factory reset is one of the options available for you when your Nokia XR21 is in recovery mode. Several options are available for you once you enter Recovery mode on your device but few are as effective as the wipe data/ factory reset option. This option is useful in solving a whole host of problems that your device could be experiencing.
If you have been using your Nokia XR21 for a while now and its performance to be less than ideal, a factory reset might be a good solution. That is however not the only problem a factory reset or factory mode can solve. It will also work for a number or Android errors that you may experience, problems caused by faulty firmware updates and also tweaks made on your device that may not have worked as expected.
It is however important to note that a factory reset or factory mode does often result in the loss of all your data. Therefore a backup is necessary to protect against this data loss risk.
Part 2. Backup your Android Device First
Before we can see how to safely enter and exit factory mode, it is important to have a full backup of your device. We mentioned that a factory mode will likely erase all the data on your device. A backup will ensure that you can get your phone back to its original state before the factory mode.
In order to do a full and complete backup of your device you need to have a tool that will not only ensure that you backup everything on your device but one that makes it easy for you to accomplish this. One of the best tools in the market is Dr.Fone - Backup & Resotre (Android) . This software is designed to enable you to create a full backup of your device.
Dr.Fone - Backup & Restore (Android)
Flexibly Backup and Restore Android Data
- Selectively backup Android data to computer with one click.
- Preview and restore backup to any Android devices.
- Supports 8000+ Android devices.
- There is no data lost during backup, export or restore.
3,428,803 people have downloaded it
Follow these very simple steps to use this MobileTrans Phone Transfer software to create a full backup of your device.
Step 1. Launch Dr.Fone on your computer and choose “Backup & Restore”
Run the software on your computer and you can see all features displayed in the primary window. Choose this one: Backup & Restore. It allows you to get your device backed up entirely with one click.
Step 2. Plug in with your device
Then plug in with your device to the computer. When your devic is detected, click on Backup.

Step 3. Select the file types to backup
The program will display all the file types it can support to backup. Just select the ones you would like to backup and hit Backup.

Step 4. Start backing up your device to the computer
After choosing the file’s type for backup, click “Backup” to begin backing up your device to your computer. It will take you a few minutes, depending on the storage of the data.

Note: You can use the feature of “Restore From Backup” to restore the backup file to your device, when you have the need later.
Part 3: One Click Solution to fix Android stuck in factory mode
From the above parts, you are well aware about what is factory mode. As we discussed, this mode fixes most troubles with Android devices.
But for situations when your Nokia XR21 gets stuck in this very same factory mode, the most feasible solution for you is Dr.Fone - System Repair (Android) . This tool fixes all Android system issues including unresponsive or bricked device, stuck on Nokia XR21 logo or factory mode or blue screen of death with a single click.
Dr.Fone - System Repair (Android)
One click fix to Android stuck in factory mode
- You can easily fix your Android stuck in factory mode with this tool.
- The one-click solution’s ease of operation is appreciable.
- It has carved a niche being the first Android repair tool in the market.
- You don’t need to be a pro in technology to use this program.
- It is compatible with all latest Nokia XR21 devices like Galaxy S9.
3,645,867 people have downloaded it
In this part we will explain how to exit Android recovery mode using Dr.Fone - System Repair (Android) . Prior to proceeding, you got to remember that device backup is paramount to keep your data safe. This process might erase your Nokia XR21 data.
Phase 1: Ready your device and connect it
Step 1: Installation completion needs to be followed by running Dr.Fone on your system. Over the program window, tap ‘Repair’ afterwards and get the Android device connected.
Step 2: Select the ‘Android Repair’ option from the list to fix Android stuck in factory modeissue. Hit the ‘Start’ button soon after.
Step 3: Select Android device details on the Nokia XR21 device information window, followed by tapping the ‘Next’ button.
Step 4: Enter ‘000000’ for confirmation then proceed.
Phase 2: Get in ‘Download’ mode for repairing the Android device
Step 1: It’s important to put the Android device in ‘Download’ mode, here are the steps to do so –
- On a ‘Home’ button-less device – turn off the Nokia XR21 device and push down the ‘Volume Down’, ‘Power’ and ‘Bixby’ buttons for about 10 seconds and un-hold. Now, hit the ‘Volume Up’ button to get into ‘Download’ mode.

- For a device with ‘Home’ button – switch it off and hold down the ‘Power’, ‘Volume Down’ and ‘Home’ buttons together for 10 seconds and release. Click the ‘Volume Up’ button for entering ‘Download’ mode.
Step 2: Press ‘Next’ for initiating firmware downloading.

Step 3: Dr.Fone –Repair (Android) starts Android repair as soon as download and verification of firmware is done. All Android issues along with Android stuck in factory mode will be fixed now.
Part 4. Common Solutions to Exit Factory Mode on Android
Having a backup of all your data will eliminate the risk of losing any of your data. You can now safely exit factory mode using one of the 2 methods below. These two methods will work on a rooted device.
Method 1: Using “ES File Explorer”
To use this method, you will need to have installed file explorer on your device.
Step 1: Open “ES File Explorer” and then press the icon on the top left corner
Step 2: Next, go to “Tools” and then turn on “Root Explorer”
Step 3: Go to Local> Device> efs> Factory App and then open factorymode as text in the “ES Note Editor” Turn it ON
Step 4: Open keystr as text in the “ES Note Editor” and change it to ON. Save it.
Step 5: Reboot the Nokia XR21 device

Method 2: Using Terminal Emulator
Step 1: Install Terminal emulator
Step 2: Type “su”
Step 3: Then Type the following;
rm /efs/FactoryApp/keystr
rm /efs / FactoryApp/ Factorymode
Echo –n ON >> / efs/ FactoryApp/ keystr
Echo –n ON >> / efs/ FactoryApp/ factorymode
chown 1000.1000/ efs/FactoryApp/keystr
chown 1000.1000/ efs/FactoryApp/ factorymode
chmod 0744 / efs/FactoryApp/keystr
chmod 0744 / efs/ FactoryApp/ factorymode
reboot
You can also exit factory mode on unrooted device by going to Settings> Application manager> All and the search for Factory Test and “Clear Data”, “Clear Cache”
As much as factory mode can be a useful solution to a number of problems, it can be quite annoying when it pops up unexpectedly. Now you are equipped with 2 effective solutions to help you safely exit factory mode if ever you find yourself in this situation.
Super Easy Ways To Deal with Nokia XR21 Unresponsive Screen
The evolution of smartphones signifies the development of mobile communication technology. Different from the initial years, they are not just used for messaging and calling but have many other applications. Nokia XR21 cell phones are presently utilized for perusing the Internet and exploring through maps, photography, videography, and numerous other used cases. A development in arranged availability goes hand-in-hand with the development of cell phones.
Nokia XR21 smartphones are gaining popularity owing to their low costs, high quality, and innovative features. High-resolution cameras, extensive battery life, and lightning-fast processing are just a few of the advantages of these mobile devices. Nevertheless, customers may sometimes need help with issues, such as a non-functioning Nokia XR21 touchscreen, which may be challenging.
Some common issues might arise for Nokia XR21 phone users. The Redmi note 4 touch not working is a serious problem. It can only go up to the initialization screen. In this guide, you’ll find the information you need to troubleshoot and fix the most common problems reported by Motorola customers.
What causes a Nokia XR21 Screen to be unresponsive?
The screen on your Nokia XR21 phone could stop responding for several reasons. The touchscreen, the system software, or the hardware itself might all be at fault. To effectively address an issue, it is crucial to locate its origins.
The following are some potential reasons for an unresponsive screen on a Nokia XR21 device, along with descriptions of each.
There are signs of soft bricking
A touch screen not working on Nokia XR21 smartphones indicates a soft brick (recoverable by firmware update), often caused by a defective or undercharged battery. System file corruption, old firmware, or failed upgrades are all possible causes. Several customers have complained that after installing a software update, their Nokia XR21 4 or 5 device’s screen became unresponsive and remained at the boot logo.
There might be issues with the Nokia XR21 device itself
Screens on Nokia XR21 devices may become unresponsive for a variety of hardware-related reasons. A broken LCD panel, faulty touch sensor, or loosened ribbon wires are all possible causes. Every Nokia XR21 device, including the Note 4 and 5, is susceptible to these problems.
There might be errors in the updated software
The Android operating system is adjustable. Some of our technological advancements may backfire on us. The phone won’t power on or become stuck in a boot loop where the logo will only show intermittently. For example, some Nokia XR21 4 and 5 users have reported their screens are unresponsive after a software update, rendering the Nokia XR21 device unusable.
The common solutions to solve a Nokia XR21 Screen unresponsive
Could anything be more annoying than a broken touchscreen on your Nokia XR21 phone? If this happens, the gadget is useless, and you won’t be able to do even the simplest tasks. Even so, it’s common for the screen to cease responding to touches.
Before taking the item in for repairs, see if you can figure out the problem independently. Do you want to learn the method? If the touch screens on your Nokia XR21 stop working, don’t panic; we’ll teach you exactly what to do.
Solution 1: Try to restart your device
Giving your Nokia XR21 a restart is one of the most common solutions if you encounter an unresponsive screen on your phone. Here’s how.
Step 1: Press and hold the power button until the screen becomes black;
Step 2: After 1 minute or so, hold the power button again to power on the Nokia XR21 device.
Solution 2: Check your charging port and battery
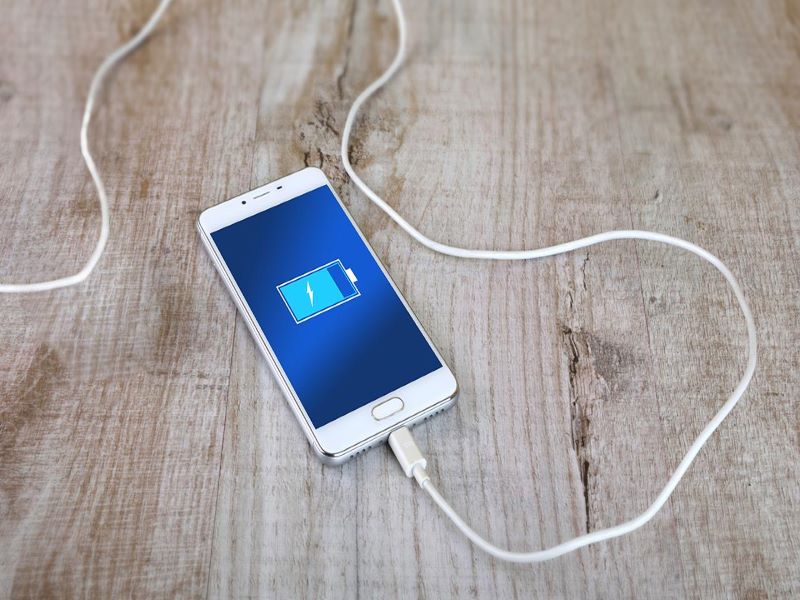
If the battery of your Nokia XR21 is empty, your screen is expected to be unresponsive. To fix that, here are some easy steps for you:
- Charge your phone.
- Leave it for about an hour.
- Come back to check. Turn your phone on.
- Test if the touchscreen is now working.
Solution 3: Contact Customer Service
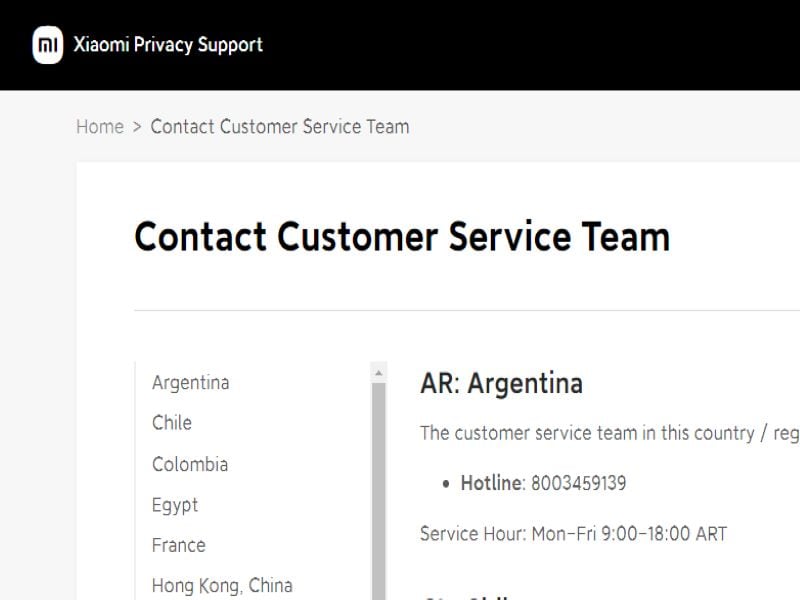
Let’s assume you’ve applied every possible course of action. For example, your Nokia XR21 4 touchscreen is still unresponsive. You may contact the brand’s customer support department if you need assistance. When the time comes, they’ll always know what to do.
Based on the customer’s feedback, one of the frequent issues of the Nokia XR21 is when the screen becomes unresponsive. These issues should not usually happen, but if you find yourself in this dilemma, a list of other solutions below will help you.
Solution 4: Turning on your full screen option offered by MI
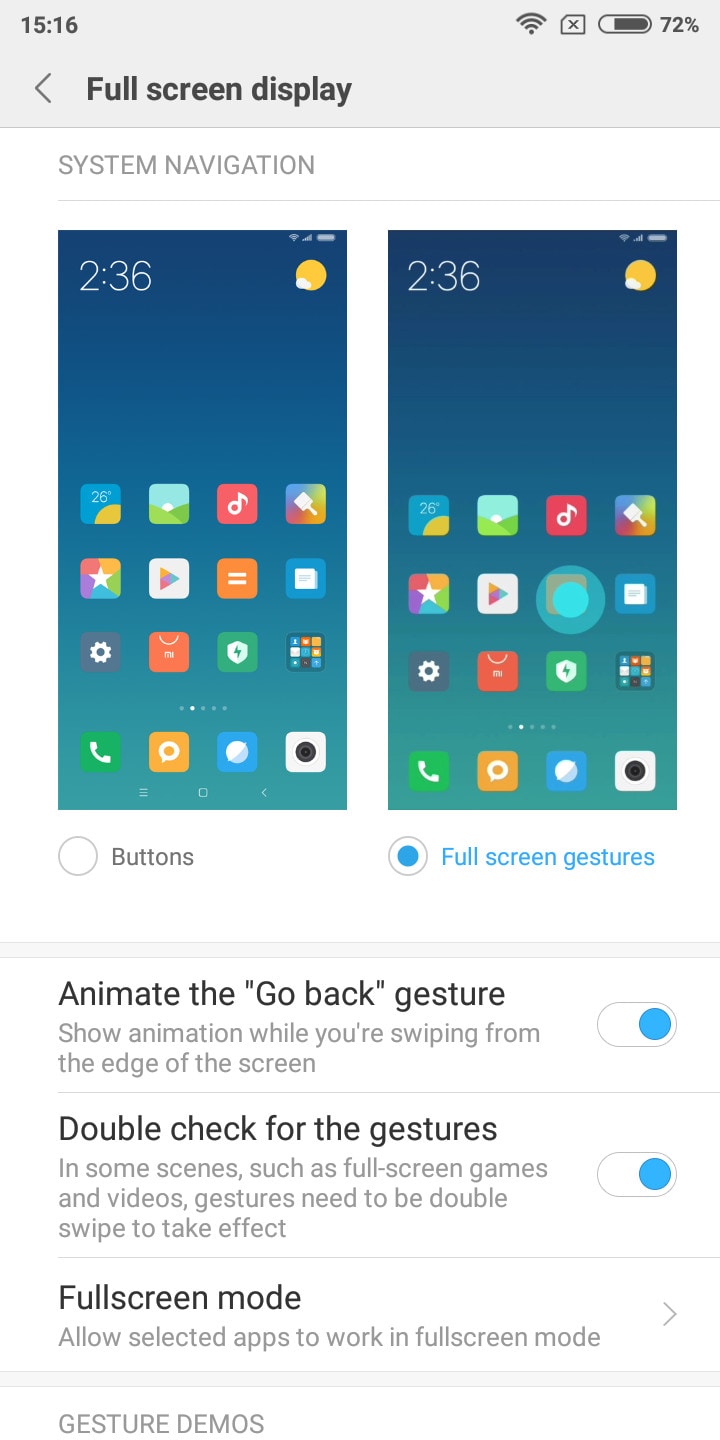
Steps to activate full screen gestures
Step 1: Browse you setting
Step 2: Search for full screen display
Step 3: From here, tap the screenshot on the right with the toggle labeled Full screen gestures
This may include gestures to get used to but it will also fix when your touchscreen sometimes stops responding.
Solution 5: Backup and Factory Reset is always a choice
Doing a factory reset may be your last remaining choice if the preceding solutions are unsuccessful. If you do this, all of the information on your phone will be deleted.
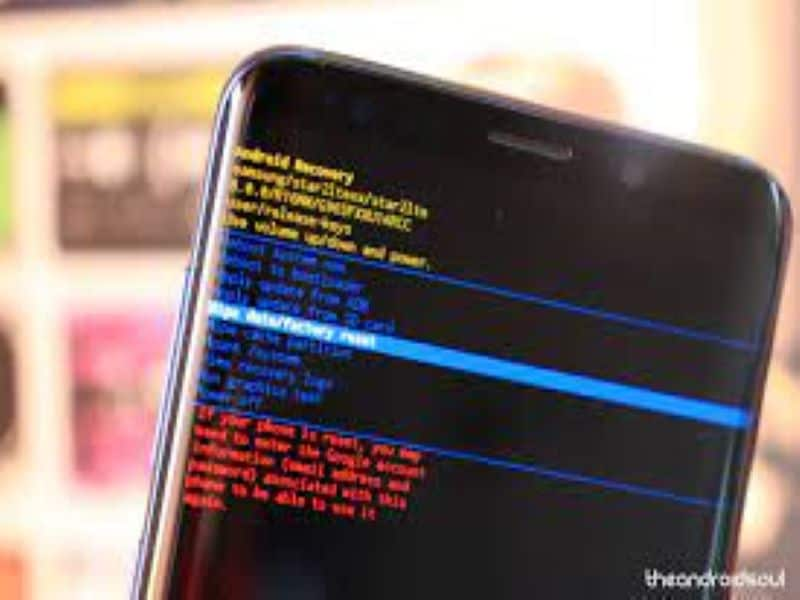
Easy Steps in Doing a Factory Reset
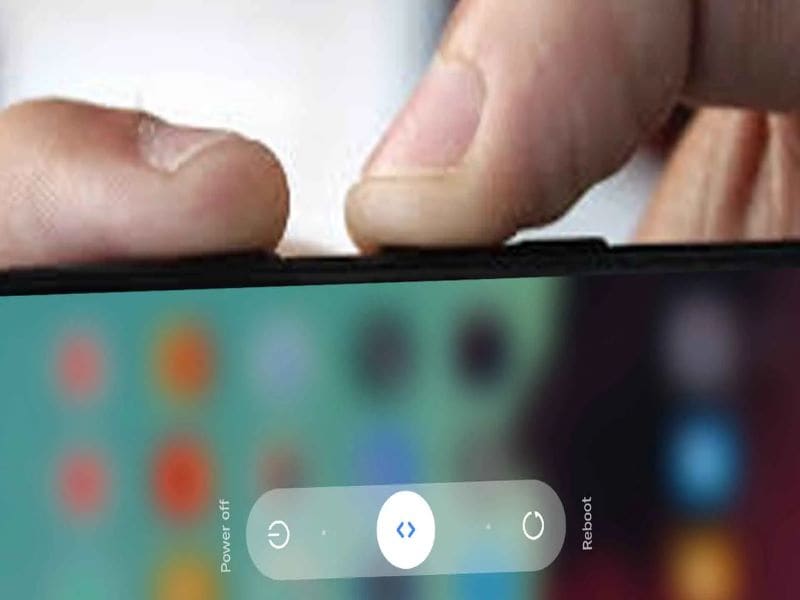
- Press the power button until the phone shuts down
- When your phone shuts down, press and hold the power buttonand Volume down button at the same time until the Android logo displays on the screen.
- Recovery Menuwill appear in your screen, press volume down button until Factory reset is highlighted
- Press thepower button in selecting the Factory reset option and your phone should restart automatically.
Solution 6: Using Dr. Fone Android Repair Toolkit
If you want to fix issues like this, most simply, Dr. Fone offers that. It is made to provide you with a complete mobile solution. You may have your phone fixed without losing any information. Dr. Fone’s many handy tools will quickly get your phone back in working order.
How to avoid a Nokia XR21 screen unresponsive?
Users may take several precautions to avoid the Nokia XR21 screen unresponsive problem. Stop using any app stores or other unofficial app providers. There is a risk that doing so may damage your device or introduce viruses that will force your phone to restart. There’s also a risk of losing important information like photos and files.
Regularly updating the Nokia XR21 phone’s software is necessary to keep it running smoothly and free of issues. Tools like Dr. Fone allow users to periodically maintain and restore data by cleaning the cache and deleting unused applications.
Avoiding severe temperatures and humidity may protect the Nokia XR21 device’s internal components and keep the screen responsive. Using high-quality charging cords is also recommended. For once, consumers won’t have to worry about breaking the screen because they accidentally dropped their cell phones. If users follow these measures, they may reduce the likelihood that their Nokia XR21 smartphone will have an unresponsive screen.
safe & secure
Conclusion
Sometimes, Nokia XR21 smartphones may experience problems with their screen. This occurs if there is an issue with the functioning of a new app or a software update. Several Nokia XR21 phone owners have reported problems with an unresponsive screen. However, the remedies outlined here should help you quickly and efficiently fix the issue and get your phone back up and running. Keep your phone updated, and remember to back up your data often to avoid this problem in the future.
When following the directions, the user may require more research into some troubleshooting techniques. If this is the case, Dr.Fone Repair is usually the solution. The fact that Dr. Fone can continually tweak his system of unresponsive screens is wonderful news. This helpful tool can fix both black screens and endless starting cycles. That’s why it’s an integral part of every modern computer.
Also read:
- [New] 2024 Approved Exploring the Unexpected Sideway Effects in IG Videos
- [New] 2024 Approved IPhone and Android Edition Compile the Most Useful Top 8 Edits Tools
- [New] 2024 Approved Ultimate Game Gathering Best 7 Shooter Experiences
- Best Halloween Thrills & Chills: Updated List of Top 10 Spine-Chilling Movies Available on Physical Media !
- Download Latest Version of Nvidia Quadro RTX 8000 Driver - Compatible with Windows 11, 10 & 7
- How To Fix Part of the Touch Screen Not Working on Asus ROG Phone 7 Ultimate | Dr.fone
- In 2024, Mastering Photoshop Alternatives on Android
- Itel A05s Not Receiving Texts? 10 Hassle-Free Solutions Here | Dr.fone
- Latest Update: Installing & Managing Lenovo Thunderbolt 3 Hub Drivers
- New In 2024, Harmonizing Hertz Techniques for Consistent Audio Levels Across Video Media
- Preserving Clarity in Editing: Guide to Non-Interlaced Video Processing
- Proven Ways to Fix There Was A Problem Parsing the Package on Vivo Y100 5G | Dr.fone
- Reasons for Realme V30 Stuck on Boot Screen and Ways To Fix Them | Dr.fone
- Reasons for Xiaomi Redmi 13C 5G Stuck on Boot Screen and Ways To Fix Them | Dr.fone
- Simple Solutions to Fix Android SystemUI Has Stopped Error For Nokia C12 | Dr.fone
- Title: Nokia XR21 Not Connecting to Wi-Fi? 12 Quick Ways to Fix | Dr.fone
- Author: Abel
- Created at : 2024-11-30 22:00:41
- Updated at : 2024-12-03 16:20:51
- Link: https://fix-guide.techidaily.com/nokia-xr21-not-connecting-to-wi-fi-12-quick-ways-to-fix-drfone-by-drfone-fix-android-problems-fix-android-problems/
- License: This work is licensed under CC BY-NC-SA 4.0.