
Reasons for Samsung Galaxy XCover 7 Stuck on Boot Screen and Ways To Fix Them | Dr.fone
Reasons for Samsung Galaxy XCover 7 Stuck on Boot Screen and Ways To Fix Them
One of the main reasons why people own a phone is for convenience. It will be ironic if that device, supposed to grant convenience, provides problems instead. Some people face this when their Android phone is stuck on the logo page and unable to do anything. As expected, this is common in Android phones and is why people are unhappy with Android phones.
This article will share the possible reasons why your Android phone is stuck on the boot screen. This article will share three possible reasons for this problem and five valuable tips to help fix this issue. If all else fails, we have an application to share and recommend that is guaranteed to solve your problem in no time. Keep on reading to find out more!
Part 1. Why Is Your Samsung Galaxy XCover 7 Stuck on the Boot Screen?
There are countless reasons why a problem happens, just like why your Android phone is stuck on the logo page. This section sieved out the top 3 reasons why your Android boot screen happens and some tips to overcome it.
1. Changes to the Software
Android is a flexible operating system. It allows users to customize it in any way they desire, which is Android’s beauty. The customizable nature of the operating system allows users to unlock, root, flash, and tinker. However, this flexibility in customization might be a double edge sword. Accidental tampering with the Android system might result in software problems, such as being stuck on the Android boot screen.
Fortunately, this is not a complicated fix. Android accepts different fixes and allows the system to return to how it once was. Even with software issues, the system does not get completely inoperable. The best way to fix changes to the software is to start from the beginning of the process. This might offer the best chance for you to restore your phone to normal.
Although it is fun to customize and change the software, following trusted sources ensures you do not damage your phone. Having an Android phone stuck on the logo page is one of the many examples of the problems that might happen if changes to the software go out of hand.

2. Android Software Updates
Updates are a common cause of Android phones stuck on the logo. It happened when the update did not complete as it should have been. Several reasons for incomplete updates, such as poor internet connection, the connection between computer and phone being lost, a power cut, the phone freezing, and the list go on. When an update is uncompleted, issues such as being stuck at the Android boot screen and many others might occur.
Before an update starts, your mobile device will notify you of the duration of the update. As a tip, set aside an additional 10-15 minutes on top of the update duration to ensure your update is completed successfully. It will be ideal for activating the software update only when there is sufficient power in your phone or keep it charging during the update.
When an update is disrupted or stopped before it completes, the existing Android version will become corrupted while the new software to be updated is incomplete. This means that your Samsung Galaxy XCover 7 has no system to run on. Always complete your software updates, and you will not have the problem of your Android phone getting stuck on the logo.

3. Malfunctioning Applications
If you noticed that your Android phone is stuck on the logo page only after installing certain apps, there is a high chance that the app is not compatible with the existing apps in your phone or with the Android version. When an app conflicts with the Android system or other apps, this will run into problems with your phone.
This problem typically happens when an app is downloaded from a third-party source, not the official Google Play Store. This app from a third-party source might be malicious or contain a virus. This can cause problems such as being stuck at the Android boot screen.
To overcome this, locate the app that has been giving you issues and remove the app from your phone. Restart your device, and you should be able to have your Samsung Galaxy XCover 7 functioning properly.
Part 2. 5 Helpful Ways To Fix Android Phones Stuck on Boot Screen
After understanding the common problems on why your Android phone is stuck on the logo page, here are five easy solutions you can try solving at home.
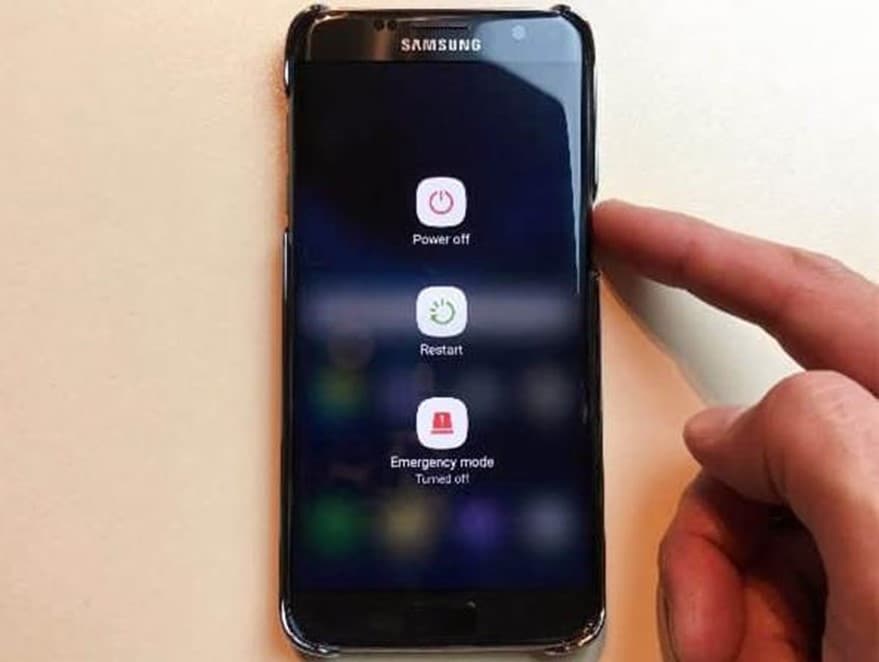
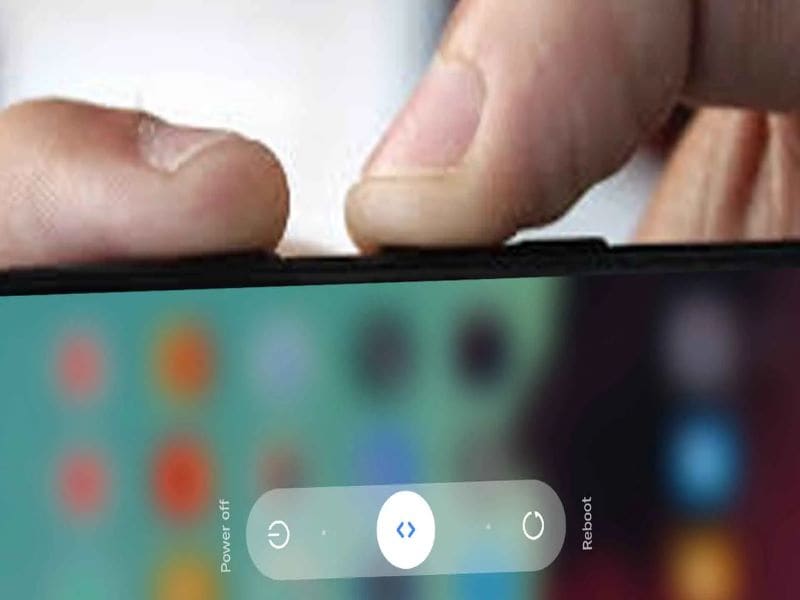
1. Force Reboot
When encountering problems with your Samsung Galaxy XCover 7, such as being stuck at the Android boot screen, you should first try a forced reboot. This simple yet effective solution could be what you need to solve all your Android problems. It is essential to leave your device turned off for at least a minute or two before turning it back on.
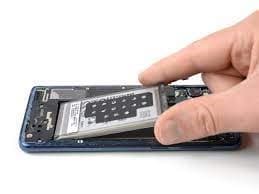
2. Pull Out Battery
Another way to restart your Samsung Galaxy XCover 7 when it is frozen is to try taking the battery out. Android devices are designed with a removable battery, and sometimes you can resolve the issue easily by removing the battery and replacing it after a couple of seconds. Then, turn on your device again and test to see if your Android phone is stuck on the logo page.
If it works, then the problem is solved. However, some Android devices come with a built-in battery. For these kinds of devices, a stimulated battery pull should be attempted. A simulated battery pull is a set of instructions telling your Samsung Galaxy XCover 7 to switch off and on again. If your device does not offer the simulated battery pull option, omit this troubleshooting option.
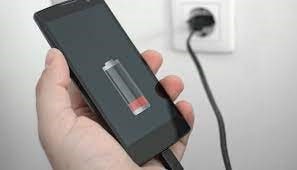
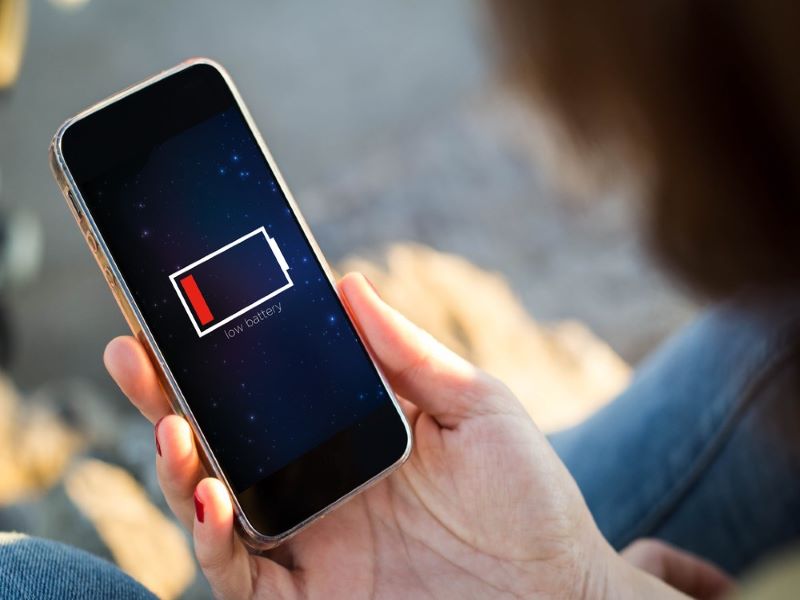
3. Charge Your Device
If your Android phone is stuck on the logo page and not getting past it, no matter how many times you have tried, it may be due to a low battery! As simple as it sounds, plug your device into a power outlet and try restarting your phone. You might be surprised that this simple fix is all it takes to solve your Android problem.
4. Wipe Cache Data
Cache refers to a software or hardware component of an Android device that stores your program and data for reference. This data might result from the daily usage of your device or duplicate data from a different source on the Samsung Galaxy XCover 7 device. Similar to a computer, if the cache occupies too much space on your device, it might cause your Samsung Galaxy XCover 7 to become slower and eventually get stuck at the Android boot screen.
Wiping out the cache data from your Samsung Galaxy XCover 7 could free up more space, allow your device to function faster, and avoid problems such as being stuck at the Android boot screen. Do not worry; wiping the cache data is entirely safe and will not lead to any loss of important data or programs on your phone.
5. Factory Reset
If all the methods above fail, performing a factory rest might be your last option. However, it is important to note that performing a factory reset will erase everything on your phone, including apps, contacts, photos, etc. As a tip, back up all your data from your device before performing a factory reset. That way, you can still retrieve all your precious information after the reset.
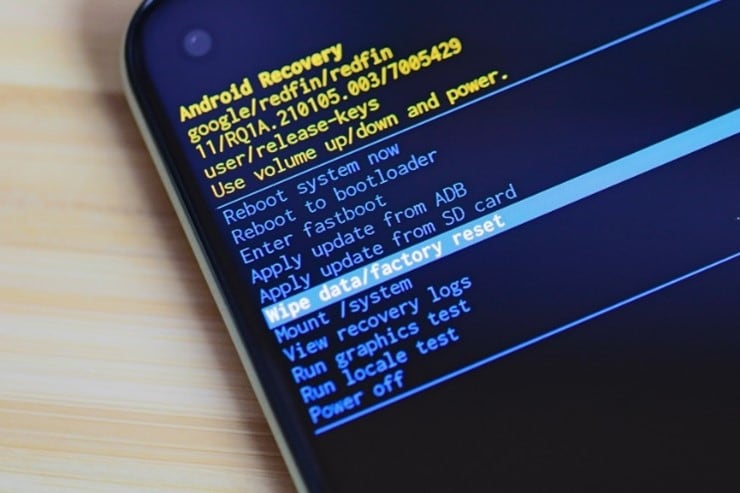
Follow the steps below to perform a factory rest on your Samsung Galaxy XCover 7:
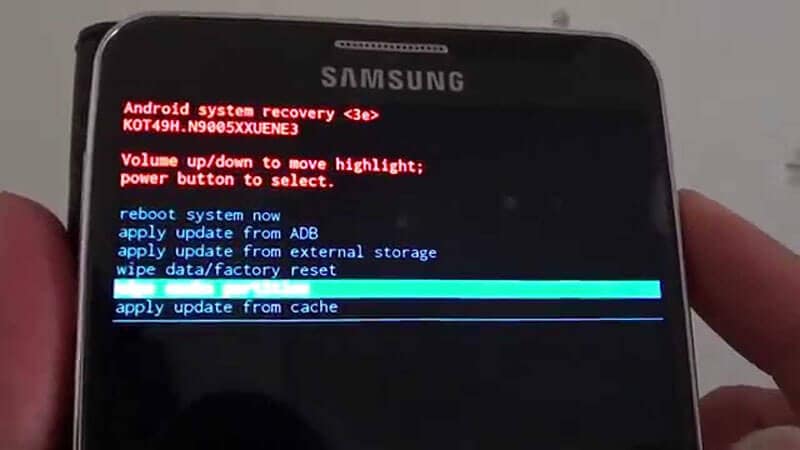
Step 1: Turn off your phone and press the Power button and Volume Down button at the same time
Step 2: Use the Volume button to scroll the options and highlight Wipe data/factory reset. Press the Power button to begin the factory reset.
Part 3. Bonus Tip: Best App To Solve Android Phone Stuck On Boot Screen
If all the solutions above do not work and you do not want to perform a factory reset on your phone, one option is to use an app called Dr.Fone. It is one of the most effective phone recovery solutions and can help to bring your Samsung Galaxy XCover 7 back to a state like it was brand new. Being stuck on the Android boot screen will be a problem of the past.

Refer to the tutorial below to solve your Android phone is stuck on the logo page issue.
Step 1: Download and install Dr.Fone – System Repair (Android) on your computer. Open the application and connect your Samsung Galaxy XCover 7 to the computer.
Step 2: Select the issue you face on the next page. If you use a Samsung Galaxy XCover 7 phone, select Stuck at Samsung Galaxy XCover 7 Logo. Alternatively, you can click on Black Screen or Stuck in Boot Loop.

Step 3: Input the Brand, Name, Model, Country, and Carrier of your phone and click on Next.

Step 4: Follow the instructions provided on the page and wait for the system repair to finish. After which, click on Done to complete the process.
 safe & secure
Conclusion
This article summarizes some possible reasons your Android phone is stuck on the logo page. Five useful strategies were shared to easily overcome your Samsung Galaxy XCover 7 being stuck in the boot. However, if all the above methods do not work, we recommend trying the Dr.Fone-System Repair.
Dr.Fone-System Repair repairs the operating system issues and fixes the problem with your Samsung Galaxy XCover 7. Once you power on your Samsung Galaxy XCover 7 again, you can rest assured that it will be like new.
Samsung Galaxy XCover 7 Not Connecting to Wi-Fi? 12 Quick Ways to Fix
Nowadays, it’s pretty much essential to have your Samsung Galaxy XCover 7 or smartphone connected to the internet. Whether you’re watching videos, looking something up, or using any kind of app, you need the internet for these applications to function correctly.
This is why it can so annoying when it gets to a point where the internet connection isn’t working. However, the problem of a web page not loading correctly is just the tip of the iceberg.
There are plenty of problems you could experience, whether it’s the Wi-Fi network keeps disconnecting on its own without any warning, perhaps a security issue where the passcode or IP address isn’t being registered properly, or even if the connection is just being super slow, even if there’s no reason too.
Luckily, despite there being so many problems out there, there are also many solutions. Today, we’re going to share with you the complete definitive guide to help you get your Samsung Galaxy XCover 7 connected and free from problems and issues.
Part 1: Restart your Samsung Galaxy XCover 7
Begin by powering off your Samsung Galaxy XCover 7 and unplugging your router. Wait for about a minute before plugging in the router and turning on your device. This simple reset can often restore stable connections and fix Android wifi not working.

Part 2: Turn on Airplane mode and turn off
Turn on Airplane Mode for a few seconds, then turn it off. This maneuver refreshes your device’s network connections and might rectify the Android not connecting to wifi issue.

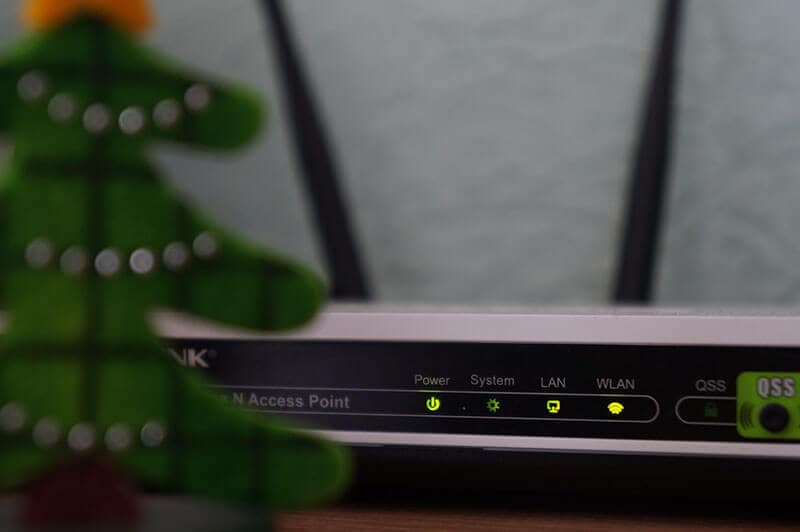
Part 3. Check Wi-Fi Router settings
The third step you’ll want to take is making sure the internet router in your house is working properly and is actually sending internet data to your Samsung Galaxy XCover 7. Of course, if you have other internet-enabled devices connected to the same router and they’re working fine, you know this isn’t the problem.
However, if you’ve got a problem with Wi-Fi not working on your Android and other devices in your home or office, you know you’ve got a router problem. Here’s how to solve it.
- Go to your internet router and check the indicator lights
- While this depends on your device, a green or blue light will mean the connection is good, whereas a red light indicates a problem
- Press the Restart button on your router and wait ten minutes before reconnecting your device and connecting again
- Call up your internet provider to see if there’s an internet connection issue in your area
- Open your web browser and log into your router settings to ensure your Samsung Galaxy XCover 7 is connected to the Wi-Fi network and is allowed to send and receive data
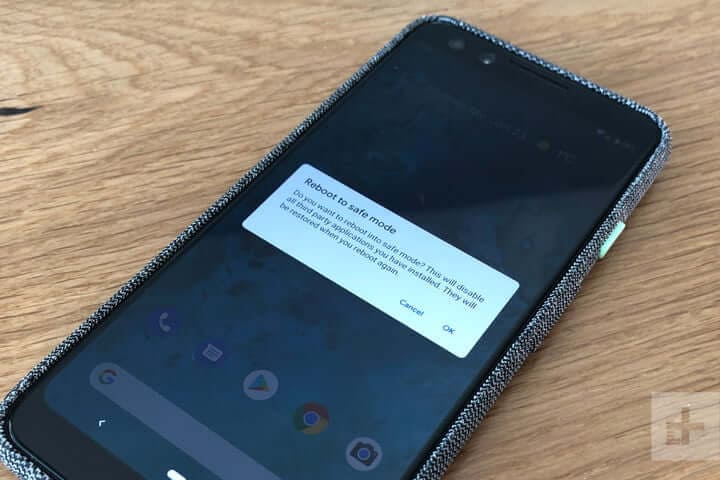
Part 4. Boot your Android in safe mode
If you’re unable to connect to the internet, but other devices have no issues, you may find the issues is coming from within your Samsung Galaxy XCover 7 itself. Fortunately, there are ways you can see whether this is the problem.
The best way to do this is to boot your device in Safe Mode. The process for doing this will depend on the make and model of your Samsung Galaxy XCover 7, but the basic process goes as follows;
- Turn off your Samsung Galaxy XCover 7 by holding down the Power button and tapping Power Off. Wait a few minutes to ensure the Samsung Galaxy XCover 7 device is completely off
- Press and hold the Power button to turn your phone on, but the press and hold both the volume up and volume down buttons at the same time
- You will see the words ‘Safe Mode’ appear on your screen as the Samsung Galaxy XCover 7 device loads
- Now you will be booted in Safe Mode. Try connecting to the internet again to see if it works
If your device connects to the internet while in Safe Mode, you’ll know you have a problem with an app or service that’s running on your device. If this is the case, you’ll need to go through your apps and delete them and then reinstall them one at a time until you find the app or service that is causing your internet problems.
Part 5. Check the Android Wi-Fi adapter
If you’re using a Wi-Fi adapter on your device to connect to the internet, you’ll need to make sure this is working. This could be an adapter on your Samsung Galaxy XCover 7 itself, especially if you’re using an older device, or if you’re using an adapter to boost the ranger of your router network.
You need to check both of these to make sure your connection is working properly.
- If using an Android Wi-Fi adapter, make sure all the Samsung Galaxy XCover 7 device drivers are up to date, and if you’re using an app, make sure the app is updated, and all the settings allow an internet connection
- If you’re using a router adapter, make sure it’s set up properly, and your Samsung Galaxy XCover 7 is connected to the adapter using the correct passwords. Try connecting another device to see if the internet connection is working on there
- Whichever method you’re using, try disconnecting your Samsung Galaxy XCover 7 and forgetting the network, and then reconnecting and entering the right password to refresh the connection
Part 6. Check SSID and IP address on Android
To make a Wi-Fi connection work, your Samsung Galaxy XCover 7 needs to match two codes that connect and relate to your router to establish the connection and work correctly. These are known as the SSID and the IP address.
Every wireless device will have its own codes and making sure they’re matched to the network you’re connecting to is crucial to ensuring the internet is working on your Samsung Galaxy XCover 7. Here’s how to check on your Samsung Galaxy XCover 7 to make sure everything is correct.
- Tap the Settings menu option, followed by Wi-Fi on your Samsung Galaxy XCover 7
- Turn on your Wi-Fi network and connect it to your router
- Find the router name (SSID) and make sure it’s exactly the same as the SSID written on your router
- Once connected, tap the Wi-Fi network and you will see the IP address. Check both your phone and the router codes to make sure this number matches
When these numbers are matching, if your Android is still not connecting to wifi, you’ll know this wasn’t the problem.
Part 7. Fix Android system issues in one click
If none of the solutions above are working, this could indicate a real problem with the firmware and operating system of your Samsung Galaxy XCover 7. Fortunately, a fast solution to get everything working again is to completely repair the software of your phone.
You can do this easily using powerful Android recovery software known as Dr.Fone - System Repair (Android) . This is the leading repair tool on the market and is designed to fix and repair any firmware and software problems you may be having.
Dr.Fone - System Repair (Android)
A one-click tool to fix Wi-Fi not working on Android
- Can repair Android from any problem including the black screen of death
- A trusted software application used by 50+ million people around the world
- The most user-friendly mobile repair application available right now
- Supports over 1,000+ Android models and devices
- A world-class customer support team to help you whenever you need them
3,483,527 people have downloaded it
To help you have the best and the most accurate experience when using the Dr.Fone - System Repair (Android) application, here’s a complete step-by-step guide on how to use it.
Step One Make your way over to the Wondershare website and download the Dr.Fone - System Repair (Android) software. Install it onto your computer by following the on-screen instructions.
Once installed, connect your Samsung Galaxy XCover 7 to your computer using a USB cable, and open the software, click “System Repair”.
Step Two Click the “Android” option in the menu and then click “Start” to begin the Repair process.
Step Three On the next screen, go through the options and use the drop-down menus to make sure the information is correct for your individual device. Accept the terms and conditions of the software, and then click the “Next” button.

Step Four Confirm you want the software to carry out the repair process by typing the ‘000000’ code into the pop-up box and pressing Confirm. Make sure you read everything displayed in this box beforehand to know what’s happening.
Step Five Now put your phone into Download Mode by following the on-screen instructions, so your device is ready for the repair process. The method for getting your phone into Download Mode will vary depending on your device, so make sure you’re following the right instructions.

Step Six Once the software has detected your device in Download Mode, it will automatically begin the repair process. You need to make sure your device stays connected throughout this time, and your computer stays on.

The whole process is automatic, so you won’t need to do anything until it’s finished. Once completed, you can disconnect your phone and start connecting it to the internet as normal!

safe & secure
Part 8. Check the Wi-Fi connectivity on another phone

When experiencing problems with your Wi-Fi network, it’s worth noting the problem might not be with your phone, but rather the Wi-Fi network itself. This is why it’s important to make sure you check the connection on another device.
Of course, if you’re already using another phone on your Wi-Fi network, you know this isn’t the case. However, if you’re not sure, here’s what you need to do;
- Get another Android or iOS phone or tablet
- Open the Settings menu and connect to the Wi-Fi network you’re having problems with
- Enter the password and connect to the network
- Open a web browser on the phone and try loading a web page
- If the page loads, you know the Wi-Fi network isn’t the problem
- If the page doesn’t load, you know you’ve got a problem with your Wi-Fi network
Part 9. Change the password of the Wi-Fi

Each Wi-Fi network router will give the opportunity to choose and change the password you have to let devices connect to your network. It’s important you try changing this because you never know if someone else has accessed your network and could be blocking your device. Here’s how it works;
- Log onto your computer and open your Wi-Fi settings
- Depending on the brand and method of your individual router, navigate to the Wi-Fi password settings menu
- Change the password to something complicated using all available digits and characters
- Save the password and restart the router to disconnect all devices
- Now connect your Samsung Galaxy XCover 7 to the router using the new password
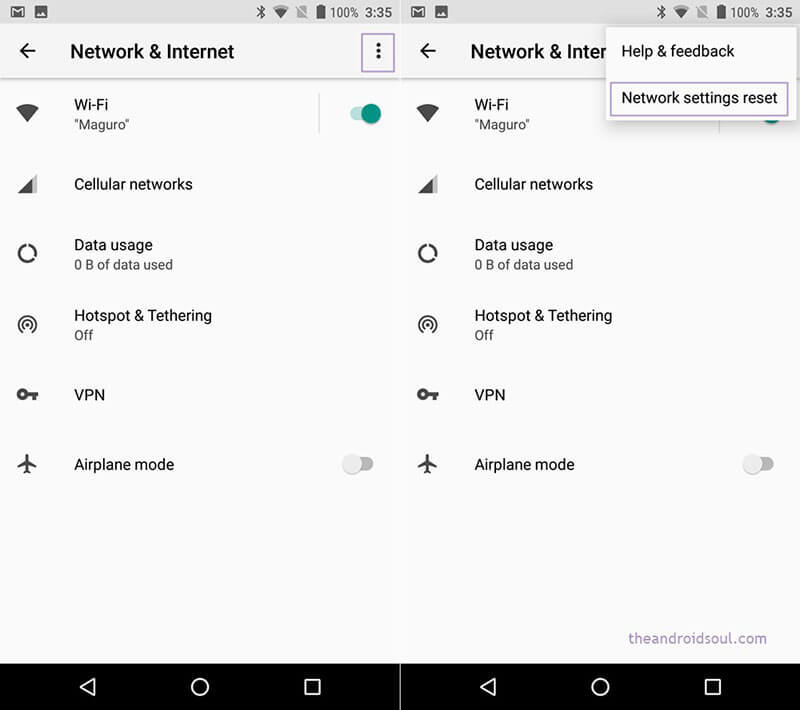
Part 10. Reset network settings on Android
Just like the method above where you’ll be effectively resetting the network settings on your router, if this hasn’t worked, you’ll be able to reset the network settings on your Samsung Galaxy XCover 7, hopefully removing the bugs and allowing you to connect.
Here’s how you can do this easily on your Samsung Galaxy XCover 7;
- From the home screen of your Samsung Galaxy XCover 7, open the Settings menu
- Tap the Backup & Reset option
- Tap the Reset Network Settings option
- Tap the Reset Network option
- If you need to, enter the PIN number or passcode for the Android device, and the Samsung Galaxy XCover 7 device will confirm the reset has taken place
- Reconnect your Samsung Galaxy XCover 7 to your Wi-Fi network for the changes to take effect
Part 11. Clear partition cache in recovery mode
As you continue to use your Samsung Galaxy XCover 7, the partition cache will fill up with data your device needs and doesn’t need. However, by clearing your device’s partition cache, you can make clear up some space which should help your device have enough memory to connect to the internet.
- Turn off your Samsung Galaxy XCover 7
- Turn it on by holding down the power button, volume button, and home button
- When your phone vibrates, let go of the Power button, but continue to hold the volume button
- When a menu is displayed, use the volume buttons to navigate the menu
- Select the Android System Recovery option, followed by Wipe Cache Partition
- Restart your device and connect to the internet
Part 12. Reset factory settings

If worse comes to worst, another option you have is to factory reset your Samsung Galaxy XCover 7. As we’ve spoken about above, while using your phone from the day you started using it, your device will fill up with files and data which can become messy and causes bugs.
However, by factory resetting your device, you can start again from the factory default from which you first received it, ultimately clearing the bugs. Make sure you back up your device before proceeding because it will erase your personal files.
- Open the Settings menu on your Samsung Galaxy XCover 7
- Navigate to System > Advanced > Reset Options
- Tap the Reset phone option, and enter your PIN code if required
- Tap Erase Everything
- Wait for your phone to complete the process
- Restart your device and connect to the internet
safe & secure
Samsung Galaxy XCover 7 Screen Unresponsive? Here’s How to Fix It
Samsung Galaxy XCover 7 phones have become increasingly popular due to their advanced features, sleek designs, and affordable prices. These phones offer many benefits, including high-quality cameras, long battery life, and fast processing speeds. However, sometimes users may encounter problems such as a Samsung Galaxy XCover 7 touch screen not working, which can be frustrating and difficult.
This article aims to provide solutions for Samsung Galaxy XCover 7 phone users experiencing screen unresponsiveness. We will explore various reasons this issue may occur and discuss step-by-step instructions for fixing the problem. So, if your Samsung Galaxy XCover 7 touchscreen is not working, don’t worry – we’ve got you covered!
What Causes A Samsung Galaxy XCover 7 Screen Unresponsive?
There are several reasons why a Samsung Galaxy XCover 7 phone’s screen may become unresponsive. Some common causes include software issues, hardware problems, or issues with the touchscreen itself. It’s essential to identify the root cause of the problem to fix it properly.
Below are some possible causes of Samsung Galaxy XCover 7 screen unresponsiveness, along with explanations of each.
Soft-bricked software: Soft-bricking refers to the state where the phone is stuck in an infinite boot loop or unable to boot. It can occur due to corrupt system files, outdated firmware, or unsuccessful updates. For example, some Samsung Galaxy XCover 7 Y2 and 5A users have reported their screens getting stuck on the boot logo after a software update, rendering the Samsung Galaxy XCover 7 device unusable.
Equipment is worn out: Hardware problems can also cause Samsung Galaxy XCover 7 screens to become unresponsive. It can be due to worn-out equipment, such as a damaged LCD screen, malfunctioning touch sensor, or loose ribbon cables. These issues can also occur in any Samsung Galaxy XCover 7 model, including the Y2 and 5A.
**Touchscreen problems:**Sometimes, the touchscreen itself can become unresponsive for various reasons. For instance, Samsung Galaxy XCover 7 Y2 and 5A users may face this issue if they have accidentally dropped their phone, exposed it to water, or used an incompatible screen protector. It can result in a damaged or malfunctioning touchscreen, making it difficult or impossible to operate the phone.
The Common Solutions To Solve A Samsung Galaxy XCover 7 Screen Unresponsive
In the previous section, we identified the possible causes of Samsung Galaxy XCover 7 screen unresponsiveness, including soft-bricked software, hardware problems, and touchscreen issues. While the underlying reasons for screen unresponsiveness can be varied and complex, some common solutions can help resolve the issue. Here are three of the most common solutions to address tablet screen unresponsiveness, no matter the Samsung Galaxy XCover 7 model.
1. Restart The Device
Restarting the phone is typically the initial solution that comes to mind when we encounter the Samsung Galaxy XCover 7 black screen problem. It’s a simple and widely used method to address the issue, as the black screen problem could be caused by a software glitch, which can often be resolved by freeing up the phone’s memory.
It is the most commonly used method to fix Samsung Galaxy XCover 7’s touch screen and power button issues, such as unresponsiveness. By restarting the Samsung Galaxy XCover 7 device, background processes are disabled, and memory is freed up, allowing programs to run smoothly and potentially resolve the problem. To restart a Samsung Galaxy XCover 7 device, press the Power and Volume Up buttons simultaneously, and release the Power button once the Samsung Galaxy XCover 7logo appears.
2. Leave The Phone And Let The Battery Drain Completely
Sometimes, the tablet screen may become unresponsive due to a software issue preventing the Samsung Galaxy XCover 7 device from functioning correctly. Leaving the Samsung Galaxy XCover 7 device unused and draining the battery helps resolve these issues. After fully discharging the battery, the Samsung Galaxy XCover 7 device can be recharged and turned back on, potentially resolving the issue.
3. Contact Custom Service
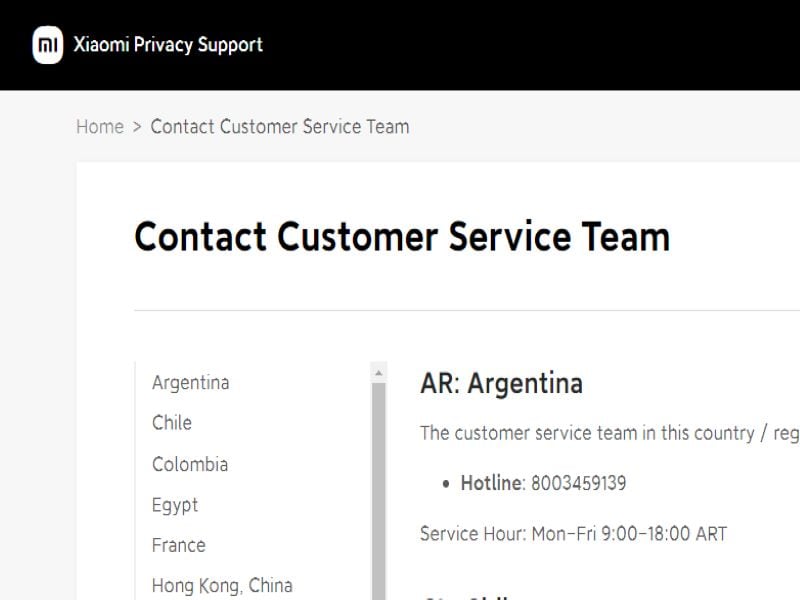
If restarting the Samsung Galaxy XCover 7 device or allowing the battery to drain doesn’t resolve the issue, seeking professional assistance is recommended. The manufacturer may provide additional troubleshooting steps or recommend sending the Samsung Galaxy XCover 7 device in for repair or replacement. It’s important to check the warranty before contacting customer service, which may affect repair or replacement options.
In addition to the common solutions we discussed earlier, some model-specific solutions can help resolve the screen unresponsiveness issue on Samsung Galaxy XCover 7 Y2 and Samsung Galaxy XCover 7 5A.
4. Optimize Device Performance
One solution is to optimize the Samsung Galaxy XCover 7 device performance by clearing the cache, removing unwanted apps, and disabling unnecessary features. This method can help free up memory and resolve the issue.
You can clear your cached data using the default settings.
- Select Settings> Storage > Cached Data.
- To clear the cache, select Clear Cache.

5. Back Up And Factory Reset
Another solution is to back up the Samsung Galaxy XCover 7 device and perform a factory reset, which can help reset the Samsung Galaxy XCover 7 device to its original state and remove any software glitches that may be causing the screen unresponsiveness. The factory settings on your phone will restore any data saved by third-party applications and some of the phone’s settings when it was first built. Note that this method erases all data from the Samsung Galaxy XCover 7 device, so it should only be considered a last resort.
In the following steps, we will show you how to format the Samsung Galaxy XCover 7 Redmi 5A to erase all your data and restore it to its factory state.
- Open the Settings.
- Navigate to the Additional settings section of the Samsung Galaxy XCover 7 Redmi 5A settings.
- Please scroll down the screen until you reach the Backup & reset option, then click to access it.
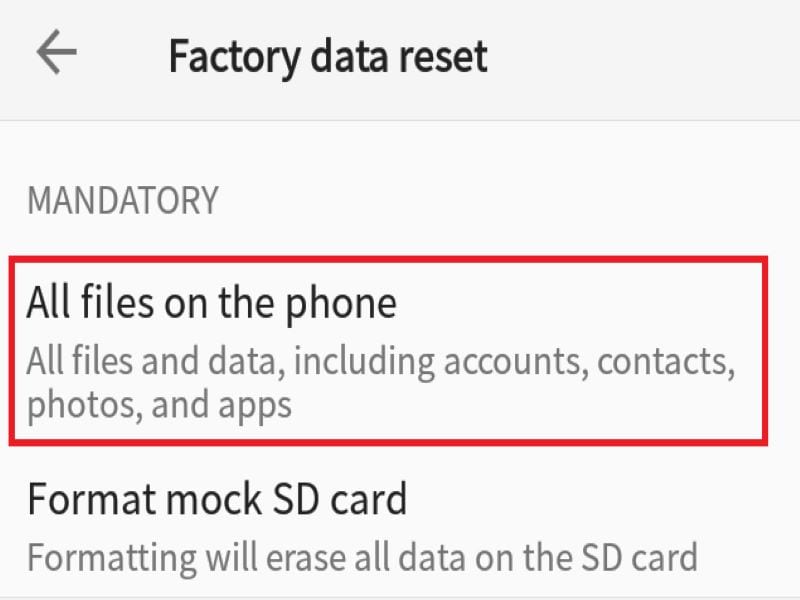
- ClickErase all data (factory reset) to restore the network settings and applications, or completely reset the Samsung Galaxy XCover 7 Redmi 5A.
- Select All files on the phoneto make a complete format of the Samsung Galaxy XCover 7 Redmi 5A.
6. Using Dr. Fone Repair
If none of the above solutions worked, you can try using Dr. Fone Repair. This software is designed to fix various software issues on Android phones, including Samsung Galaxy XCover 7 devices. It can fix issues such as screen stuck on boot, black screen, and other software-related problems. Dr. Fone Repair is easy to use and can protect your data and files on your phone.
Here’s how to fix repair screen unresponsiveness or any software-related issues on Samsung Galaxy XCover 7 Y2 and Samsung Galaxy XCover 7 5A using Dr. Fone Repair:
- Begin by installing and opening Dr.Foneon your PC.
- Once opened, select the ‘System Repair’ option and connect your Android smartphone to your PC via USB cable.
- On the next screen, choose “Android****Repair“ from the list of available options.
- Click on the “Start“ button to initiate the repair process.
- You will then be prompted to enter the required device information such as the Samsung Galaxy XCover 7 device name, model number, and firmware version.
- Once you have entered the necessary information, click on the ‘Next’ button to proceed.
- Follow the on-screen instructions carefully to repair your Samsung Galaxy XCover 7.

How To Avoid A Samsung Galaxy XCover 7 Screen Unresponsive?
To avoid facing a Samsung Galaxy XCover 7 screen unresponsive issue, users can take several preventative measures. One important step is to update the Samsung Galaxy XCover 7 phone regularly to ensure the software is up to date and all bugs and glitches are fixed. Users can also use tools like Dr. Fone to regularly manage and repair data, including clearing cache and removing unwanted apps. It is also important to use quality charging cables and avoid exposing the Samsung Galaxy XCover 7 device to extreme temperatures or humidity, which can damage the internal components and potentially cause screen unresponsiveness. Finally, users can avoid dropping or mishandling the Samsung Galaxy XCover 7 device, leading to physical damage and causing the screen to become unresponsive. Users can help prevent screen unresponsiveness by taking these steps and ensuring their Samsung Galaxy XCover 7 device runs smoothly and reliably.
safe & secure
Conclusion
Encountering a Samsung Galaxy XCover 7 screen unresponsive issue can be a common problem for some Samsung Galaxy XCover 7 phone users. However, with the solutions we have provided in this article, you can effectively solve the problem and get your phone back up and running in no time. It’s important to remember to regularly back up your data and take preventative measures, such as avoiding harmful malware and keeping your phone updated, to avoid experiencing this issue in the future.
By using reliable software, like Dr.Fone Repair, you can ensure that your Samsung Galaxy XCover 7 phone is well-maintained and operating smoothly. With these solutions and tips, you can enjoy the benefits of your Samsung Galaxy XCover 7 phone without any interruptions.
Also read:
- [New] In 2024, Capturing Life, One Click at a Time The Ultimate Guide for Documenting Your Sim's Journey in Sims 4
- [New] In 2024, Prime Video Titans The #Tweeted and Tested Binge Masters
- [Updated] 2024 Approved Simplified Techniques for Capturing Vimeo Content
- [Updated] In 2024, Excellent Audio Capture on Demand
- 8 Ways to Transfer Photos from Samsung Galaxy S23 to iPhone Easily | Dr.fone
- Expert Recommendations Prime Apps for Mac Video Recording for 2024
- Full Guide on Mirroring Your Honor Magic 5 to Your PC/Mac | Dr.fone
- GoPro's Best Underwater Enhancement Filters
- How To Fix Unresponsive Touch Screen on Infinix Smart 7 HD | Dr.fone
- How To Unbrick a Dead Oppo Reno 8T | Dr.fone
- Optimizing Steam Deck Performance for Top-Tier Gaming
- Reasons for Vivo Y200 Stuck on Startup Screen and Ways To Fix Them | Dr.fone
- Reliable User Guide to Fix Lava Blaze 2 Running Slow and Freezing | Dr.fone
- Reliable User Guide to Fix Realme 10T 5G Running Slow and Freezing | Dr.fone
- Simple and Effective Ways to Change Your Country on YouTube App Of your Google Pixel 7a | Dr.fone
- Solved Warning Camera Failed on Infinix Note 30 | Dr.fone
- Title: Reasons for Samsung Galaxy XCover 7 Stuck on Boot Screen and Ways To Fix Them | Dr.fone
- Author: Abel
- Created at : 2024-10-19 16:53:08
- Updated at : 2024-10-24 17:17:28
- Link: https://fix-guide.techidaily.com/reasons-for-samsung-galaxy-xcover-7-stuck-on-boot-screen-and-ways-to-fix-them-drfone-by-drfone-fix-android-problems-fix-android-problems/
- License: This work is licensed under CC BY-NC-SA 4.0.