
Strategies for Apps That Wont Download From Play Store On Oppo Find X6 | Dr.fone
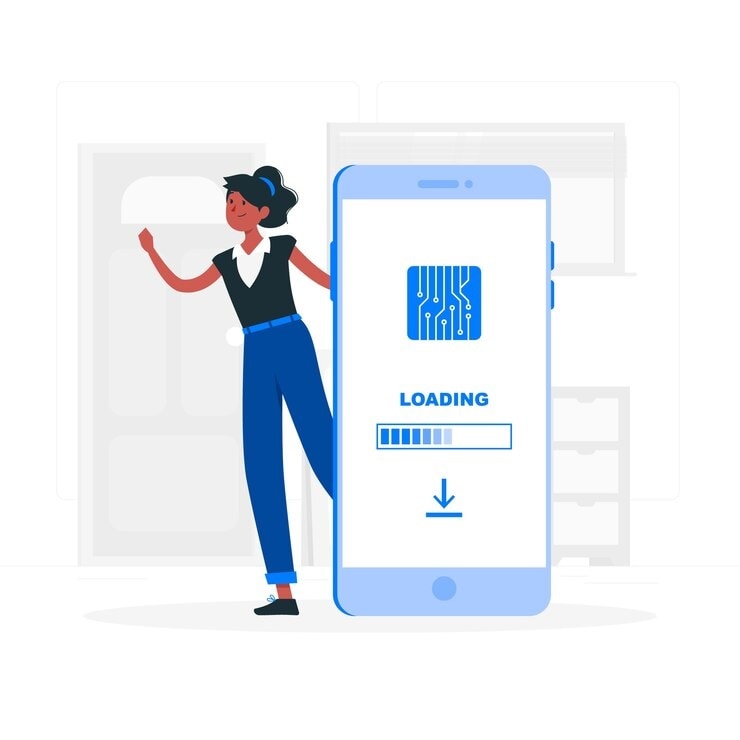
Strategies for Apps That Won’t Download From Play Store On Oppo Find X6
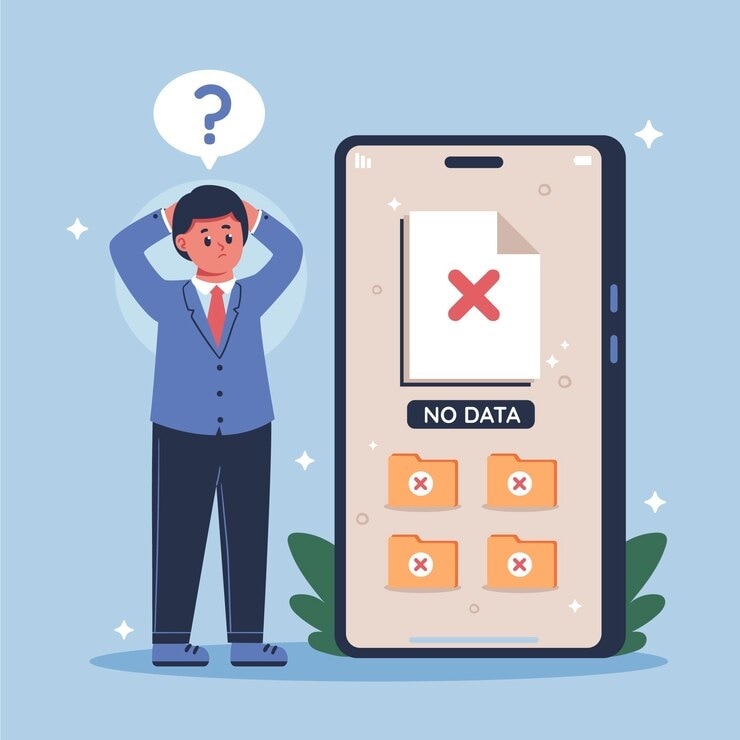
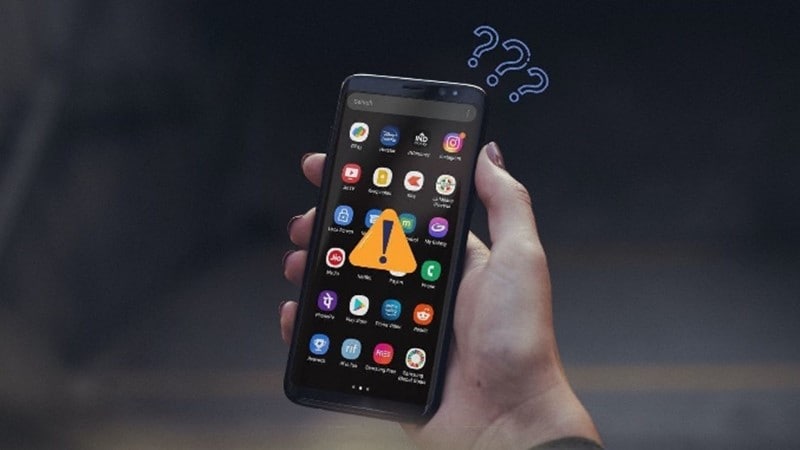
The frustration of apps not downloading in the Google Play Store can annoy users. A seamless download experience is crucial for user satisfaction and app success. When you encounter such issues, they disrupt the interaction expected from your device.
The inconvenience can impact user trust and the overall perception of an app’s reliability. Addressing these challenges is crucial to maintaining a satisfied user experience and ensuring the success of apps on the platform. Explore the article below to learn what to do when apps not downloading from the Play Store issue appears.
Part I. 7 Usual Reasons Behind Apps Not Downloading in Google Play Store
The reasons below collectively contribute to the frustration users experience when apps are unable to download from the Play Store:
Connectivity Issues
Slow or unstable internet connections can interfere with the download process. It often leads to failed or delayed app installations. You will experience frustration when faced with connectivity issues, impacting your ability to access desired apps.
Insufficient Storage
Limited available storage on the Oppo Find X6 device prevents the installation of new apps. Users may find it challenging to manage their storage effectively. It can hinder the expansion of your app library and impact the overall device functionality.
Outdated Play Store Version
Running an outdated version of the Play Store can cause compatibility issues with the newest versions of apps. You’ll miss out on new features and improvements, affecting the overall user experience and the efficiency of the Play Store.
Google Account Authentication Problems
Issues with verifying Google accounts can restrict access to the Play Store. It prevents you from downloading or updating apps. Authentication problems pose a significant barrier, impacting your ability to stay current with app versions.
App Download Restrictions
Device settings or parental controls may impose restrictions on certain app downloads. You may encounter limitations in accessing specific apps. It can affect the Oppo Find X6 device’s versatility.
Incorrect Date and Time Settings
Inaccurate date and time settings on the Oppo Find X6 device can disrupt the Play Store’s functionality. You’ll face obstacles in downloading apps due to authentication errors or syncing issues. It can have a negative impact on the overall user experience.
Play Store Bugs and Glitches
Technical issues within the Play Store, such as bugs or glitches, can lead to failed downloads. You may encounter unexpected errors, causing uncertainty and potential distrust in the reliability of the app platform.
If you encounter any of these issues, having a reliable tool to fix them is essential. Wondershare Dr.Fone - System Repair offers a solution if you cannot download from the Play Store. The platform ensures you can download apps again with a high success rate in minutes.
Part II. Having a Third-Party Tool Is Essential To Safeguard Your Apps
Dr.Fone - System Repair is a dependable alternative offering a comprehensive solution to various Android-related problems. Its key features set it apart, making it an essential asset for users facing app download challenges.

 safe & secure
4,307,222 people have downloaded it
Key Features
The summarized points show why Dr.Fone is a flexible and powerful tool for Android users with various phone models.
Supports up to 1000+ Android Models
Dr.Fone System Repair boasts compatibility with a vast range of Android models. It provides a universal solution for users regardless of their device. The extensive support ensures that users with diverse Android devices can rely on the tool for effective issue resolution.
Fixes All Kinds of Android Problems in Minutes
The tool is designed to address a wide array of Android problems. Whether it’s connectivity issues, authentication problems, or glitches within the Play Store, Dr.Fone - System Repair solves these issues within minutes. Its efficiency in tackling diverse problems makes it a valuable asset for users seeking a quick and reliable solution.
High Success Rate Without Data Loss
One of the standout features of Dr.Fone - System Repair is its high success rate in problem resolution without causing data loss. You can have confidence that your apps and important data remain intact throughout the repair process. It ensures a smooth solution and maintains the integrity of the user’s device and data.
When grappling with persistent issues hindering app downloads on the Google Play Store, having a reliable third-party tool becomes essential to safeguard your apps and ensure a seamless user experience. The next section will show you how to use the platform to fix the apps not downloading in the Google Play Store problem.
Part III. First Choice: Use Dr.Fone - System Repair for App Downloading Issues
Using Dr.Fone - System Repair to resolve app downloading issues is straightforward. Here are three simple steps to effectively address app-related challenges:
**Note:**It is highly recommended that you back up your Android data before using Dr.Fone for Android repair.
- Step 1: Download and install Dr.Fone - System Repair on your computer. Launch the program and select System Repair from the available options.
safe & secure
3,143,540 people have downloaded it
- Step 2: Connect your Oppo Find X6 to the computer using a USB cable. Dr.Fone will detect your device, and you’ll be prompted to choose your device’s type. Select Android Repair.

- Step 3: Follow the on-screen instructions until the app downloads the correct firmware for your device. As it downloads, Dr.Fone will verify it and put your device details on display. You can install the firmware on your Oppo Find X6 by choosing Fix Now.

Step 4: Initiating the system repair process will be accompanied by a progress bar visible on the screen. Upon completion, a prompt window will emerge, presenting a completion message.
If you can download apps successfully, click Doneto close the tool.
If the problem persists, select TryAgain to rerun the process.

If you can’t download Dr.Fone for some reason, you can try these common fixes to try to resolve your app download issues on your device
Part IV. 8 Other Methods of Resolving Common App Downloading Issues
Here are 8 other methods to troubleshoot and resolve common app downloading problems:
Check Internet Connection
A stable internet connection is essential for downloading apps. Do an Internet signal check to ensure you are connected to a reliable Wi-Fi network or have a strong mobile data signal. If the connection is weak, consider switching to a more robust network.
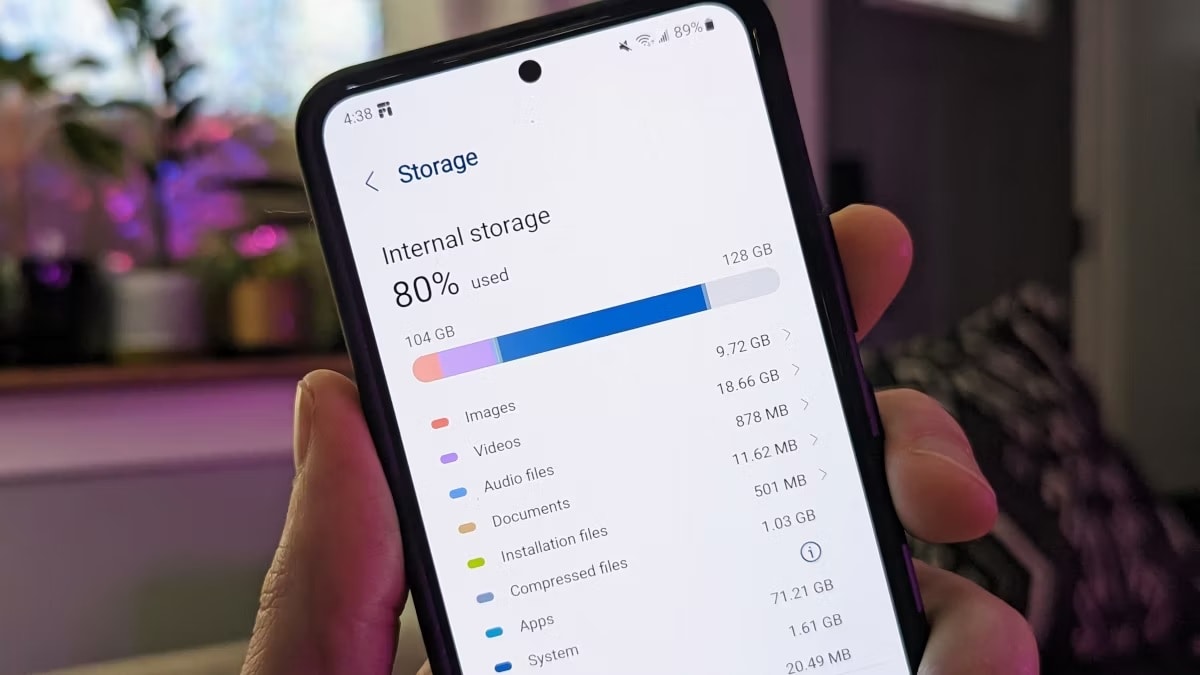
Free Up Storage Space
Insufficient storage on your device can hinder app installations. Navigate to the Oppo Find X6 device settings, access the Storage section, and clear unnecessary files or apps. Creating more space ensures a smoother download experience.
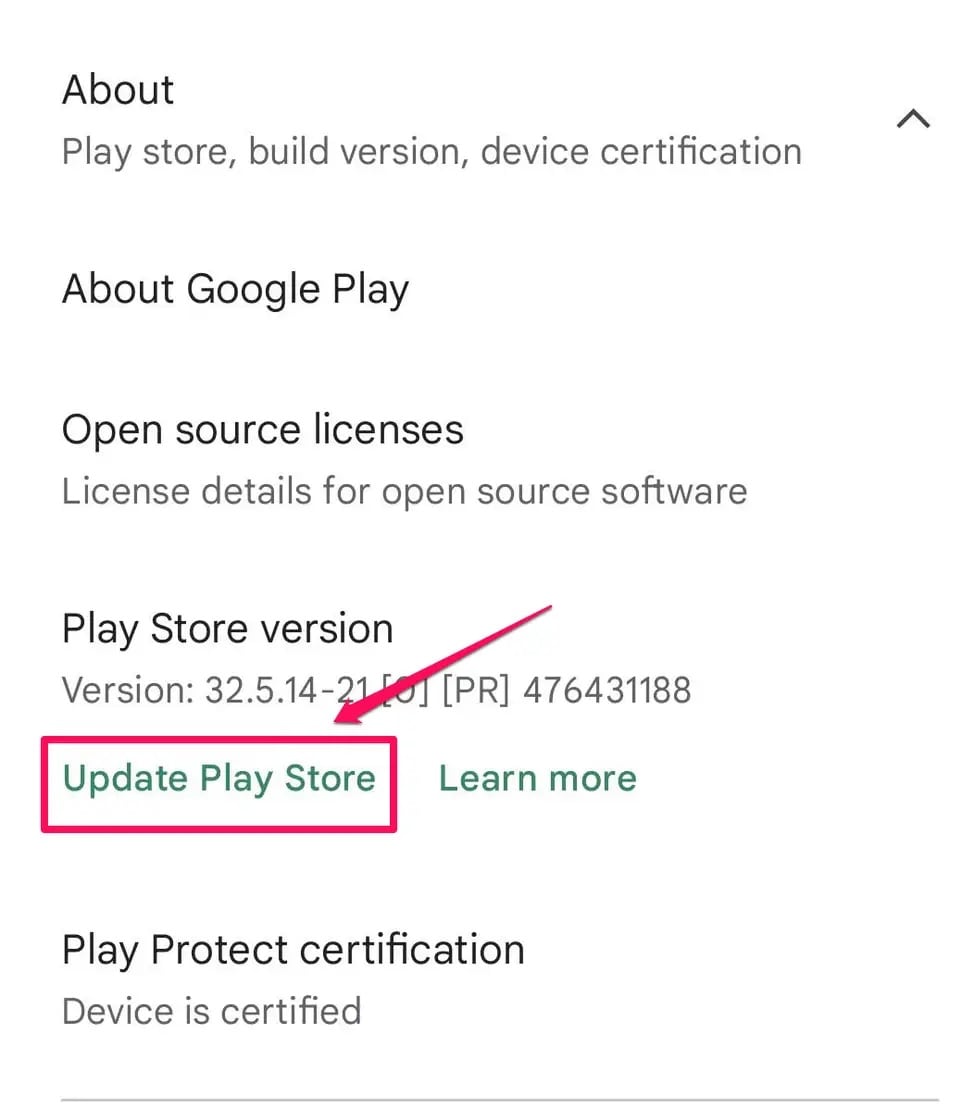
Update the Play Store
An outdated Play Store version may lead to compatibility issues. Open the Google Play Store, go to Settings, and tap the Play Store version. If an update is available, install it to ensure compatibility with the latest apps.
Clear Play Store Cache and Data
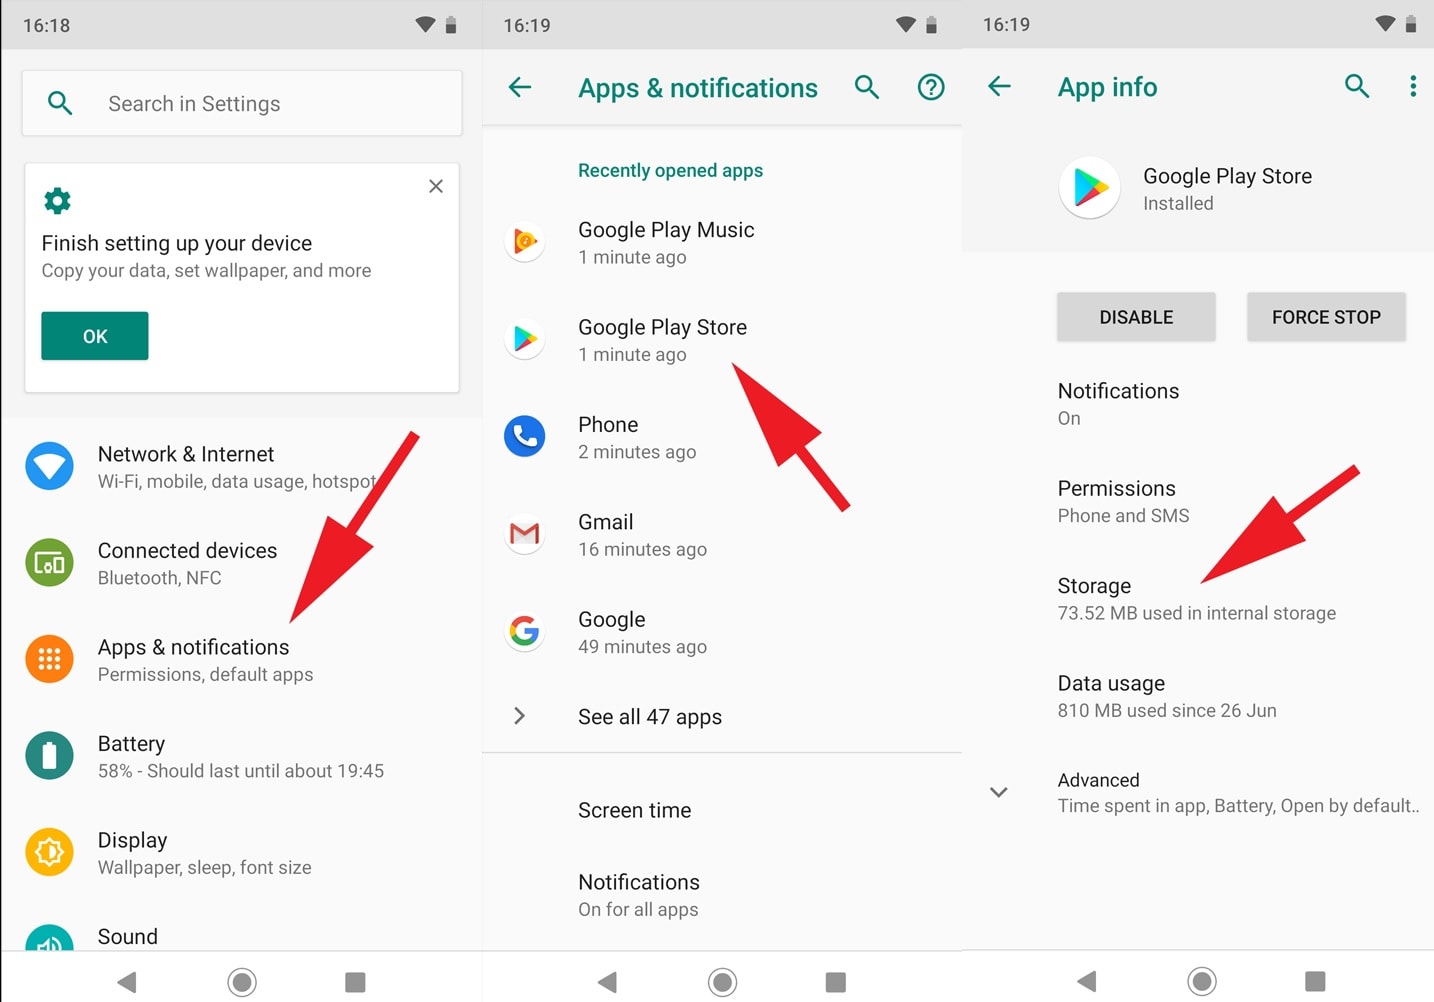
Cached data in the Play Store can sometimes cause download problems. Head to the Oppo Find X6 device settings and open Apps or Application Manager. Locate Google Play Store, and tap Storage. Clear both the cache and data to refresh the app.
Verify Google Account
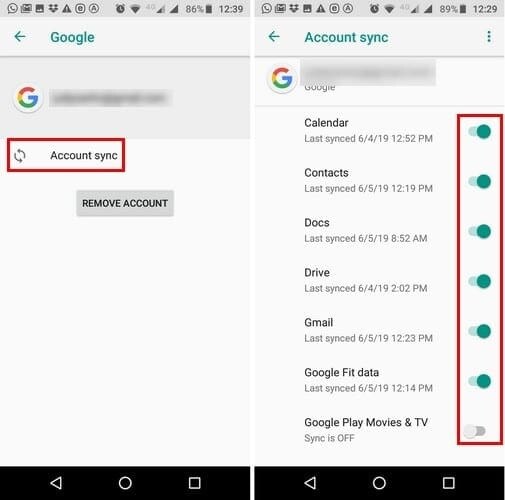
Authentication issues with your Google account can prevent app downloads. Confirm that your Google account is properly verified. Go to the Oppo Find X6 device settings, select Accounts, and ensure your Google account is active and synced.
Check Date and Time Settings
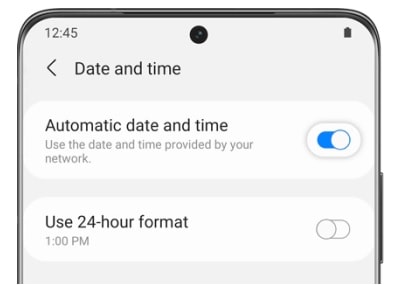
Incorrect date and time settings may disrupt the authentication process. Verify that your device’s date and time are set correctly. Enable automatic date and time settings to ensure accuracy.
Review Download Restrictions
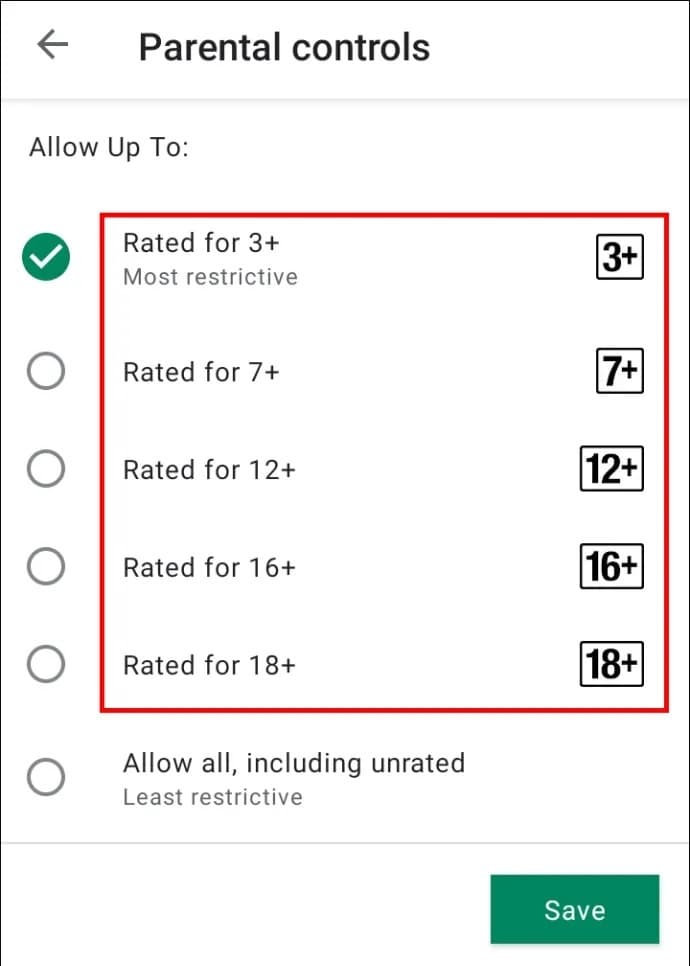
Device settings or parental controls might impose restrictions on certain app downloads. Examine the download restrictions in the Oppo Find X6 device settings and adjust them accordingly to allow for the installation of desired apps.
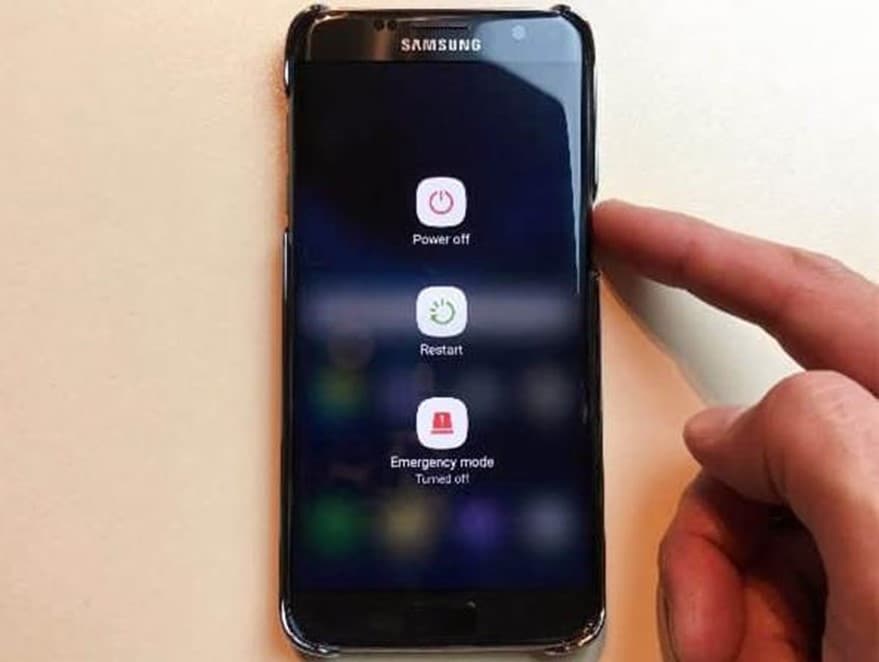
Restart the Oppo Find X6 device
Sometimes, a simple restart can resolve various issues. Power off your device, wait a few seconds and then power it back on. This can help refresh system processes and eliminate temporary glitches.
Conclusion
Ensuring a smooth app download experience demands attention to various factors. From connectivity to storage management, each step contributes to resolving download challenges. The careful review of date/time settings and download restrictions further enhances the process when you cannot download from the Play Store.
For persistent issues, consider Dr.Fone - System Repair. The app is a viable option, providing a comprehensive approach. Embracing these measures ensures you can easily fix apps that won’t download from the Play Store. Having a reliable tool beside you also fosters an uninterrupted and enjoyable downloading journey from the Play Store.
What to Do if Google Play Services Keeps Stopping on Oppo Find X6

Is the annoying Google Play Services error constantly popping up on your phone? Is it happening while reading, gaming, or browsing social media?
The error constantly plagues thousands of Android users, and it can be incredibly frustrating when you’re using the phone for something important or doing something entirely unrelated to the Google Play app.
Oddly enough, the “Unfortunately, Google Play Services has stopped.” error isn’t severe – you can fix it with a few general and easy-to-do fixes, a factory reset, or a system repair. Below, you’ll find info about why it’s happening and a list of ten possible solutions.
Why Am I Getting the Message “Google Play Services Keeps Stopping?”
Computers and phones often speak in error codes and apps that stop working. Even minor connectivity issues can cause these problems, leaving you wondering what’s wrong with your device or displaying the “Unfortunately, Google Play Services has stopped working.” error message.
Software errors are another set of problems that can also cause this issue. Namely, an average phone user has at least 40 installed apps, and sometimes these apps don’t play well together. They generate problems or steal resources from each other, such as RAM, causing crashes and errors.
There’s also the issue of wrong app versions. Although each Android phone uses the Android operating system, these systems can be vastly different, and the apps built for them can be made to be phone-specific and only run on a specific phone model.
That’s also the case with Google Play Store and Google Play Services.
Why Google Play Services Keeps Stopping
The Google Play Services keeps stopping error is an infamous one, and it can appear for various reasons and even on brand new phones. However, these causes can be categorized into three groups, which are:
- Network Issues
- Software Errors
- Wrong Play Services Version
Regardless of what’s causing the issue on your phone, we’ve compiled a list of ten possible solutions, and you can find those below.
Solutions to Try When Google Play Services Keeps Stopping
There are many solutions for the issue of Google Play Services that keeps stopping. We’ve listed the most famous and effective ones, and you’ll find them below in no particular order. Try them out and see whether they fix the issue.
1. Do a Factory Reset
A factory reset on any smartphone removes all your data on the phone’s internal storage and can even wipe your SD card clean if you select the option. Before you reset your phone to factory settings, ensure you’ve backed up all your essential apps and files. When you’re ready, you can do a factory reset by following these steps:
Step 1: Go into Settingsand search for “reset.”
Step 2: Choose Factory reset.
Step 3: Tap the Erase all dataor Reset device at the bottom, whichever button is there.

Step 4: Input your password and confirm the action.

Your phone will now restart and start the reset process. Once the factory reset completes, your phone will look brand new, and you’ll need to install all your apps again. Moreover, your Google Play Services app will likely get fixed by this, too.
2. Update Your System
As keeping your phone’s system and apps updated to the latest possible version is essential and recommended for the best performance and highest efficiency, you can try updating it to see whether it fixes your Google Play Services error. Here’s how:
- Step 1: Open the Settings
- Step 2: Head into System> System update.
- Step 3: If there’s an update available, click it and go through the process of updating your phone’s system.
Restarting your phone after an update, even if it doesn’t restart itself, is highly advisable, ensuring that the new updates apply without issues.
3. Revert to the Previous Version
As we’ve discussed the wrong Play Services versions above, it’s worth noting that sometimes even the developers can make mistakes and roll out the wrong version for your phone. So, if you notice that the phone is getting the error after you’ve updated Google Services or the Play Store, you can quickly revert to the previous version, and here’s how:
- Step 1: Head into Settings> Apps > Google Play Services.
- Step 2: Press the Disablebutton at the bottom of the screen.
- Step 3: Restart the phone, repeat the process by clicking Enablethis time, and restart the phone again.
As these are system apps, you can’t remove them from the phone, and disabling them will only remove the updates, leaving you with a base version that came with your phone out of the box.
4. Uninstall the App’s Updates and Reinstall
Like reverting to the previous version, you can also try reinstalling updates to fix the Google Play Services has stopped working error. The process is similar to the one above, but we’ve still included the steps. Here’s how you can do that:
Step 1: Go into Settings> Apps and find Google Play Services.
Step 2: Tap it and press Uninstall Updatesat the bottom.
Step 3: Exit the Settingsapp and restart the phone.
Step 4: Open the Play Storeapp and head into the app’s settings by clicking your profile icon. Then scroll to the bottom, and tap Settings.
Step 5: Find and tap the Play Store versionto update your Google Play Services.

As you’re already there, you might as well update all other apps after you tap Manage apps & device. That will ensure that older and not-up-to-date apps aren’t causing the issue.
5. Check Storage
Believe it or not, one of the leading causes of the Google Play Services issue is a phone overfilled with apps. Namely, if you have insufficient storage, the Google Play Store app will likely crash and display errors such as “Unfortunately, Google Play Services has stopped working.”
Head into your phone’s Settings and select Storage to see how your phone’s doing storage-wise. Deleting a few apps you don’t use and transferring your photo and video library to a PC is highly advisable if your phone’s storage space lacks gigabytes.
6. Do a System Repair
Although the other solutions here are general fixes that might help, a system repair might take a bit longer but will undoubtedly fix your issue. You can use the Wondershare Dr.Fone app to repair the system and eliminate the annoying “Unfortunately, Google Play Services has stopped working” error.
Moreover, Dr. Fone works on Android and iOS devices and can fix various phone issues, including boot loops, a white screen of death, a stuck phone, etc. That’s why we’ve included a guide on using it for an Android phone issue. Here’s how:
Step 1: Launch the Wondershare Dr.Fone app on your PC and head into Toolkit> System Repair > Android.
Step 2: Select the type of issue you want to fix > Start.
Step 3: Select the make and model of your phone so that Dr.Fone can find the appropriate Android software.
Step 4: Connect the phone to the PC via a USB cable and follow the on-screen instructions to put the phone into Download Mode. The instructions are available for both phones with and without the home button.
Step 5: Select the appropriate Android firmware, download it, and hit Fix Nowafter it downloads.
Step 6: Enter the code and hit Confirmto continue the system repair process. When it’s done, click the Done


That’s all it takes to do a system repair with Wondershare Dr.Fone. Give the software a few minutes to complete, during which your phone might restart a few times. Once it’s done, your Google Play Services app will undoubtedly work.
7. Clear Cache
The easiest and the most obvious fix for many Android apps is clearing the app’s cache. Here’s how you can do that for Google Play Services and Google Play Store:
Step 1: Go into Settings> Apps and find the Google Play Store
Step 2: Tap Storageand hit the Clear cache
Step 3: Repeat the process for the Google Play Services

If this doesn’t work, move on to another possible fix.
8. Check Date and Time Settings
Oddly enough, the Google Play Services app is prone to failure because of an incorrectly set time or date. That’s because Google’s servers constantly check these settings before issuing updates to the Oppo Find X6 devices, so you’ll need to ensure they’re correct beforehand. Here’s how:
Step 1: Head into Settings> System > Date & Time.
Step 2: Ensure that both “**Use network–provided time” and “Use network-provided time zone**” are toggled on.
Step 3: If this doesn’t work, you can try repeating the process and manually setting the time and the time zone.

Once you check or change these settings, try using the Google Play Store app and check whether the issue is fixed. Restarting the phone after changing the settings is also highly advisable.
9. Troubleshoot Your Internet Connection
Another regularly overlooked troublemaker is a poor internet connection. That’s because most apps nowadays are meant to work in online mode only, and losing connection or using a bad one interferes with the app’s functionality.
To test the internet connection on your Oppo Find X6, you should open a browser and head to a random internet page to see if it’s opening and whether there are any delays. If it’s working fine, your internet connection isn’t the problem.
10. Adjust Google Play Services Permissions
Although permissions rarely change, they can cause issues if you change them accidentally. These settings can be found in the same place where you would uninstall updates or clear the app’s cache, so you can use some of the steps mentioned above to check them.
Once inside Permission Settings, check whether the Google Play Services and Play Store apps have sufficient permission to do their jobs and whether any required permissions were recently removed. If so, grant these two apps their permissions back.
safe & secure
4,953,228 people have downloaded it
Conclusion
Although it’s an incredibly frustrating error, the “Unfortunately, Google Play Services has stopped” message is more annoying than serious. We’ve explained why it happens, but we’ve also given you a list of solutions to fix it.
Our list includes various fixes, from simple ones, like deleting the app’s cache and ensuring your network works fine, to more serious ones, like doing a factory reset. Alternatively, you can do a system repair with the help of Wondershare Dr.Fone, which will certainly fix the problem, but it might be a bit more complicated than cache deletion.
Reasons for Oppo Find X6 Stuck on Boot Screen and Ways To Fix Them
One of the main reasons why people own a phone is for convenience. It will be ironic if that device, supposed to grant convenience, provides problems instead. Some people face this when their Android phone is stuck on the logo page and unable to do anything. As expected, this is common in Android phones and is why people are unhappy with Android phones.
This article will share the possible reasons why your Android phone is stuck on the boot screen. This article will share three possible reasons for this problem and five valuable tips to help fix this issue. If all else fails, we have an application to share and recommend that is guaranteed to solve your problem in no time. Keep on reading to find out more!
Part 1. Why Is Your Oppo Find X6 Stuck on the Boot Screen?
There are countless reasons why a problem happens, just like why your Android phone is stuck on the logo page. This section sieved out the top 3 reasons why your Android boot screen happens and some tips to overcome it.
1. Changes to the Software
Android is a flexible operating system. It allows users to customize it in any way they desire, which is Android’s beauty. The customizable nature of the operating system allows users to unlock, root, flash, and tinker. However, this flexibility in customization might be a double edge sword. Accidental tampering with the Android system might result in software problems, such as being stuck on the Android boot screen.
Fortunately, this is not a complicated fix. Android accepts different fixes and allows the system to return to how it once was. Even with software issues, the system does not get completely inoperable. The best way to fix changes to the software is to start from the beginning of the process. This might offer the best chance for you to restore your phone to normal.
Although it is fun to customize and change the software, following trusted sources ensures you do not damage your phone. Having an Android phone stuck on the logo page is one of the many examples of the problems that might happen if changes to the software go out of hand.
2. Android Software Updates
Updates are a common cause of Android phones stuck on the logo. It happened when the update did not complete as it should have been. Several reasons for incomplete updates, such as poor internet connection, the connection between computer and phone being lost, a power cut, the phone freezing, and the list go on. When an update is uncompleted, issues such as being stuck at the Android boot screen and many others might occur.
Before an update starts, your mobile device will notify you of the duration of the update. As a tip, set aside an additional 10-15 minutes on top of the update duration to ensure your update is completed successfully. It will be ideal for activating the software update only when there is sufficient power in your phone or keep it charging during the update.
When an update is disrupted or stopped before it completes, the existing Android version will become corrupted while the new software to be updated is incomplete. This means that your Oppo Find X6 has no system to run on. Always complete your software updates, and you will not have the problem of your Android phone getting stuck on the logo.

3. Malfunctioning Applications
If you noticed that your Android phone is stuck on the logo page only after installing certain apps, there is a high chance that the app is not compatible with the existing apps in your phone or with the Android version. When an app conflicts with the Android system or other apps, this will run into problems with your phone.
This problem typically happens when an app is downloaded from a third-party source, not the official Google Play Store. This app from a third-party source might be malicious or contain a virus. This can cause problems such as being stuck at the Android boot screen.
To overcome this, locate the app that has been giving you issues and remove the app from your phone. Restart your device, and you should be able to have your Oppo Find X6 functioning properly.
Part 2. 5 Helpful Ways To Fix Android Phones Stuck on Boot Screen
After understanding the common problems on why your Android phone is stuck on the logo page, here are five easy solutions you can try solving at home.
1. Force Reboot
When encountering problems with your Oppo Find X6, such as being stuck at the Android boot screen, you should first try a forced reboot. This simple yet effective solution could be what you need to solve all your Android problems. It is essential to leave your device turned off for at least a minute or two before turning it back on.
2. Pull Out Battery
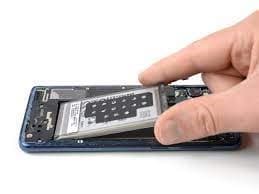
Another way to restart your Oppo Find X6 when it is frozen is to try taking the battery out. Android devices are designed with a removable battery, and sometimes you can resolve the issue easily by removing the battery and replacing it after a couple of seconds. Then, turn on your device again and test to see if your Android phone is stuck on the logo page.
If it works, then the problem is solved. However, some Android devices come with a built-in battery. For these kinds of devices, a stimulated battery pull should be attempted. A simulated battery pull is a set of instructions telling your Oppo Find X6 to switch off and on again. If your device does not offer the simulated battery pull option, omit this troubleshooting option.
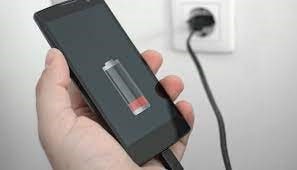
3. Charge Your Device
If your Android phone is stuck on the logo page and not getting past it, no matter how many times you have tried, it may be due to a low battery! As simple as it sounds, plug your device into a power outlet and try restarting your phone. You might be surprised that this simple fix is all it takes to solve your Android problem.
4. Wipe Cache Data
Cache refers to a software or hardware component of an Android device that stores your program and data for reference. This data might result from the daily usage of your device or duplicate data from a different source on the Oppo Find X6 device. Similar to a computer, if the cache occupies too much space on your device, it might cause your Oppo Find X6 to become slower and eventually get stuck at the Android boot screen.
Wiping out the cache data from your Oppo Find X6 could free up more space, allow your device to function faster, and avoid problems such as being stuck at the Android boot screen. Do not worry; wiping the cache data is entirely safe and will not lead to any loss of important data or programs on your phone.
5. Factory Reset
If all the methods above fail, performing a factory rest might be your last option. However, it is important to note that performing a factory reset will erase everything on your phone, including apps, contacts, photos, etc. As a tip, back up all your data from your device before performing a factory reset. That way, you can still retrieve all your precious information after the reset.
Follow the steps below to perform a factory rest on your Oppo Find X6:
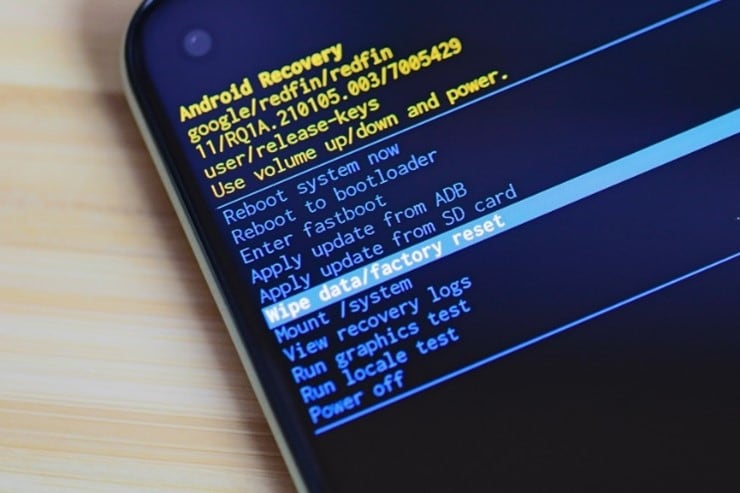
Step 1: Turn off your phone and press the Power button and Volume Down button at the same time
Step 2: Use the Volume button to scroll the options and highlight Wipe data/factory reset. Press the Power button to begin the factory reset.
Part 3. Bonus Tip: Best App To Solve Android Phone Stuck On Boot Screen
If all the solutions above do not work and you do not want to perform a factory reset on your phone, one option is to use an app called Dr.Fone. It is one of the most effective phone recovery solutions and can help to bring your Oppo Find X6 back to a state like it was brand new. Being stuck on the Android boot screen will be a problem of the past.
Refer to the tutorial below to solve your Android phone is stuck on the logo page issue.
Step 1: Download and install Dr.Fone – System Repair (Android) on your computer. Open the application and connect your Oppo Find X6 to the computer.
Step 2: Select the issue you face on the next page. If you use a Oppo Find X6 phone, select Stuck at Oppo Find X6 Logo. Alternatively, you can click on Black Screen or Stuck in Boot Loop.

Step 3: Input the Brand, Name, Model, Country, and Carrier of your phone and click on Next.

Step 4: Follow the instructions provided on the page and wait for the system repair to finish. After which, click on Done to complete the process.
safe & secure
Conclusion
This article summarizes some possible reasons your Android phone is stuck on the logo page. Five useful strategies were shared to easily overcome your Oppo Find X6 being stuck in the boot. However, if all the above methods do not work, we recommend trying the Dr.Fone-System Repair.
Dr.Fone-System Repair repairs the operating system issues and fixes the problem with your Oppo Find X6. Once you power on your Oppo Find X6 again, you can rest assured that it will be like new.
Also read:
- [New] 2024 Approved Harnessing the Power of Filmora for YouTube Video Promotions
- [New] In 2024, From Blurry to Bold Crafting Powerful YouTube Previews
- 2024 Approved Unravel the Mysteries of YouTube Metrics for Growth
- Comprehensive Tutorial: How to Deactivate Hyper-V on Windows Systems and Servers
- How to Flash Dead Lava Blaze 2 5G Safely | Dr.fone
- How to Share/Fake Location on WhatsApp for Tecno Spark 20C | Dr.fone
- Identifying Centralized Management of Window's Settings Through Organizational Policies
- In 2024, Does Google Pixel Fold Have Find My Friends? | Dr.fone
- In 2024, Top 5 Car Locator Apps for Itel P55+ | Dr.fone
- Infinix Zero 5G 2023 Turbo Not Receiving Texts? 10 Hassle-Free Solutions Here | Dr.fone
- Retail Marketing Through VR Technology for 2024
- Troubleshooting Grayed Sync Functions on Windows 11 – A Step-by-Step Guide
- Title: Strategies for Apps That Wont Download From Play Store On Oppo Find X6 | Dr.fone
- Author: Abel
- Created at : 2025-02-13 17:01:38
- Updated at : 2025-02-20 16:25:05
- Link: https://fix-guide.techidaily.com/strategies-for-apps-that-wont-download-from-play-store-on-oppo-find-x6-drfone-by-drfone-fix-android-problems-fix-android-problems/
- License: This work is licensed under CC BY-NC-SA 4.0.